
Everyone wants to present a beautiful Easter table for Easter. This is made up of the right crockery and Easter decorations, and that includes the good old napkins, regardless of whether they are made of paper or fabric. There are simple techniques that you can use to create truly wonderful designs. Bring spring and some Easter motifs to the table and leave your guests breathless by folding napkins for Easter in the following ways!
Make your own Easter bunny with Easter egg for the Easter table
Although this napkin bunny looks complicated at first glance, it’s actually not that difficult to make. Take any napkin with a matching motif or simply in a spring color and you’re ready to go. It doesn’t matter whether it’s a cloth napkin or a paper napkin, but it should be square.
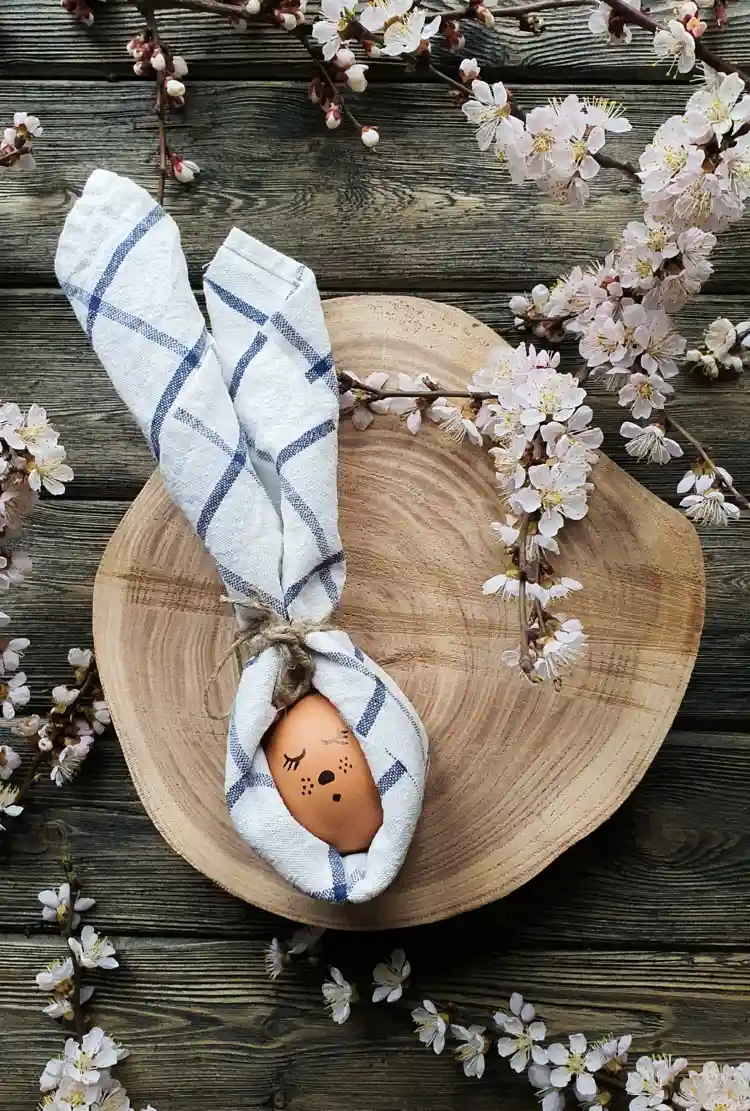
You will also need a piece of twine or ribbon to tie it together. The special thing about this design, in addition to the bunny ears look, is the fact that you can put a nice Easter egg in it. It’s so easy to fold the napkins for Easter:
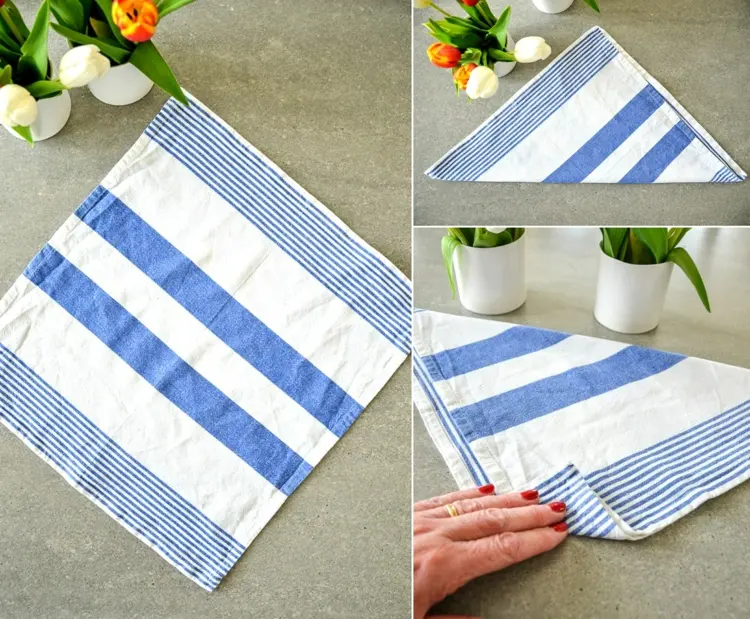
- Spread the napkin out in front of you.
- Fold them diagonally and fold over the tip opposite the crease.
- Then start rolling up the napkin.
- Fold the roll in half.
- Place the Easter egg inside and tie the ends of the roll together just above.
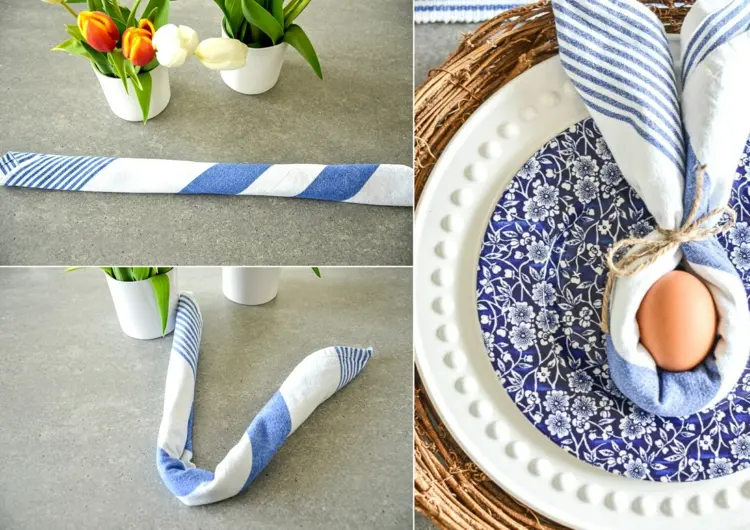
Tipp: You can also place the egg upright in the loop. This gives the whole thing the look of a nest, especially if you add some greenery (e.g. artificial moss). And how about drawing a bunny face with a permanent marker?
You can find a few ideas specifically for paper napkins here.
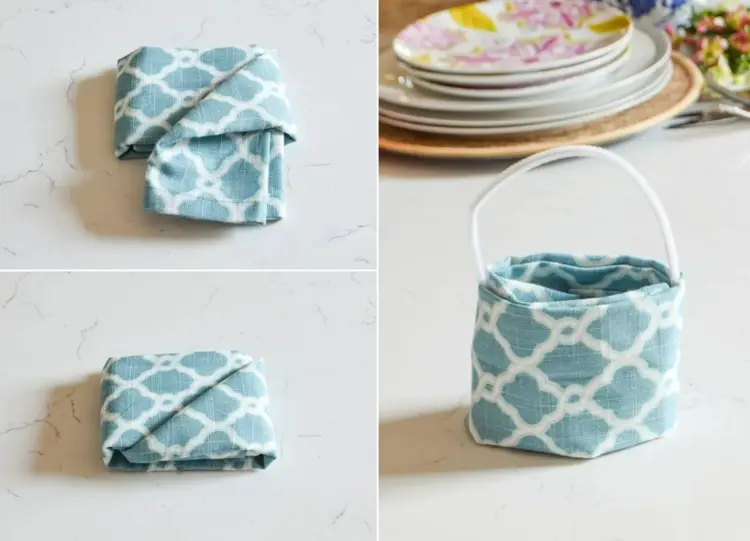
Folding napkins for Easter – Easter basket for decoration or gifts
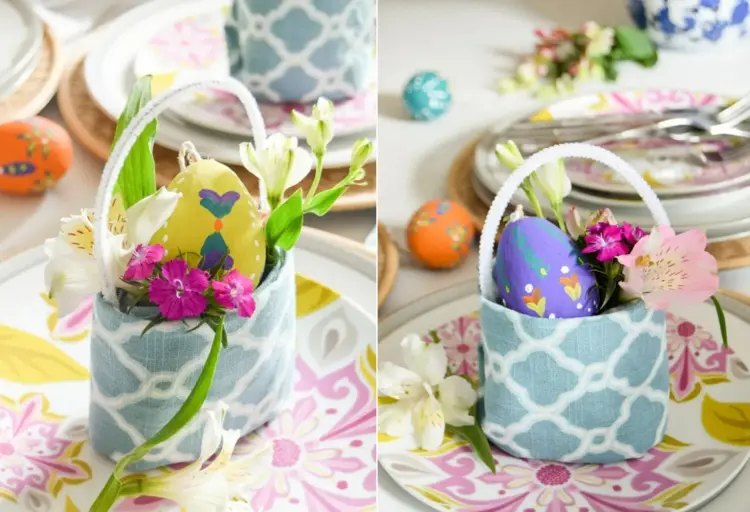
If you have prepared small bouquets of flowers for the guests or would like to give everyone a few self-designed Easter eggs, you can bring them to them in a beautiful basket that you fold out of a cloth serviette and then place on or next to the plate. Once you get the hang of it, the baskets are quick and easy to make:
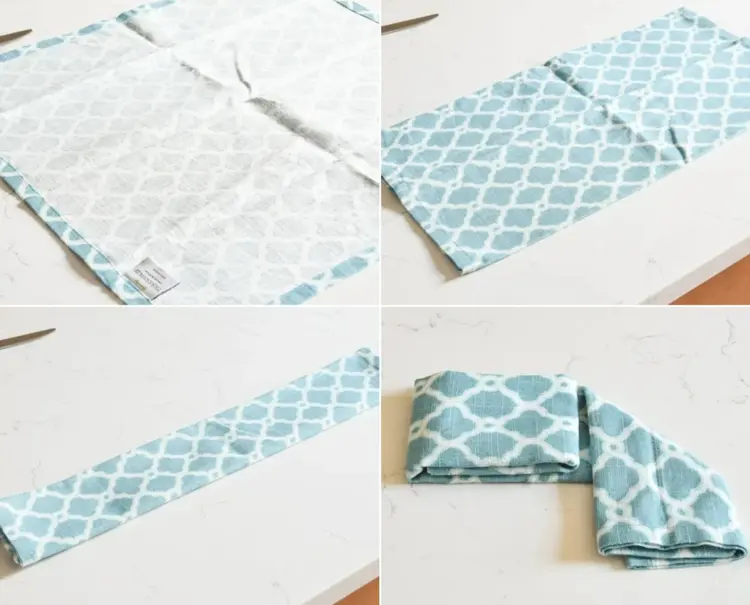
Folding napkins for Easter as table decorations:
- Spread out a square cloth napkin in front of you, wrong side of cloth facing up.
- Fold them in half to make a narrow rectangle, and then fold one more time. The result should be a strip.
- Now it gets a little trickier, but you can see it clearly in the picture instructions: Fold one end of the strip inwards twice.
- Fold the other end down at an angle, touching the edge of the other folded piece.
- Flip the protruding end over (twist it, so to speak) and tuck it in between the other layers.
- Now you can stand up the package you received and carefully open it in the middle to get a cloth container.
- Fill in Easter eggs, sweets or flowers as you like.
Make cutlery bag yourself in the form of carrots
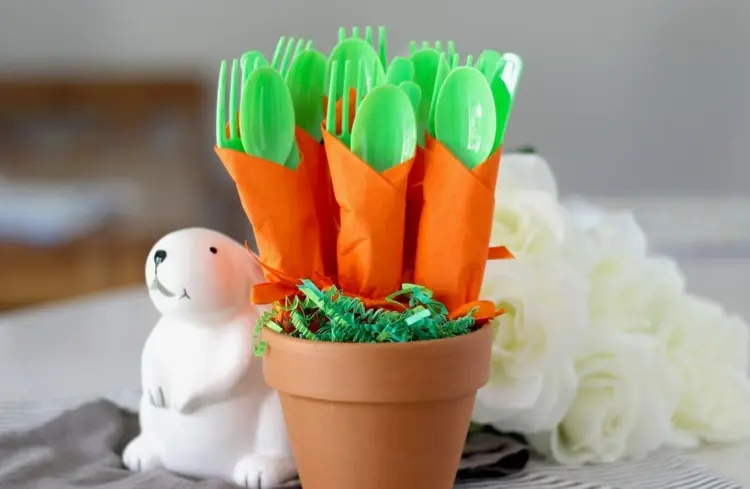
You could also fold a cutlery bag out of napkins for Easter! The great news is that you don’t actually have to fold this, just twist it. Perfect for a last-minute table decoration or for an Easter picnic. It is important that you use an orange napkin (it doesn’t matter whether it’s fabric or paper, it just depends on the occasion). With green cutlery you can imitate the carrot green. But normal cutlery is also suitable, which you can back with green paper, for example. Here’s how you can make this cute table decoration:
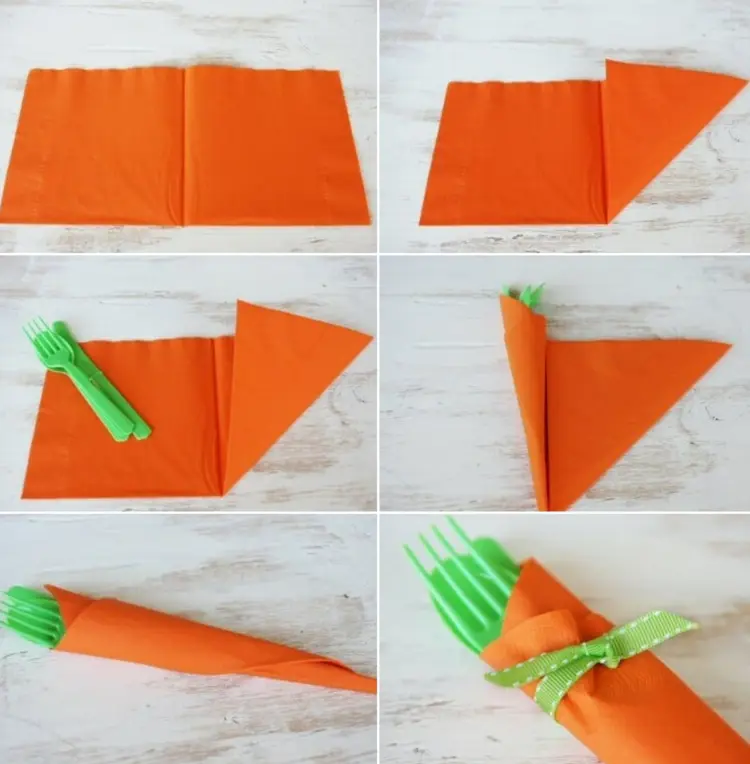
Folding napkins for Easter – instructions:
- Fold a square napkin in half to form a rectangle (the crease is on the bottom side). If you are using a paper napkin, simply unfold it once. Then you can save yourself this step.
- Take the right corner and fold it diagonally to the middle of the rectangle.
- Now place the cutlery on the left, unfolded side of the former rectangle (you are welcome to tie the cutlery together beforehand). If you are using normal cutlery, place green paper (e.g. tissue paper) underneath beforehand and let it protrude a little at the top. In this way, you can imitate the green of a carrot without much effort.
- Wrap the cutlery up to the middle, then take the other side and wrap it around the cutlery as well.
- To keep everything in place, tie green ribbon, pipe cleaners, or twine around the cutlery.
- You can attach a name tag or other decoration to the ribbon.
The finished cutlery bags look particularly effective when they are all presented together in a basket on the table (everyone can take out a bag before eating). But of course you can also just put a carrot on each plate, which is also a good option if you use name cards to allocate the seats.