Everyone is happy about Easter. And children are most excited about fun games and decorations. Of course, the traditional bunny is the most popular Easter decoration, right? There are so many ways you can make a bunny for Easter. Here are some interesting ideas you can try. Let’s go and have fun!
How to make a jumping bunny
Bring fun to your little ones at home with this cute bouncy bunny!
Materials needed:
Cardstocks (two colors of your choice)
Glue
hot glue
wobbly eyes
line
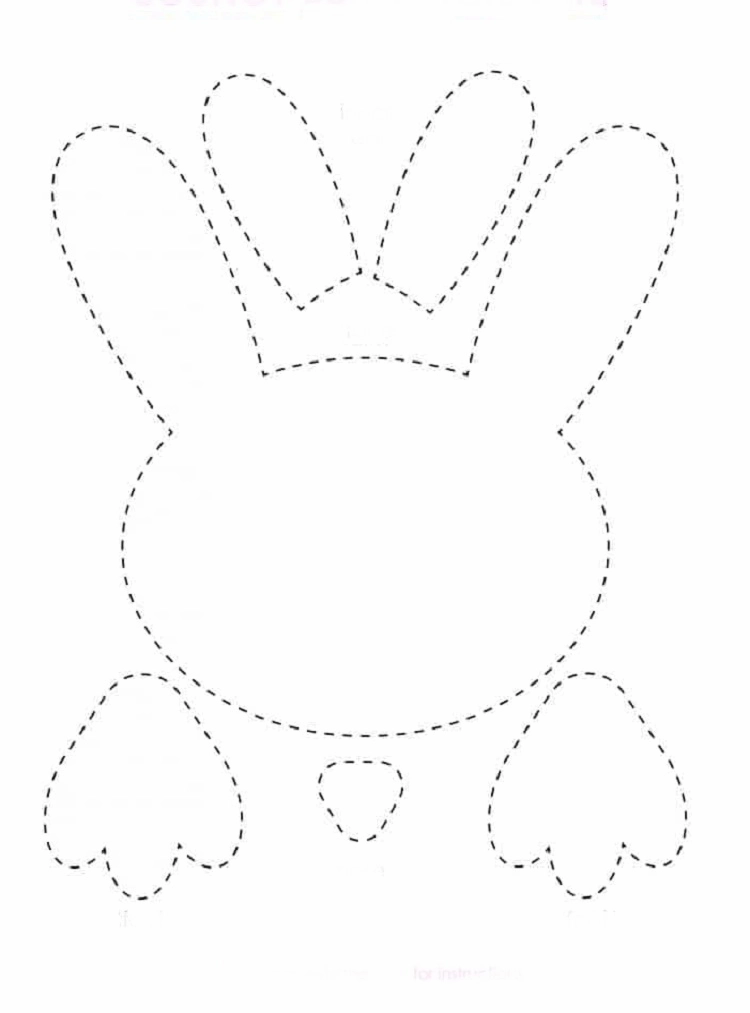
Template for the bunny
Crafting instructions:
- Print out the template above, cut it out and assemble the part of the bunny’s face.
For the bunny’s body:
- Cut the cardboard lengthwise.
- Overlap the corners of the two rectangles.
- Fold one side over the other. Do the same with the other color. Keep doing this to the end.
- If you want a bigger body for the bunny, join another rectangle and keep folding.
- Fold one end and secure with glue or hot glue.
- Attach the head to the other end.
- Place the feet at the bottom of the body.
- Attach the string to the back of the bunny’s head. It’s so easy and fun to make a rabbit for Easter!
Making bunnies out of toilet rolls with children
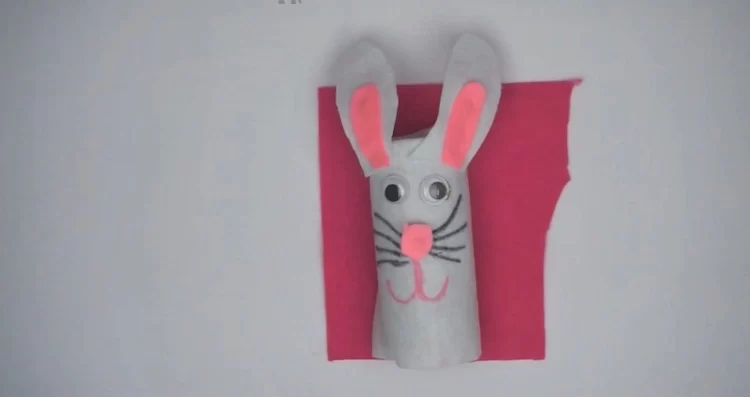
You can make a bunny out of toilet paper roll. It’s easy and the kids will definitely love this craft idea!
What you need:
Toilet paper
White and pink felt or paper
Pink and black marker
wobbly eyes
Scissors
Glue
White pompom
Do-it-yourself steps:
- Take the toilet paper roll and cover it with the white felt.
- Then cut out two ears from the white felt.
- Cut out two oval shapes from the pink felt and glue them to the white felt for ears.
- Attach the white pom pom to the pink felt for the bunny nose.
- Using the pink and black marker, draw the bunny’s mouth and whiskers.
- The last step is to attach the googly eyes. So your bunny is ready!
Easy handicrafts: make your own bunnies for Easter
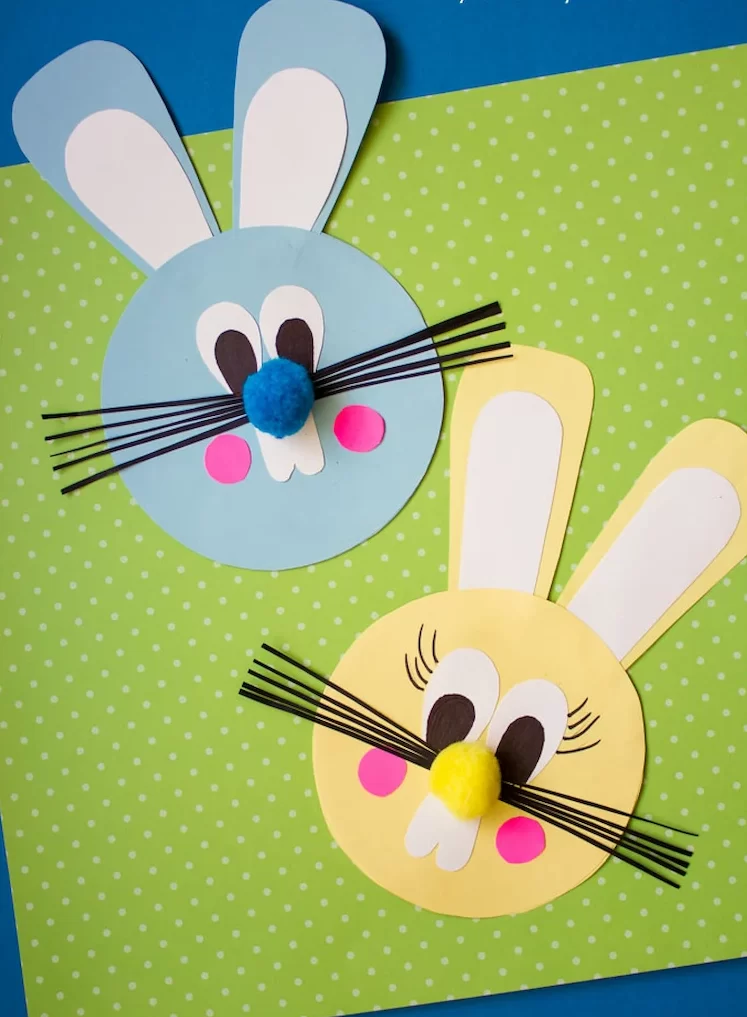
This easy paper Easter bunny craft is fun for kids of all ages. You can use the Easter bunnies to decorate your home or classroom, as large dolls (attach a wooden spoon to the back with strong tape), or as masks.
What you need:
Craft Paper – A4 or Letter Size 2 Sheets Blue and Yellow. Plus a sheet of white, black and pink
Scissors
Pompoms
Black marker
glue stick
Crumpled paper
Make the Easter crafts yourself:
- First cut out two circles for the face. Then 2 ears with a length of about 13 cm.
- Cut out eyes and ears from white construction paper and some teeth and don’t forget the whiskers and cheek points.
- Glue the ears between the two round face cutouts using a glue stick. Now glue on the eyes, the ears and the whiskers. Draw the eyes with black pencils. Finally, add a matching pompom for the bunny’s nose. Aren’t they cute? They really are that easy to make and don’t they look just adorable?
Make bunnies out of socks
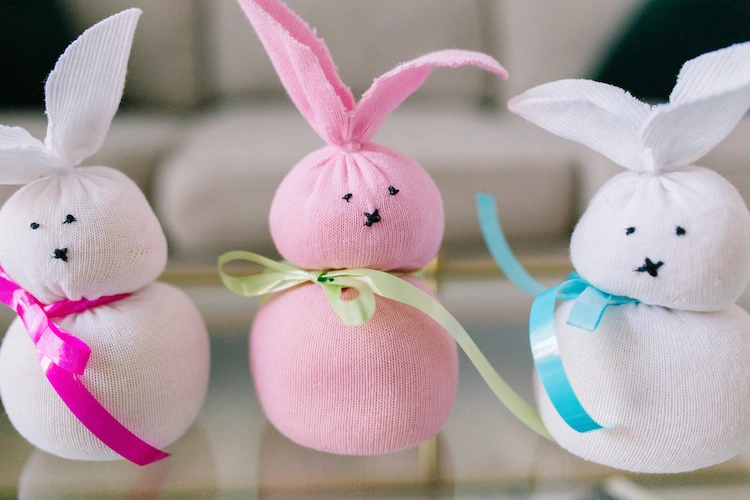
This easy Easter Bunny sock craft is fun for kids of all ages. You can use the Easter bunnies to decorate your home or classroom, or as dolls.
Materials needed for this craft:
Parish
Satin Ribbon – You can also use any type of ribbon you have at home.
Simple rubber bands
Long Grain Rice – About 1 cup per bunny
Needle and black thread or black sharpie marker
Crafting instructions:
- Here we go! First stretch the sock over a sturdy glass and then fill it with 1 cup of rice.
- Take a poly ribbon or elastic and tie it at the top.
- Then take another ribbon and wrap it around near the top to shape the body and head.
- Use another ribbon to shape the bunny’s tail.
- Cut off the excess sock at the top. If you leave a lot of sock on top, the ears will become floppy. If you cut them off closer to the head, they will stand upright.
- Cut off the middle of the top part of the sock. Then cut each ear at an angle to make the curve for the ears.
- For the next part you can either draw two eyes and an “X” for the nose with black thread or you can use a felt pen.
- Tie a small bow around your bunny’s neck and he’s done! Kids love to play with it as the rice inside makes it soft and makes it easy for them to stand the bunny up.