Less packaging, more reuse and recycling
The preliminary agreement with the Council not only includes targets for packaging reduction (5% by 2030, 10%

Liverpool FC: “Feels really dirty” – the Klopp era is about to end uneventfully
Sport FC Liverpool “It feels really dirty” – the Klopp era before an unadorned end As of:

Sonorama Ribera completes the lineup with one hundred new names
After having announced some time ago around fifty artists who will participate in the next edition of

Colds and allergies, are decongestant nasal sprays addictive? Here’s how to avoid this risk
by Laura Cuppini Continuous use increases the feeling of suffocation because it worsens the obstruction of the
Less packaging, more reuse and recycling
The preliminary agreement with the Council not only includes targets for packaging reduction (5% by 2030, 10%
Liverpool FC: “Feels really dirty” – the Klopp era is about to end uneventfully
Sport FC Liverpool “It feels really dirty” – the Klopp era before an unadorned end As of:
Sonorama Ribera completes the lineup with one hundred new names
After having announced some time ago around fifty artists who will participate in the next edition of
Colds and allergies, are decongestant nasal sprays addictive? Here’s how to avoid this risk
by Laura Cuppini Continuous use increases the feeling of suffocation because it worsens the obstruction of the
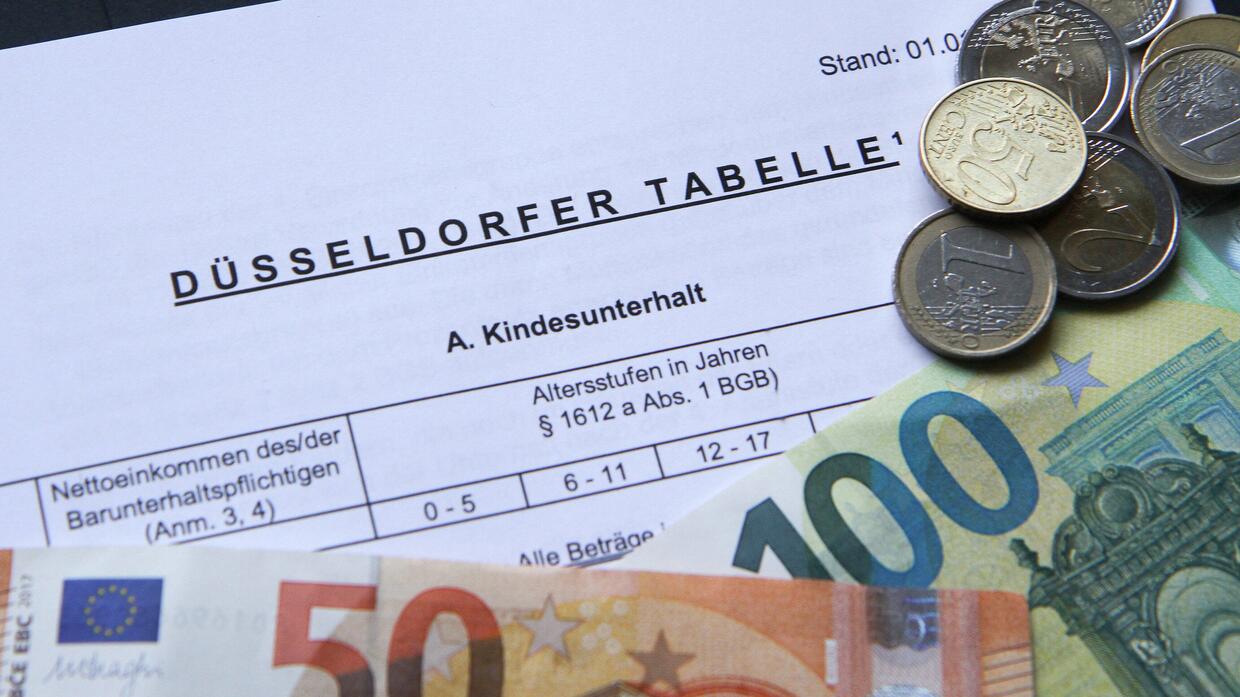
Guideline 2024 – this is how much money child support costs
When parents separate or divorce, one parent usually has to pay child support to the other. The

Car live ticker: Aceman will be a purely electric car
Audi Q7 and Q8 plug-in hybrid Around a quarter of a year after the lifting of the

Melconian responded to Milei, after the mockery: “There are still no noodles and tuco: reality agrees with me”
The Economist Carlos Melconian he responded to the president Javier Mileywho imitated him and mocked him in


:quality(85)/cloudfront-us-east-1.images.arcpublishing.com/infobae/LSV7VWIEUZDEXBZLUHGPHUOPQM.jpg)

