Originated from OpenAI, Disco Diffusion, one of the “vanguard” tools in the field of artificial intelligence drawing, can be regarded as the favorite AI drawing software for many digital art lovers.
The most special feature of Disco Diffusion is that it integrates many open source artificial intelligence drawing modules, and has been further adjusted and optimized by a large number of developers to produce high-quality AI images. Especially through the continuous improvement of the development team in recent months, the current Disco Diffusion is more powerful than when it was just launched, regardless of its detail, accuracy or functionality.
Because the integrated modules are all open source projects, Disco Diffusion itself is completely open source, the source code is also completely open, and it is completely free to use. Even the pictures generated by AI have no so-called “copyright” restrictions. Users not only It can be freely forwarded, processed, and even applied to the commercial field, which is a big advantage over other AI drawing tools.
With the powerful computing power of Google cloud host, Disco Diffusion does not need to consume the user’s own computer resources when drawing. As long as a browser and a Google account are prepared, almost everyone can easily operate Disco Diffusion and feel the artificial intelligence drawing. Charm.
Preset for Disco Diffusion
Although the original Disco Diffusion had to download the program code to the computer, calculate and generate images offline, but considering that everyone’s hardware performance is different, the current Disco Diffusion provides the ability to generate images through cloud hosts and Google Colab function, users only need to prepare a Google account and a web browser to start the operation.
Compared with other AI drawing tools, the interface of Disco Diffusion is relatively primitive and complicated. Novices may be overwhelmed by the dense code at the beginning. Therefore, if it is easy to use, it is recommended to adjust the basic settings first, and wait for future familiarization with the operation. Further customization.
Disco Diffusion
Website link: https://tinyurl.com/ykfwnsv2
Charging method: free, pictures without copyright
Step 1. Open Disco Diffusion’s Google Colab code link through a web browser, and click “Copy to Cloud Drive” on the top.
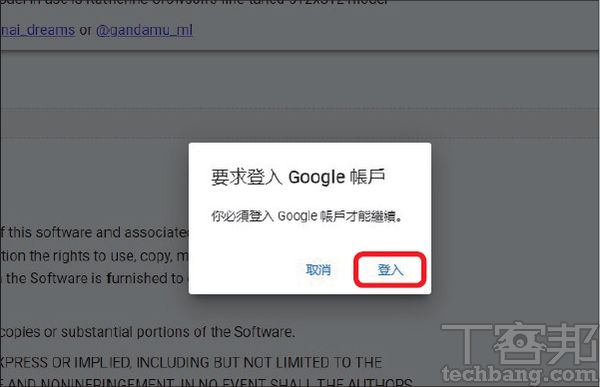
Step 2. After logging in to the Google account, the execution code of Disco Diffusion will be copied to the root directory of Google Drive, and then the web page will be automatically redirected.
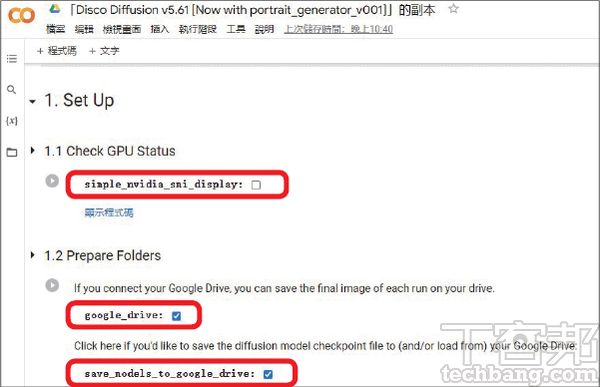
Step 3. After the webpage jumps, start editing the basic settings of Disco Diffusion. It is recommended to check the first option to perform calculations through cloud GPU, and the second and third options to store the results in the cloud hard drive.
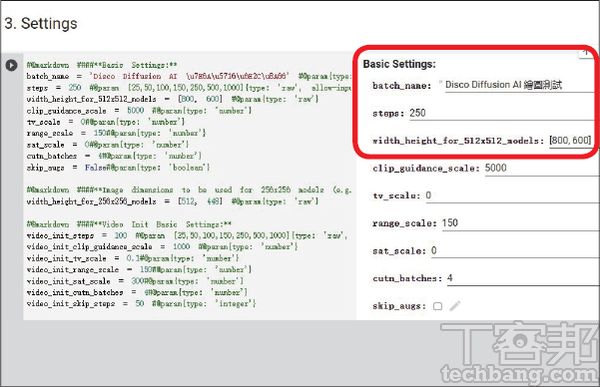
Step 4. Pull down the page to the “Setting” section, and modify batch_name to the desired project folder name; the larger the number of Steps, the finer the picture, it is recommended to keep the default; the third column is the picture size, Both length and width must be multiples of 64.
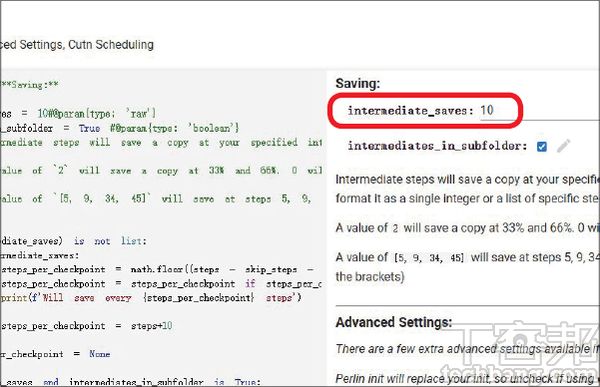
Step 5. Continue to pull down the web page to find the “Extra Setting” section, modify the value of intermediate_saves, and specify how many semi-finished pictures that appear during the production process to be saved.
Let Disco Diffusion generate images through keywords
To enable Disco Diffusion to paint according to a specific theme, the most important step is to enter keywords, the so-called “Prompts”. Disco Diffusion can not only deal with scattered keywords, such as content subject, style, color tone, etc., but can even deal with natural sentences. For example, in the example, the official used complete and logical words and asked Disco Diffusion to deduce the painting appearance. Although the cloud host is used for calculation, the execution speed of Disco Diffusion is not very fast, especially the more Steps value, the larger the specified size, and the more pictures are output, the slower the drawing speed will be.
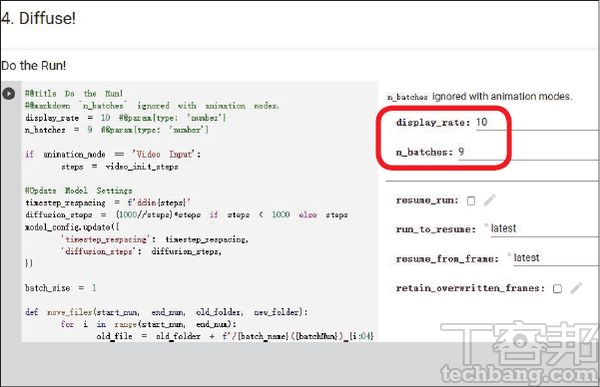
Step 1. In the “Do the Run!” block of “Diffuse!”, modify the display rate value to determine the update frequency of the image preview; n_batches refers to how many times to execute with the same setting to obtain the final images.
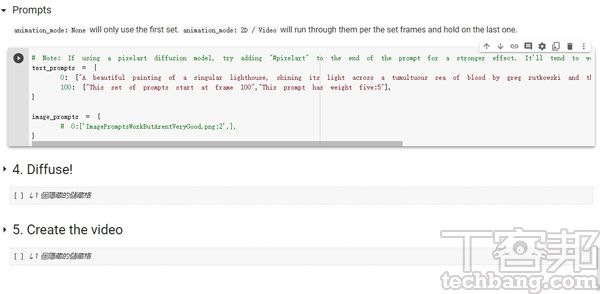
Step 2. Find the “Prompts” block, and enter the English keywords for AI to make pictures. By default, there is already an example sentence description of “A beautiful painting…”. For the first time, it is recommended to make simple modifications according to the example.
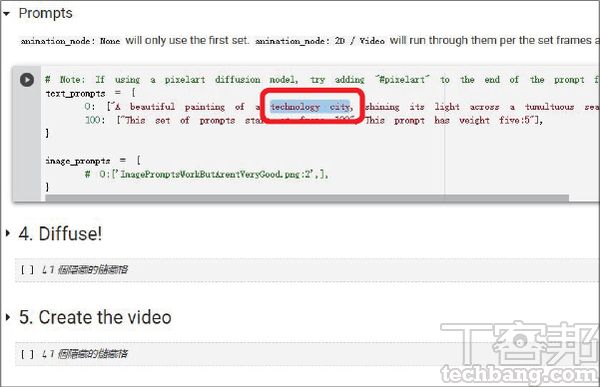
Step 3. For example, the author changed the “singular lighthouse” in the original example sentence to “technology city”, that is, the theme of the drawing was changed from “lighthouse” to “technology city”.
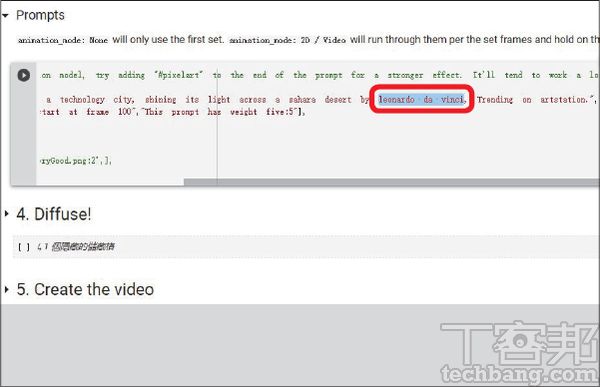
Step 4. The author’s name presented after the original example sentence “by…”, the author here also replaces it with “leonardo da vinci”, which means that the work presents the style of Leonardo da Vinci.
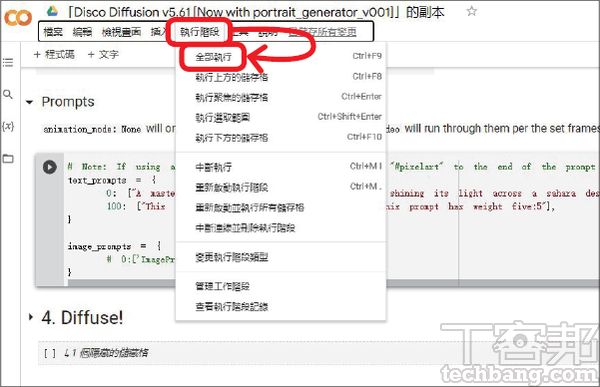
Step 5. After completing keyword input and modification, find “Execution Phase” in the top navigation bar, and press “Execute All”.
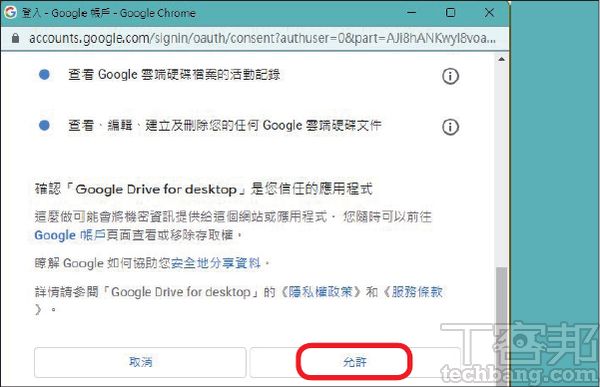
Step 6. During the process, Disco Diffusion will ask for access permission to save the necessary data and result pictures, click “Connect to Google Drive”.
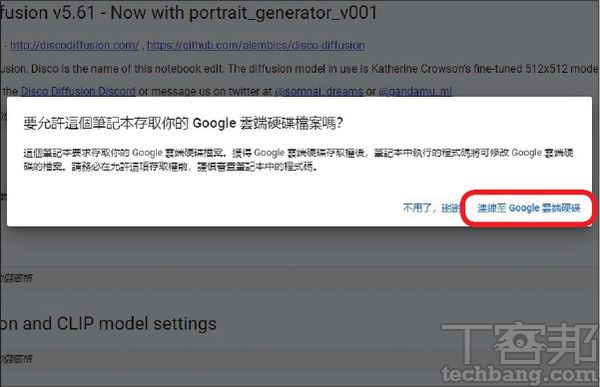
Step 7. In the case of logging in to the Google account, click “Allow” after the page jumps.
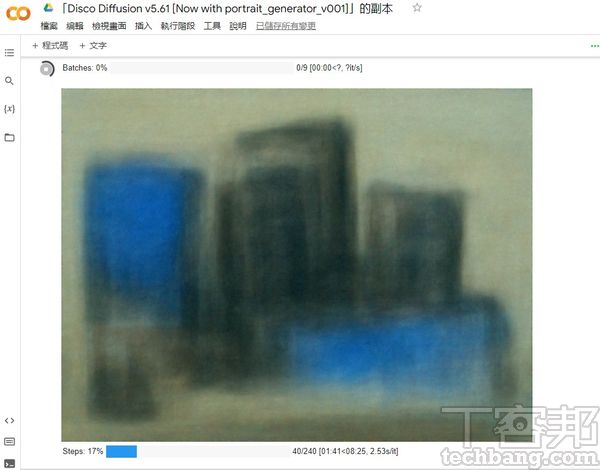
Step 8. When Disco Diffusion starts to execute, at the bottom of the “Diffuse!” block, you will see the overall progress bar, preview image and current progress bar in sequence, and there is also an animation icon in the upper left corner.
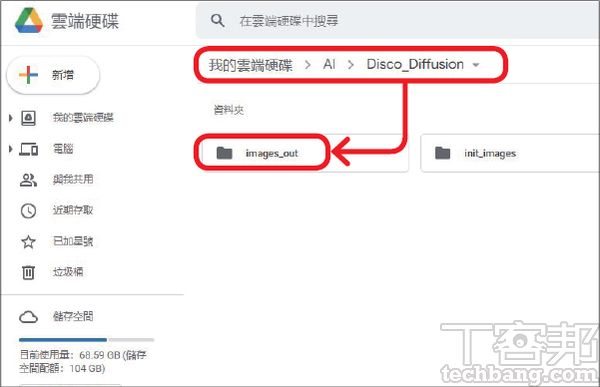
Step 9. The final image file will be stored in the AI, Disco Diffusion, images_out folder path under the root directory of Google Drive.
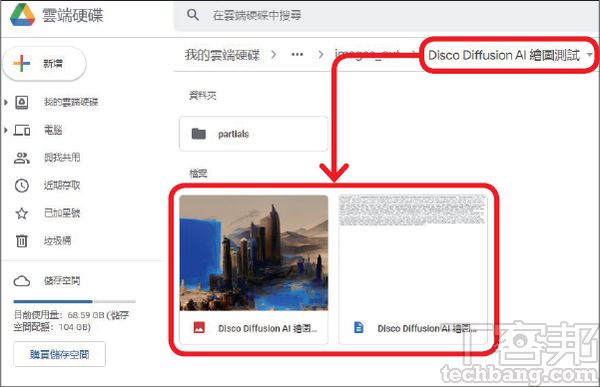
Step 10. Click on the previously set project name folder, and you will see the final version of the result picture, as well as the setting parameter text file used when executing the AI drawing.
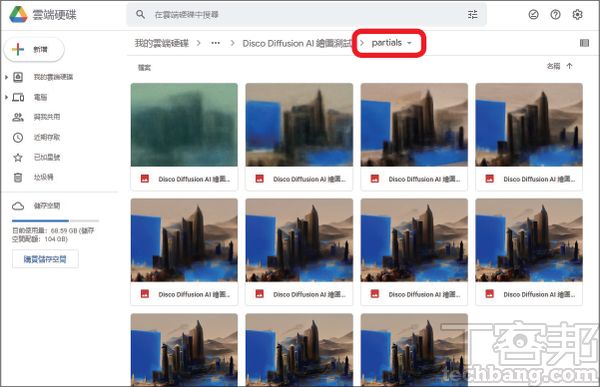
Step 11. In the partials folder, the semi-finished images generated by AI during the execution process will be stored, that is, the number of images specified by the intermediate_saves parameter.
This article was simultaneously published in PC home magazine
Welcome to join the PC home magazine fan group!