
The much-anticipated Phanteks NV7 casing is finally here. This brand new panoramic casing adopts the rare full-tower size design among the current panoramic casings. The overall internal space and heat dissipation design have good expansion performance. , in addition to supporting the installation of E-ATX large motherboards, it also supports the installation of up to 12 fans and up to 3 360 radiators. Let’s follow the steps of the author to see the difference between NV7 and other panoramic chassis.
Specification:
Dimensions: mid-tower
Material: steel, tempered glass
Main board: mini-ITX, micro-ATX, ATX, E-ATX (up to 277 mm)
Graphics card: up to 450 mm
Power supply: up to 255 mm
Air-cooled tower fan: max. 185 mm
Side fans: 120mm x 4
Upper fan: 120mm x 3
Lower fan: 120mm x 3 or 140mm x 3
Rear fan: 120mm x 2
Side radiator: up to 360mm
Upper radiator: up to 360mm
Lower radiator: max 360mm or 280mm
Rear radiator: up to 240mm
PCIe slots: 8 (can support vertical kit installation)
2.5-inch storage device installation positions: 6 (including 2 installation positions and 1 3.5-inch public space)
3.5-inch storage device installation positions: 2 (one installation position and two 2.5-inch common spaces)
前 I/O 埠:USB 3.0 Type-A x2、Type-C x1(yjo4el USB 3.2 Gen2)、HD Audio
content directory
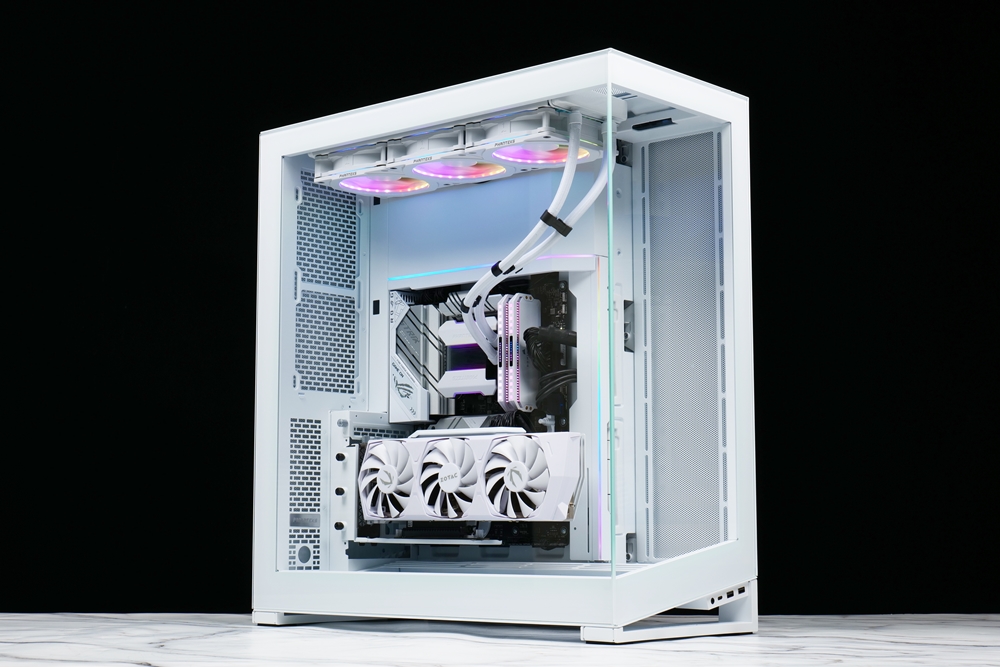
Panoramic tower double-sided glass excellent view
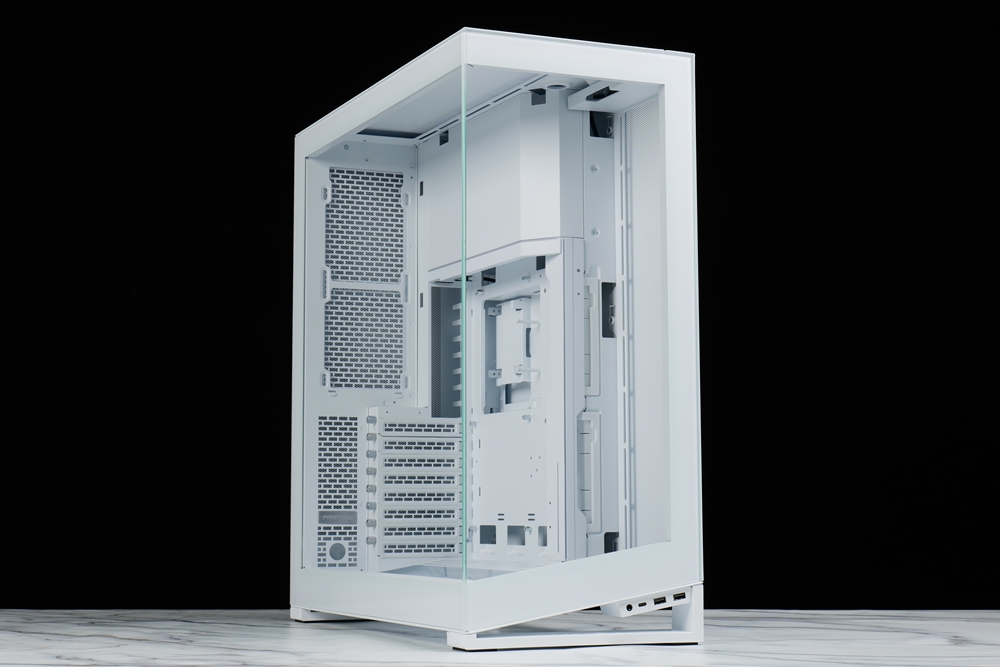
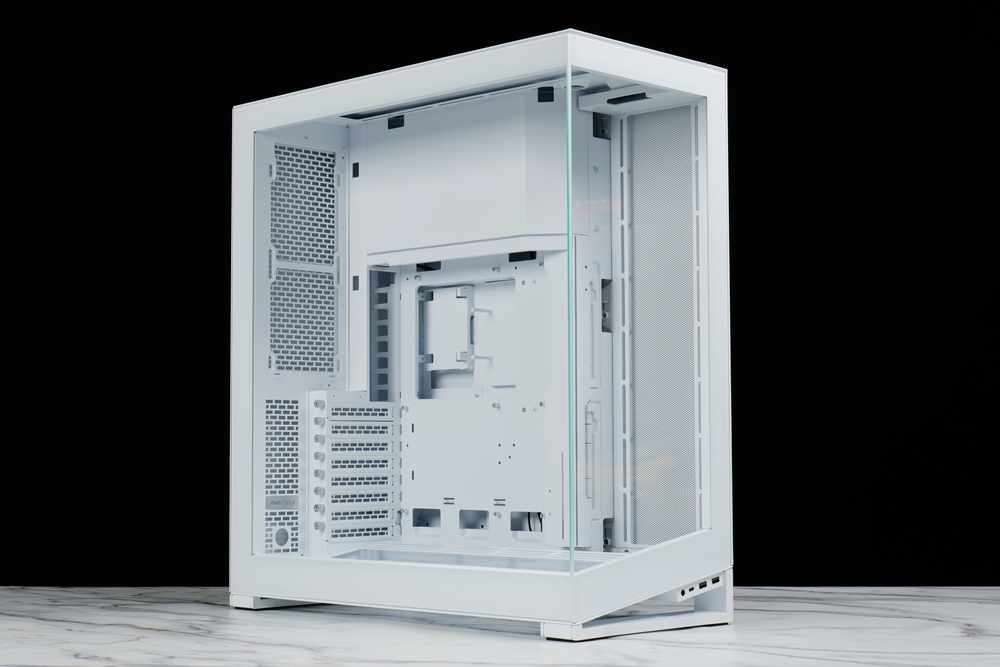
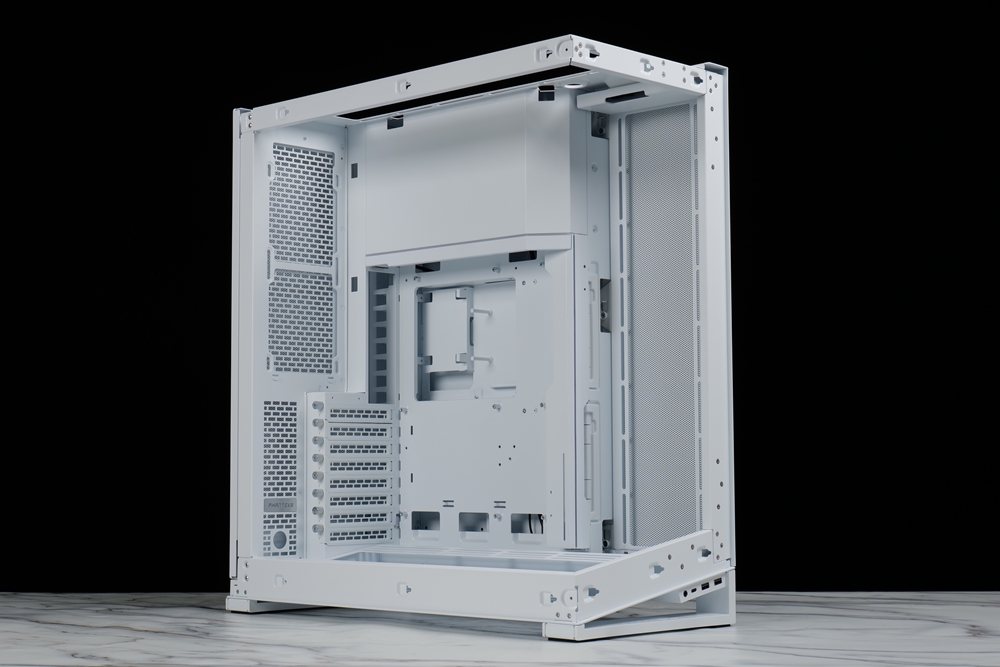
Phanteks has caught the trend this time and launched a panoramic case. This brand new NV7 case has a super large full-tower size, but the design adopts the configuration that the power supply is installed above the motherboard, so it is relatively Compared with those dual-chamber panoramic chassis, the footprint is smaller, but the height has increased a lot.
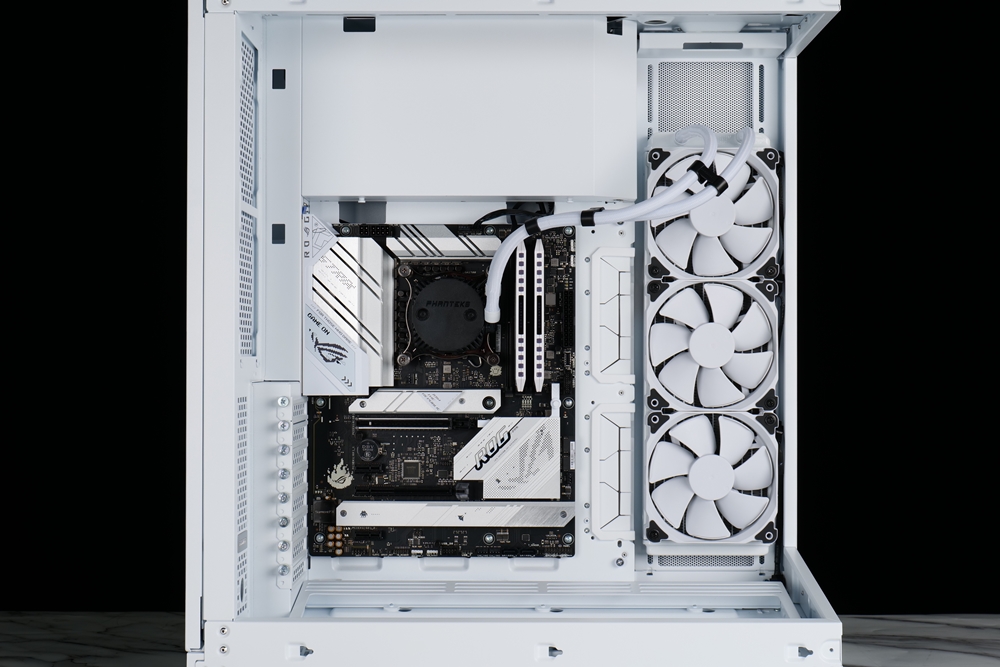
The spacious internal space supports the installation of the largest E-ATX motherboard, and the heat dissipation part supports the installation of up to 12 fans and 3 360 water-cooling radiators, and the side and top support thick row installation.
And since there is no fan installation position in the front, the installation of the graphics card is basically unlimited. In addition, the prepaid graphics card holder in the accessories makes it more convenient for players to install large graphics cards. In addition, the 8 expansion slots support various general-purpose graphics card upright adapters Installation, in the absence of a vertical graphics card installation position, players can still easily erect the graphics card through the adapter kit.
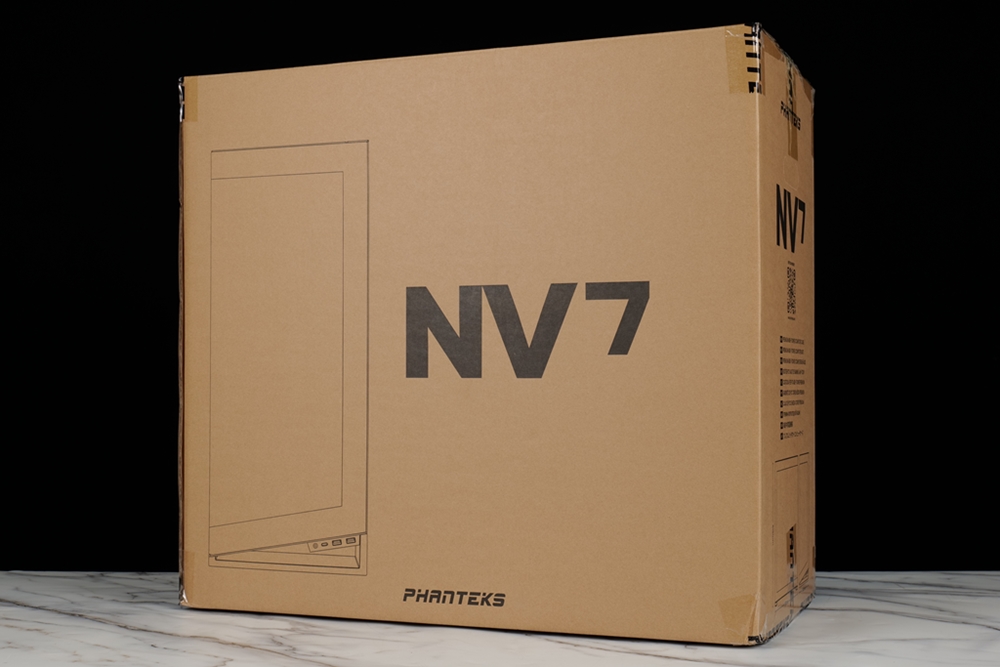
→ Super large Phanteks NV7 outer box.
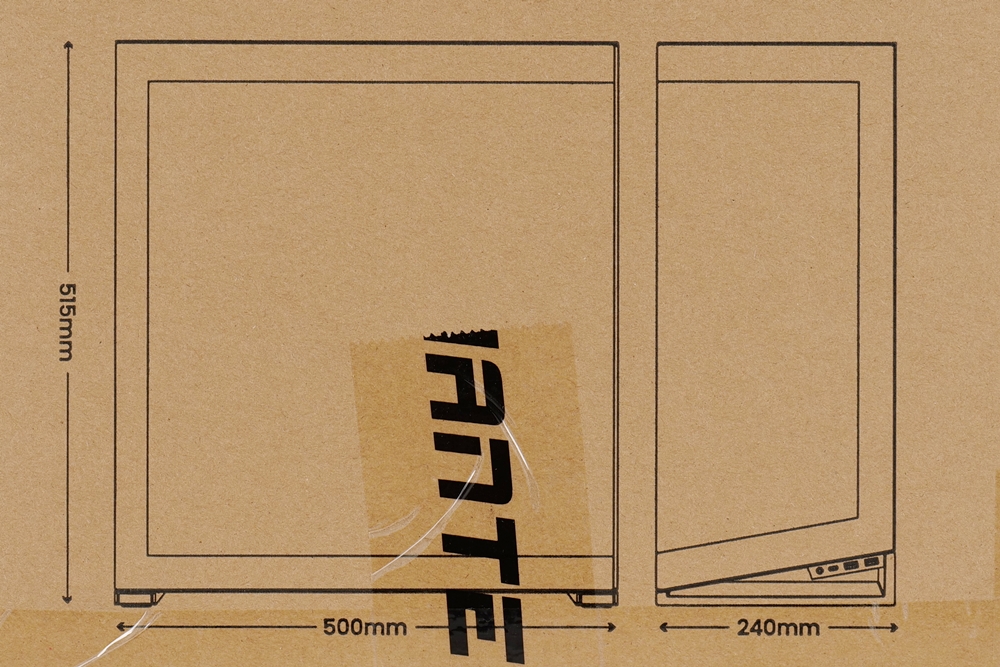
→ There is a shell size on the side of the outer box for players’ reference.
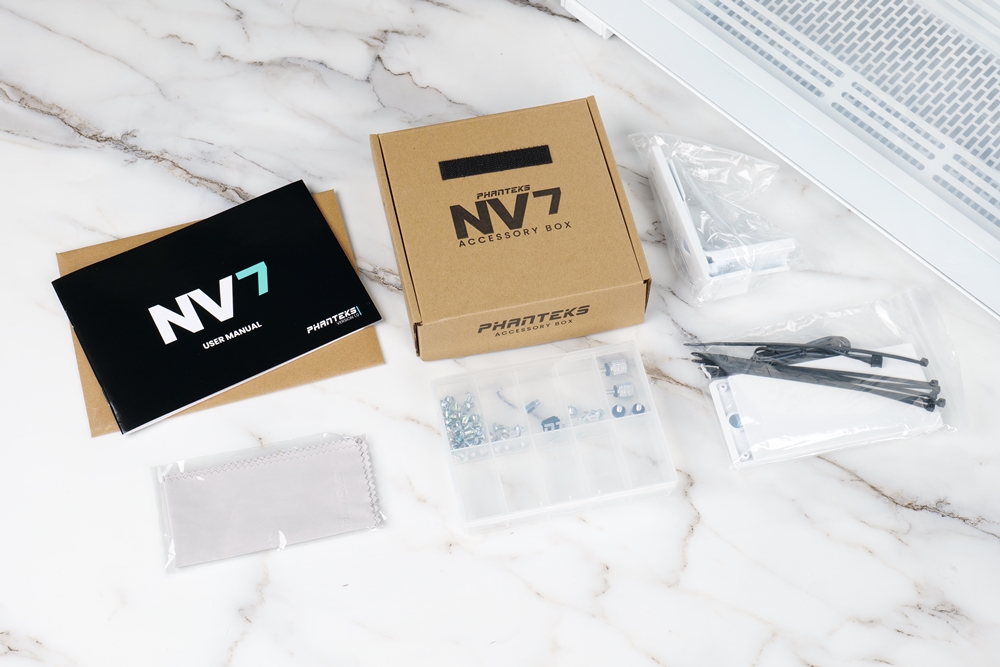
→A complete list of manuals and accessories.
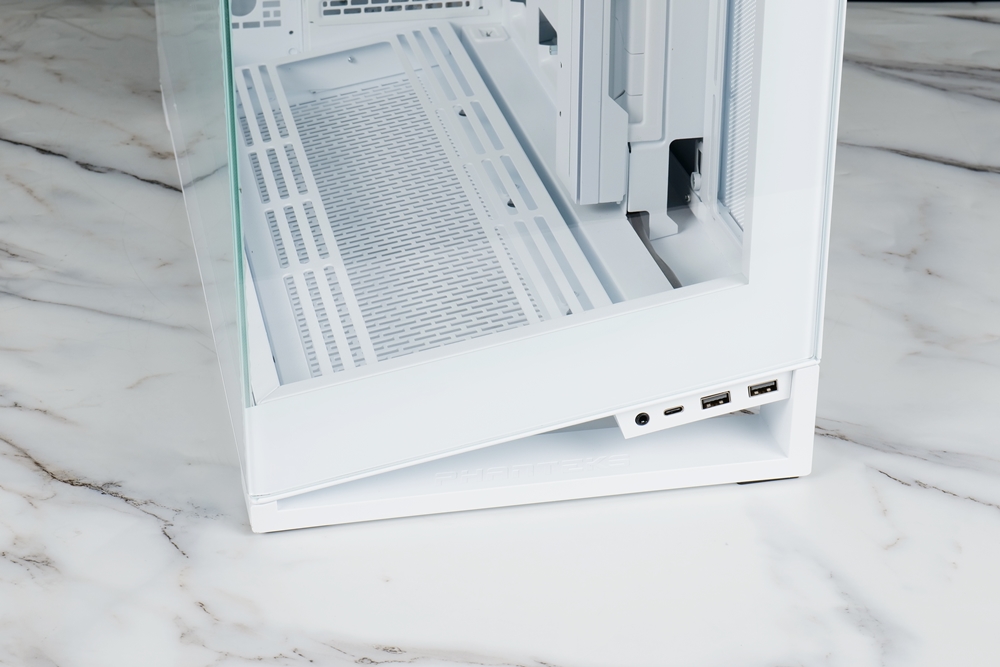
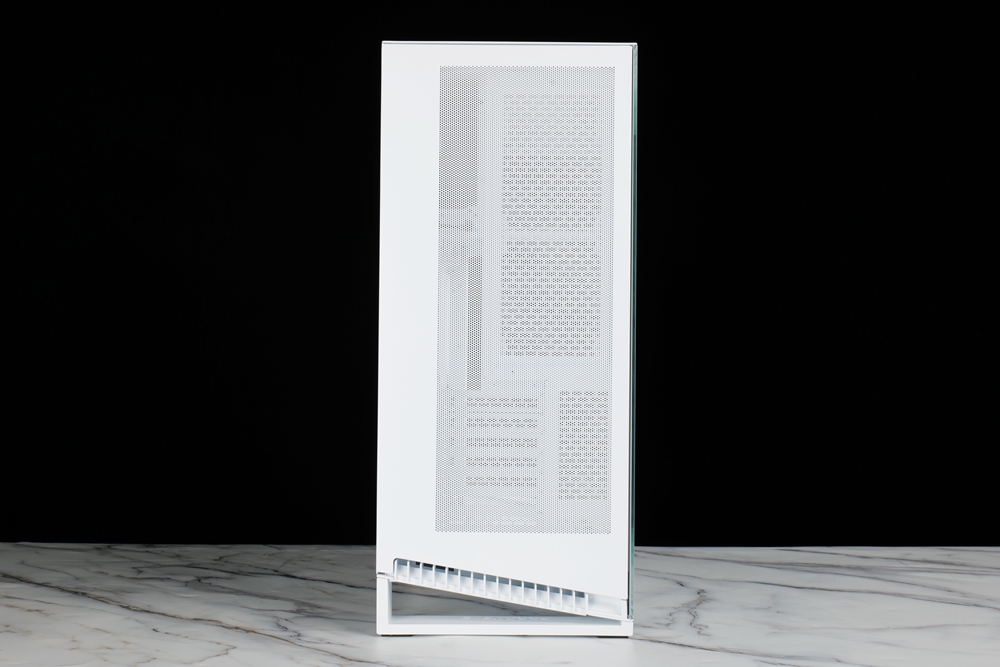
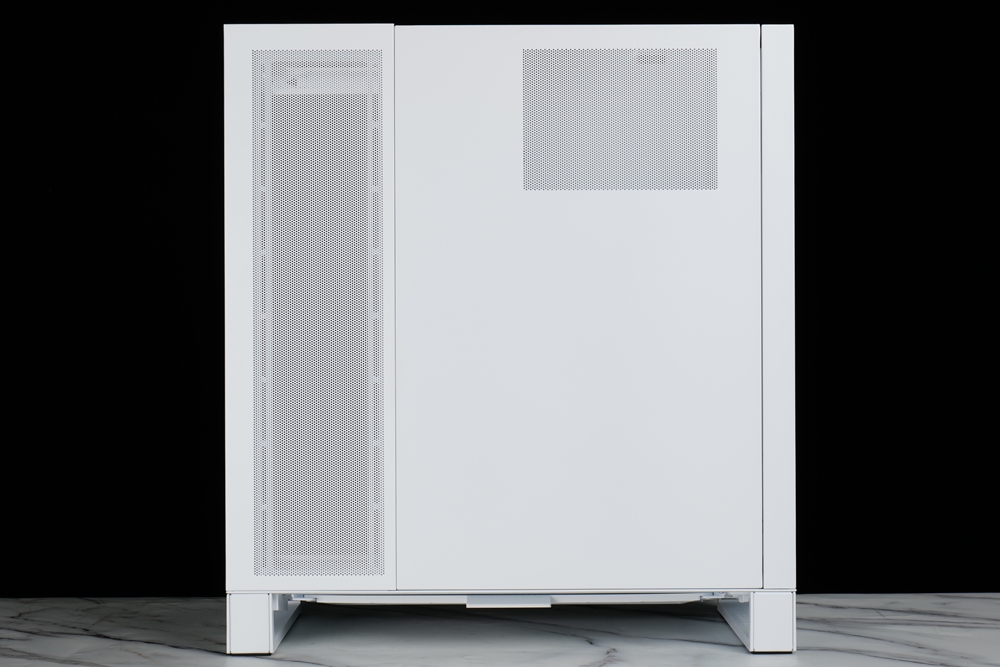
First of all, when you see the NV7, you will be shocked by the two large floor-to-ceiling windows at first glance. The fully transparent glass can give you an excellent internal view, and it is not difficult to find it from the front. In the design, the bottom adopts a 10-degree slope design. The I/O port can be placed just outside the bottom, and the bottom fan can be better displayed inside, and there is also a space at the bottom of the case to allow the air flow from the bottom to better enter the case, while the power switch and lighting effect control buttons are arranged. On the top of the case, it is convenient for internal wiring.
→Phanteks NV7 Front Appearance List.
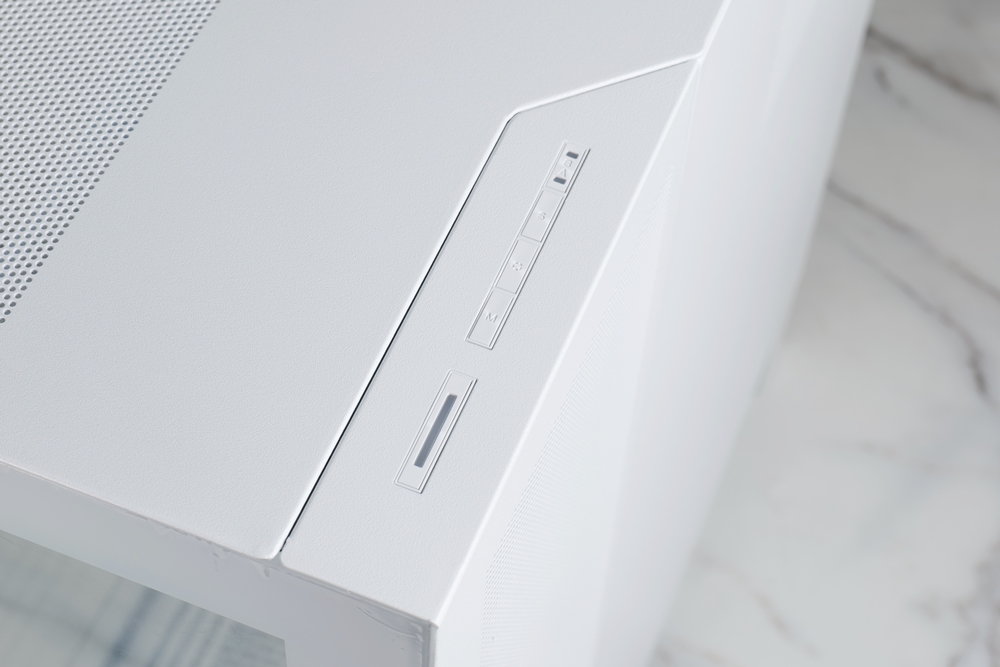
→A list of buttons on the top of the case.
→The 10-degree chamfer design on the bottom of the case.
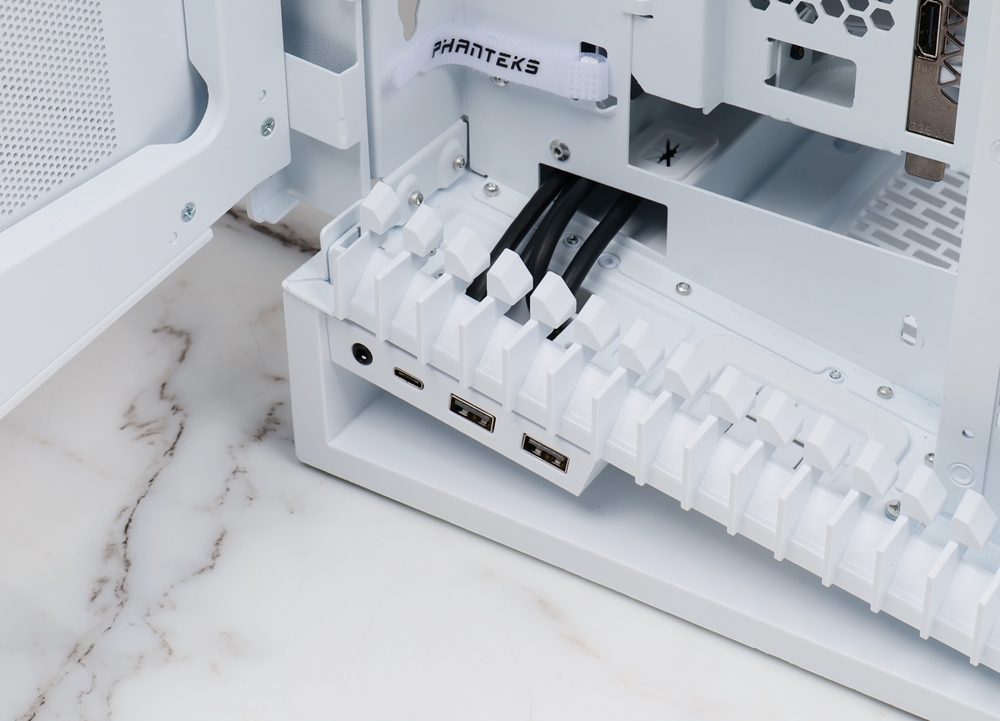
→ I/O can be retrofitted to the rear.
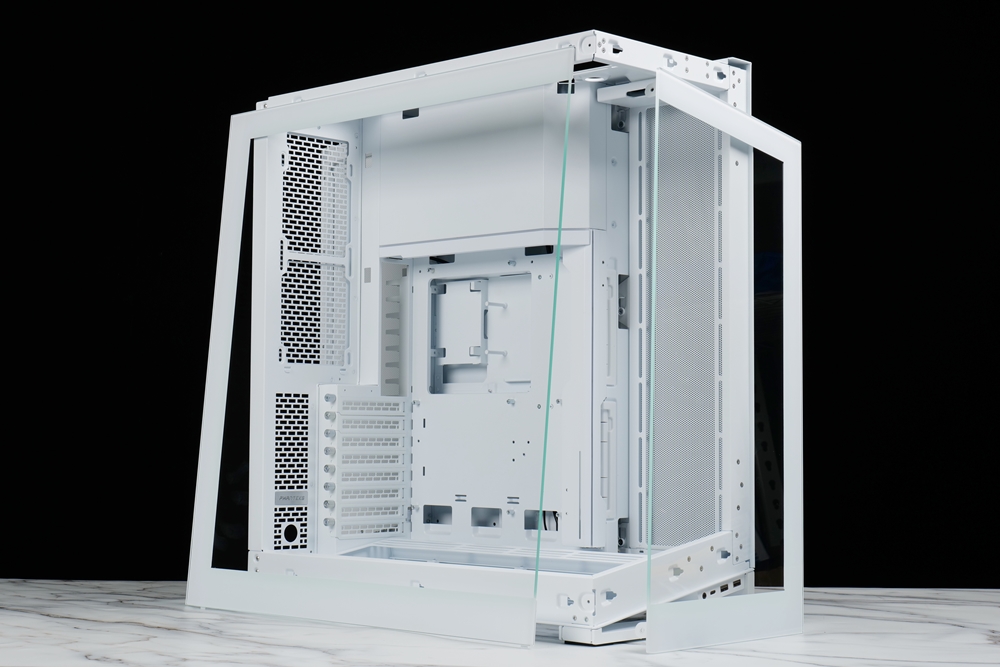
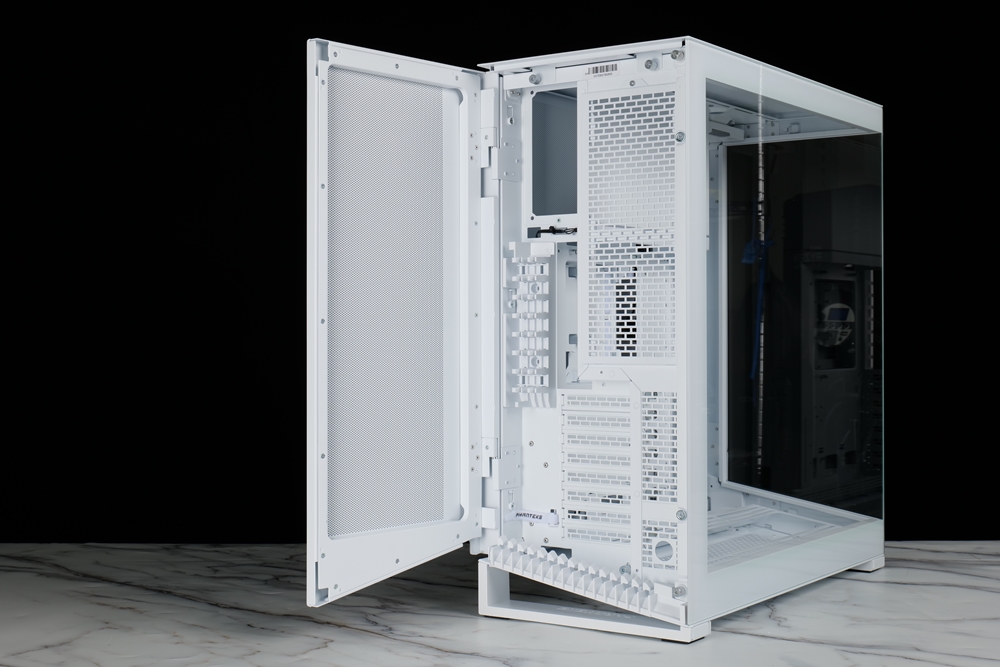
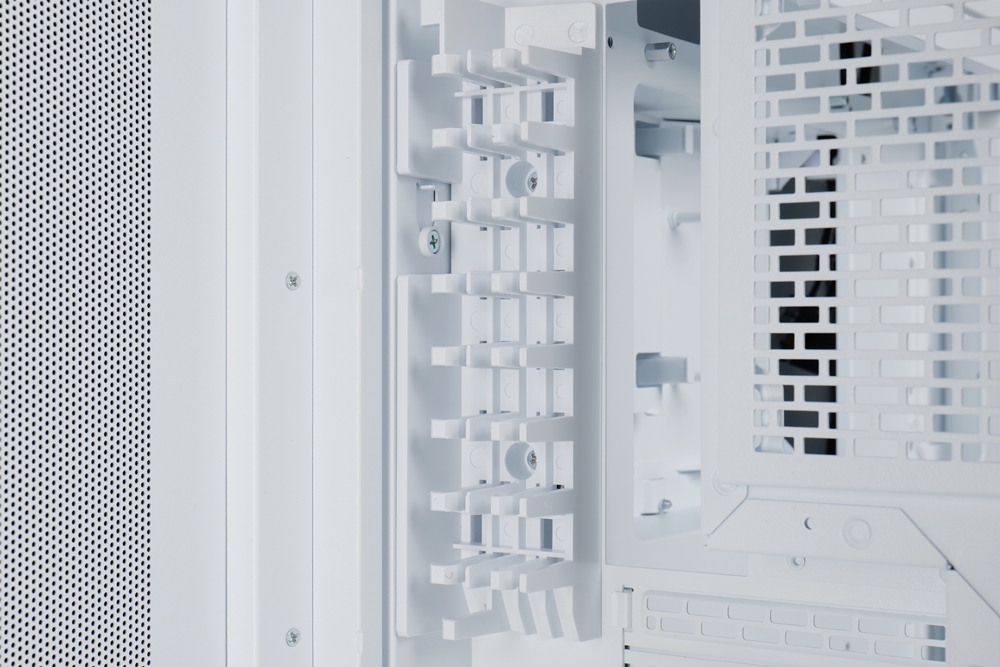
The NV7 is a panoramic case. The tempered glass on the front and sides adopts a full-screen design, and there are side strips in the same color as the case to cover the metal buckle underneath. The two panels are removable. Design, open the back door version and loosen two thumb screws to remove the side glass panel, and the front glass panel needs to remove 2 screws to disassemble, and since there is no A-pillar for support between the two pieces of glass, the front panel There are L-shaped metal parts at the frame connection between the frame and the backplane to reinforce the structural strength to ensure that the frame can support the glass and the installation of the upper heat dissipation parts.
→Panoramic double-sided glass appearance at a glance.
→Both pieces of glass can be removed to facilitate the installation of hardware parts.
→Schematic diagram of removing the glass and top cover.
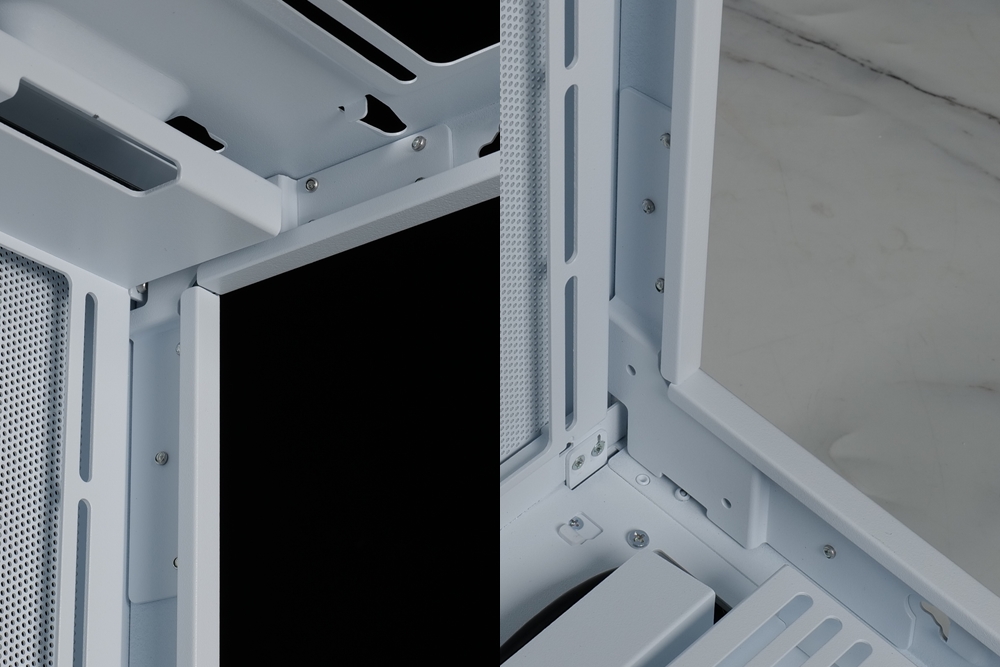
→ L-shaped metal parts for structural strength reinforcement.
A unique door panel design is adopted at the rear of the case, and Ultra-Fine Performance Mesh openings are used in the appearance to ensure ventilation and safety. Perhaps considering that players may place it horizontally on the desktop on the side of the screen, we can design it at the rear. It can well hide all the wires, and the wires can be fixed through the internal wire clamp, and the wires come out from the lower wire groove, and there is also an opening at the bottom, so that the thicker wires cannot be stuck into the lower groove. Wires can be routed directly through the opening.
→ Mesh door panel at the rear of the case.
→ After opening the mesh door, you can see the I/O area behind the internal motherboard.
→ There is a wire slot design on the side of the motherboard I/O.

→ The lower wire guide can make the wires have a clean routing.
12 fan installation positions, DIY water-cooling friendly configuration
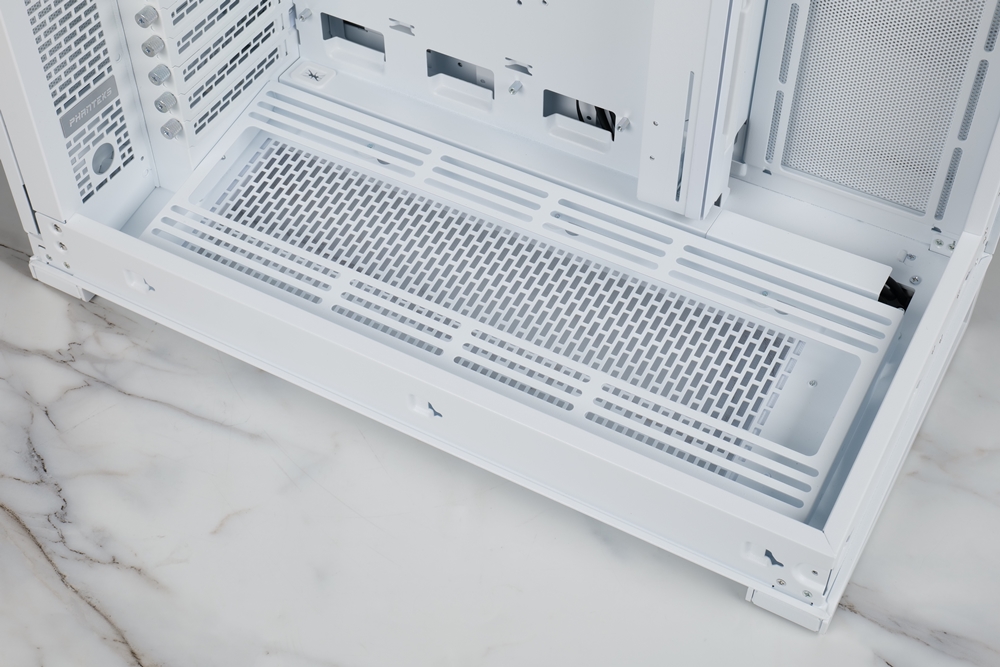
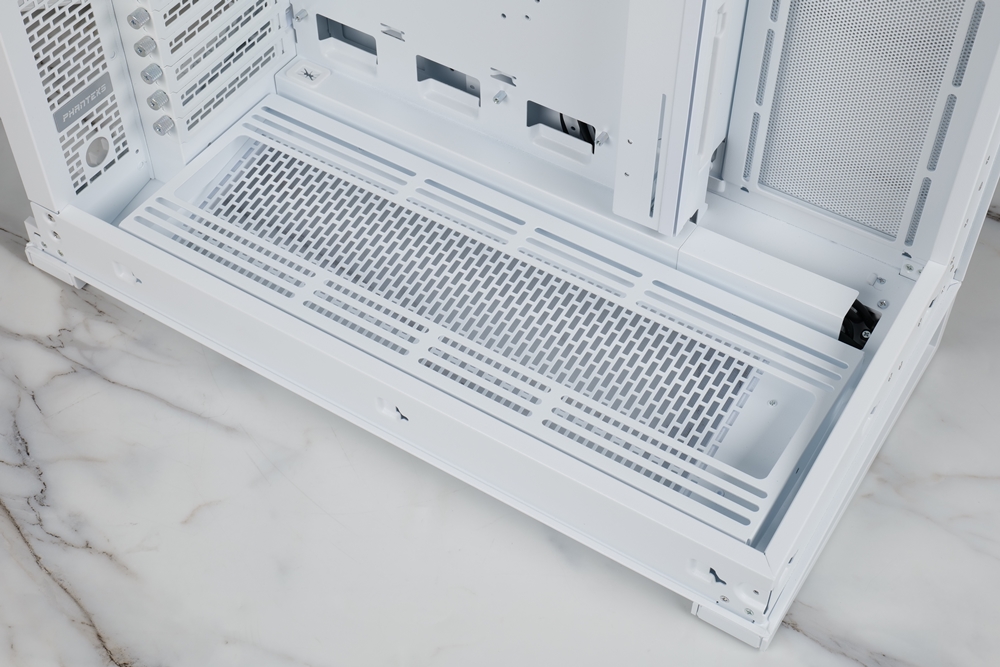
Although most of the mid-to-high-end casings currently provide more fan installation positions, the bottom part is fully open and has a fan installation position design, and the body is still designed with a chimney vertical air duct. First, you can see the upper fan installation position, and give it a 3 There is a 120mm fan installation space, and there is an extra space of about 6cm. The installation can be fine-tuned according to the configuration of the water-cooling tube. In addition, there is a 20mm opening on the upper front side. Players who install DIY water-cooling can install through-board water-cooling connectors. Let the water injection hole on the top be usable.
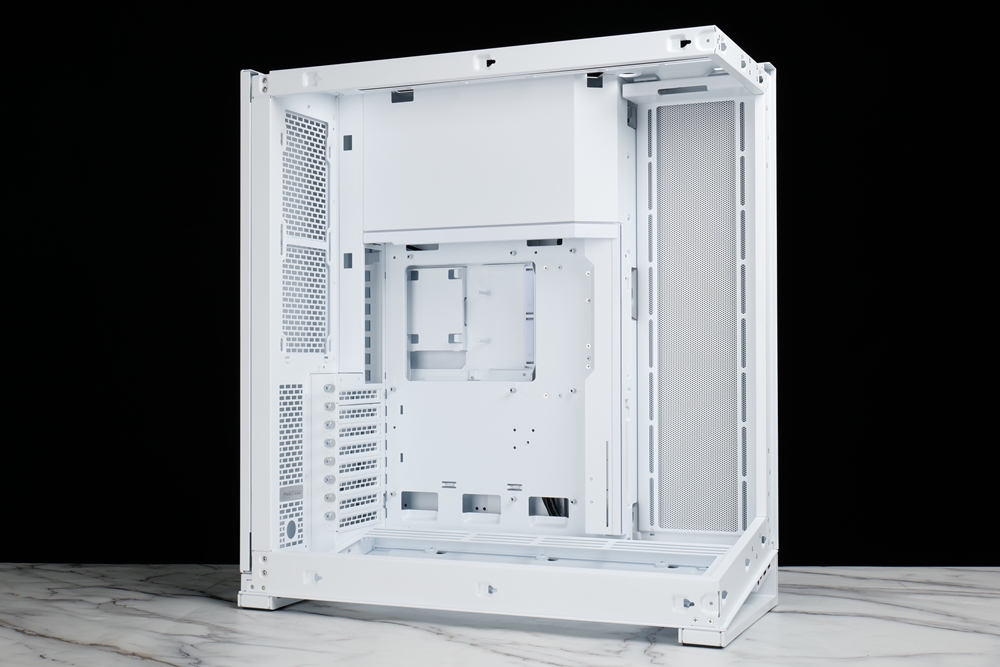
→Overview of the internal space of the casing.
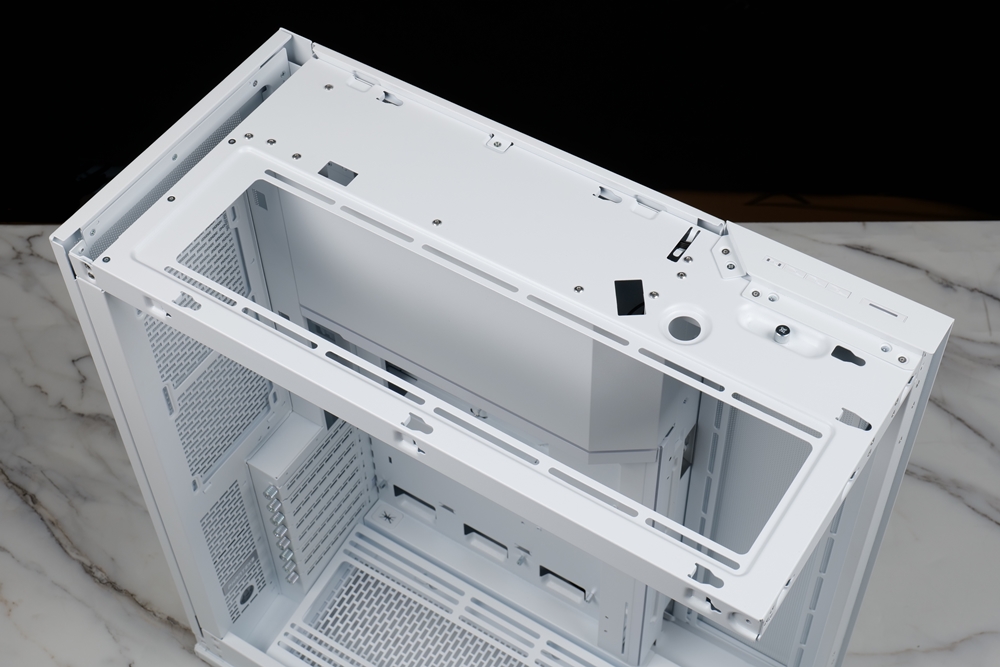
→The installation position of the upper fan.
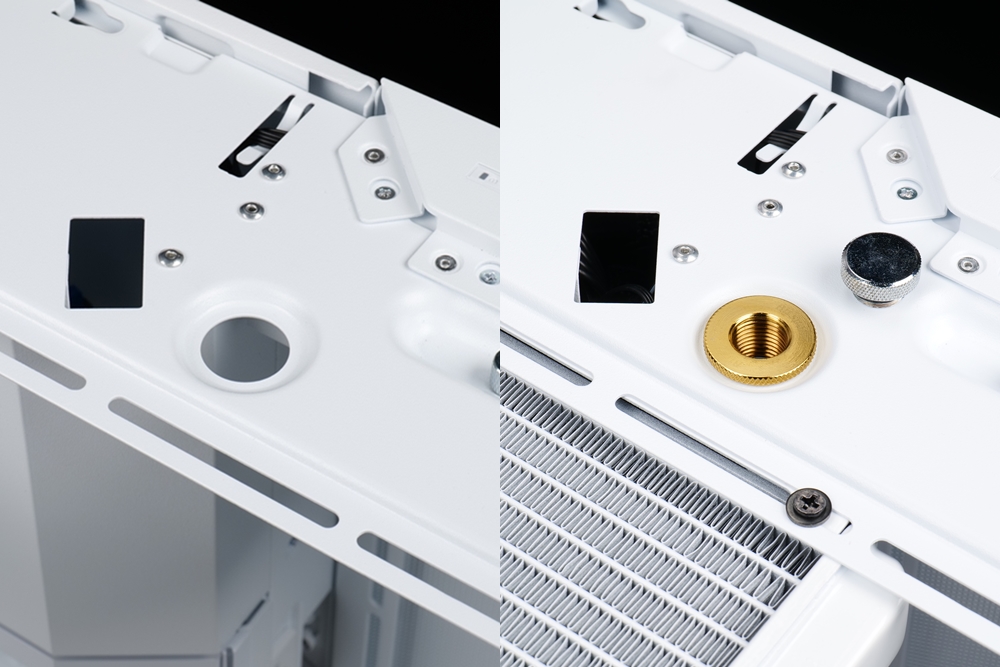
→ There is a 20 mm opening at the front for installing bulkhead water-cooling joints.
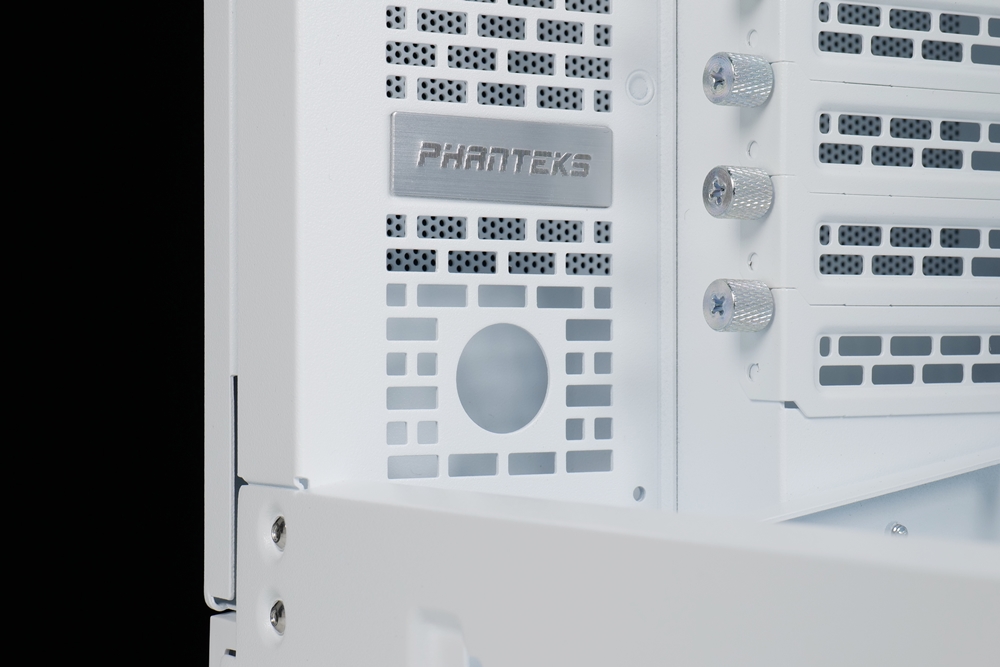
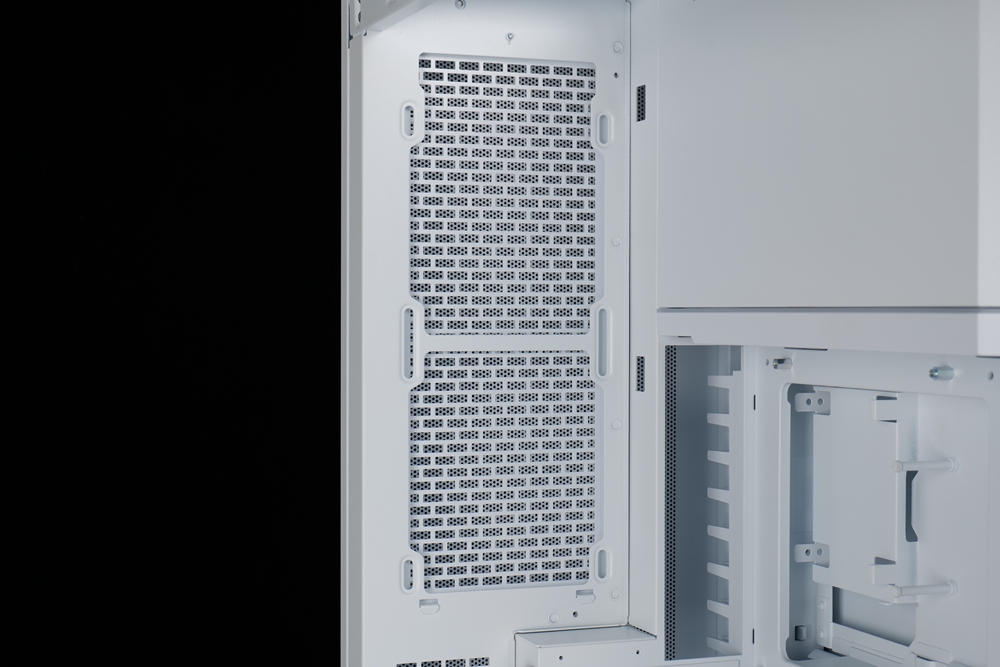
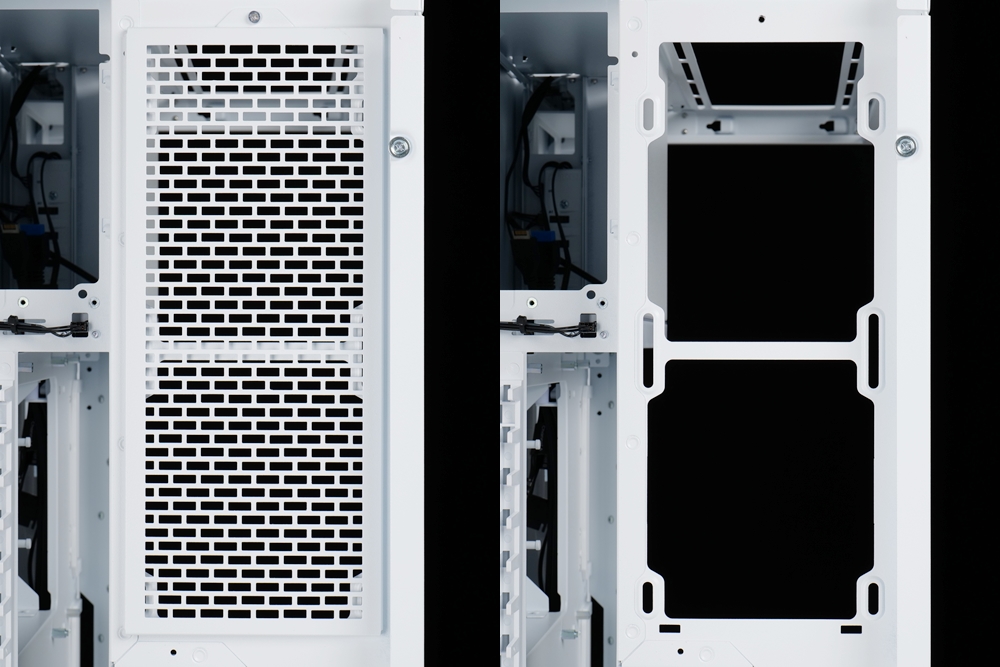
The fan mounting positions on the side and the bottom are all designed with modular brackets. First of all, the fan mounting position on the side can support up to 4 fan installations. However, because there is no extra space reserved, it does not support 480mm water cooling radiators. Installation, players need to make a choice between installing a full board with 4 fans and a 360mm water cooling row.
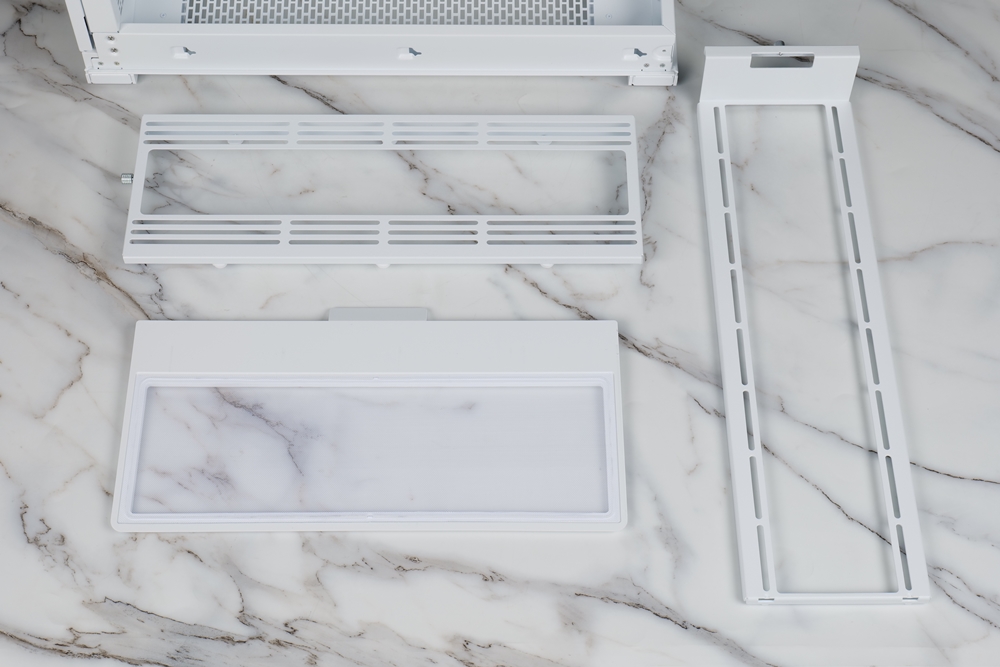
→A list of modular brackets, and a dust filter at the bottom of the case.
→A list of fan installation positions on the side, the same as the Ultra-Fine Performance Mesh openings on the side.
Then you can see the lower fan installation position, the design has a 10-degree inclination, which can better display the fan lighting effect, but if the player still wants to install the fan horizontally, or needs to install a water-cooled pump at the bottom, you can also mount it Rotate it horizontally and install it, so that the installation position can be changed to a horizontal angle. In addition, you can see a 20mm opening on the chassis behind the bracket. Here, players can also install a through-board water-cooling joint and use it as a drain hole.
→The lower fan mounting bracket is preset with a 10-degree inclination.
→ After the lower fan mounting bracket is reversed, it can be changed to a horizontal angle.
→ There is a 20mm opening at the rear of the case, which can be installed with a through-board water-cooling joint.
As for the installation position behind the fan, there are two 120 mm fan installation positions. In addition to the fans that players can install here, if you want to do DIY water cooling, you can use the 240 specification public version of the water channel plate.
→ Rear fan installation position.
→The metal plate can prevent the rear wires.
High and spacious
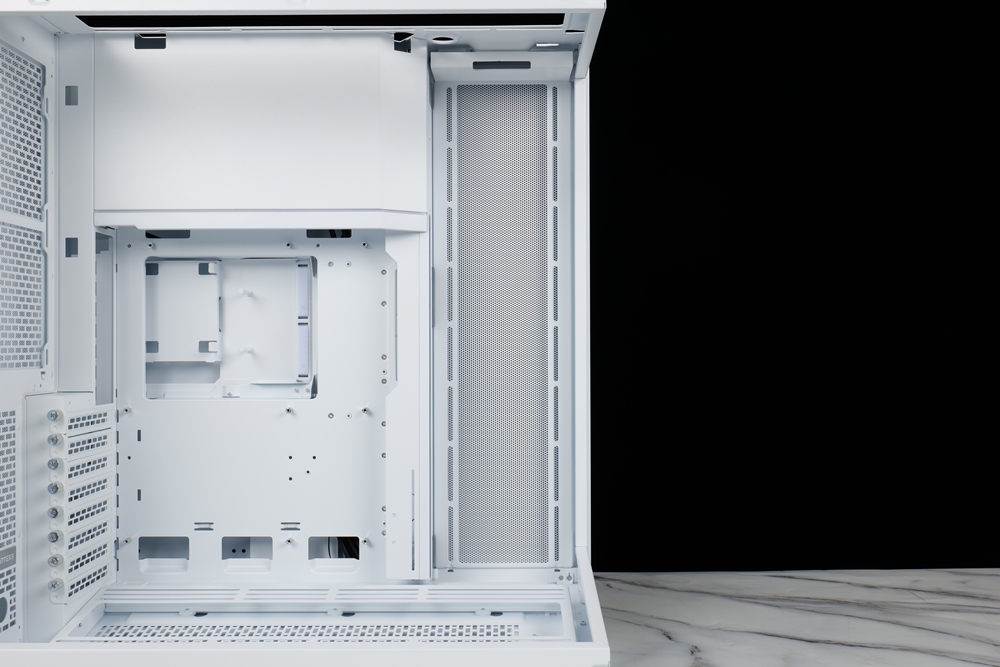
Due to the special design of the configuration, the power supply in the rear subdivision is upright and overlapped above the motherboard installation position, thus creating a high visual effect inside, and the design of the motherboard installation location through the upper and The modular cable shield on the side has built-in visual effects, and in order to support the installation of E-ATX motherboards, the shield on the upper side is designed to be installed in both directions, whether it is an ATX or E-ATX motherboard. board can have a better visual effect.
→ There are modular shielding panels on the top and right side of the main board installation position.
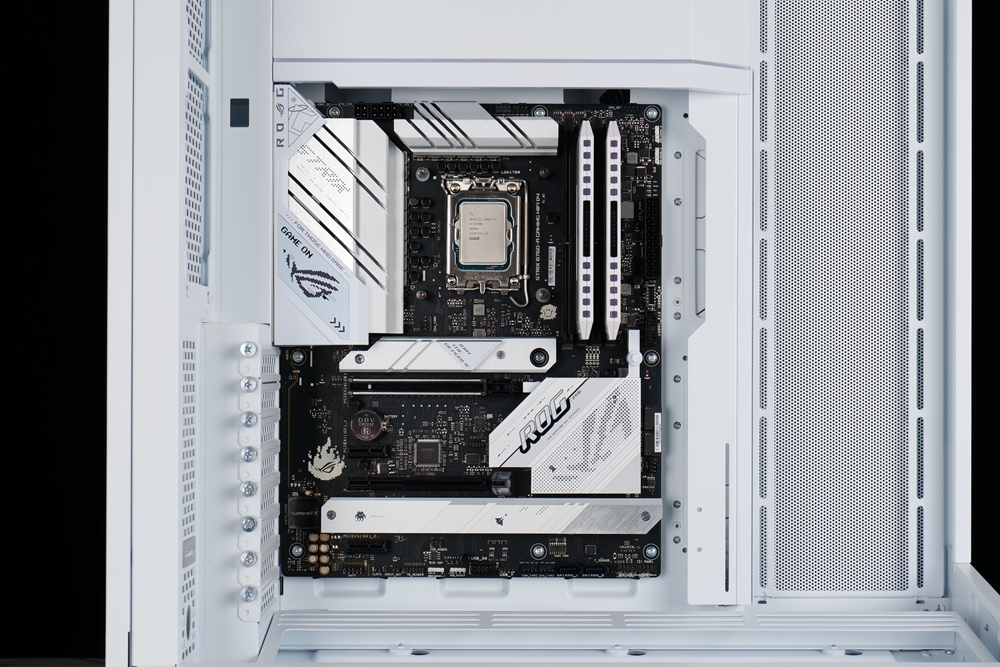
→ ATX motherboard installation diagram.
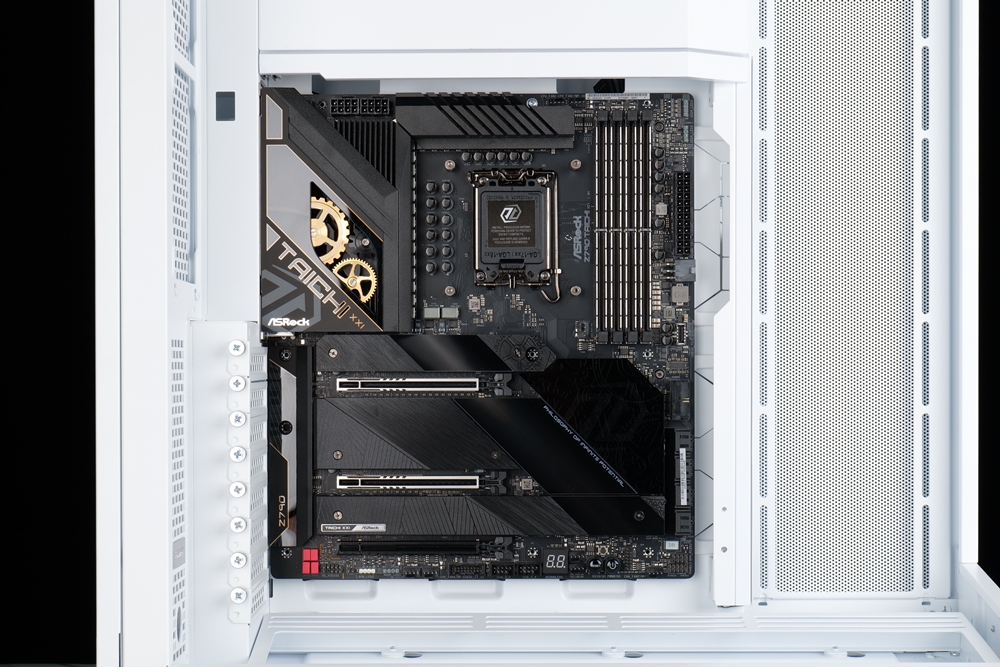
→ E-ATX motherboard installation diagram.
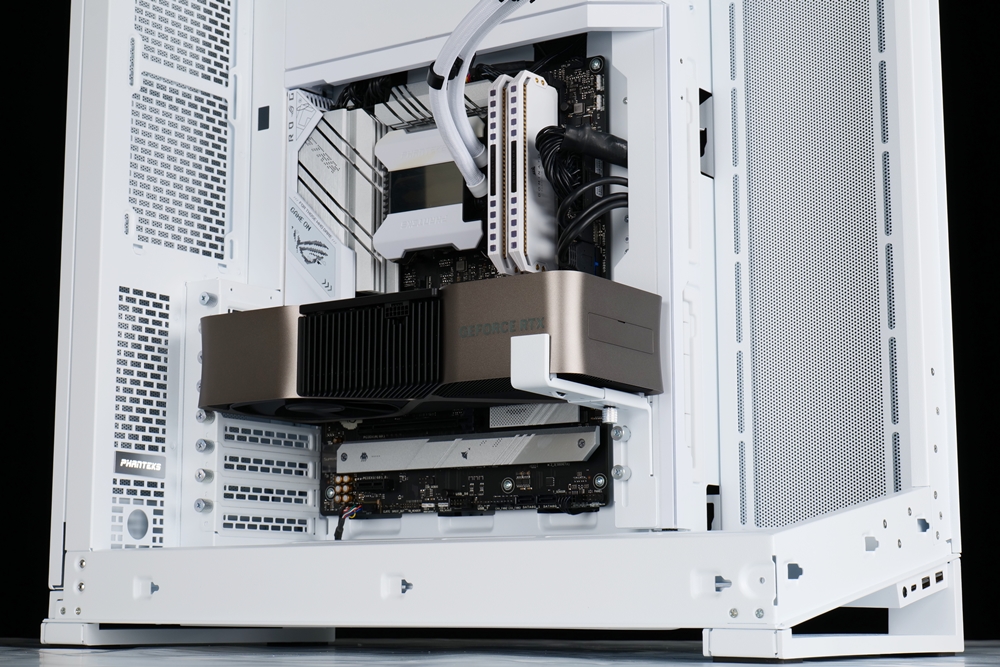
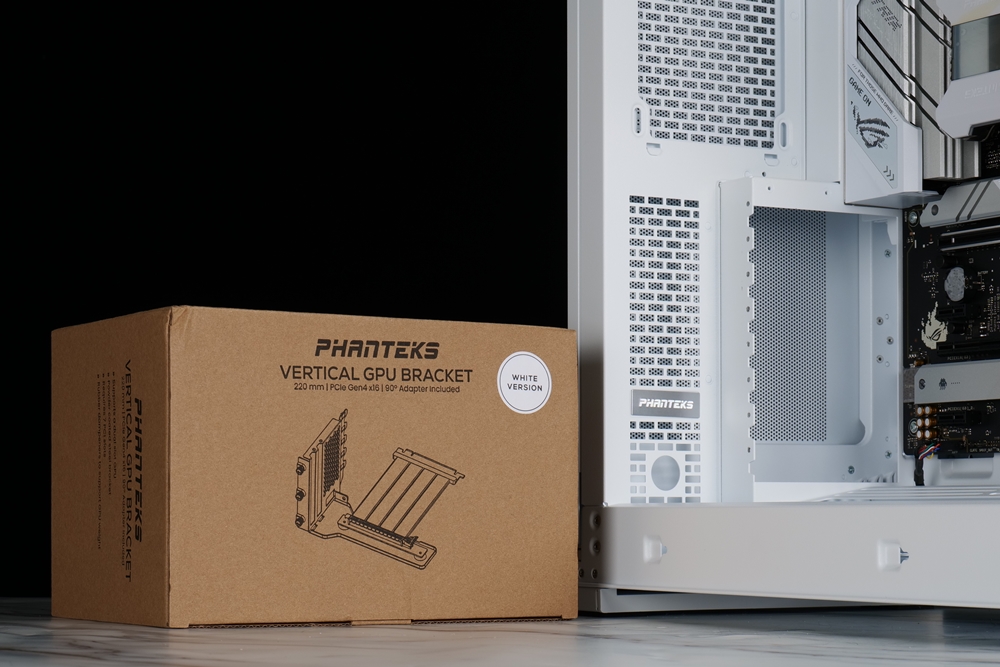
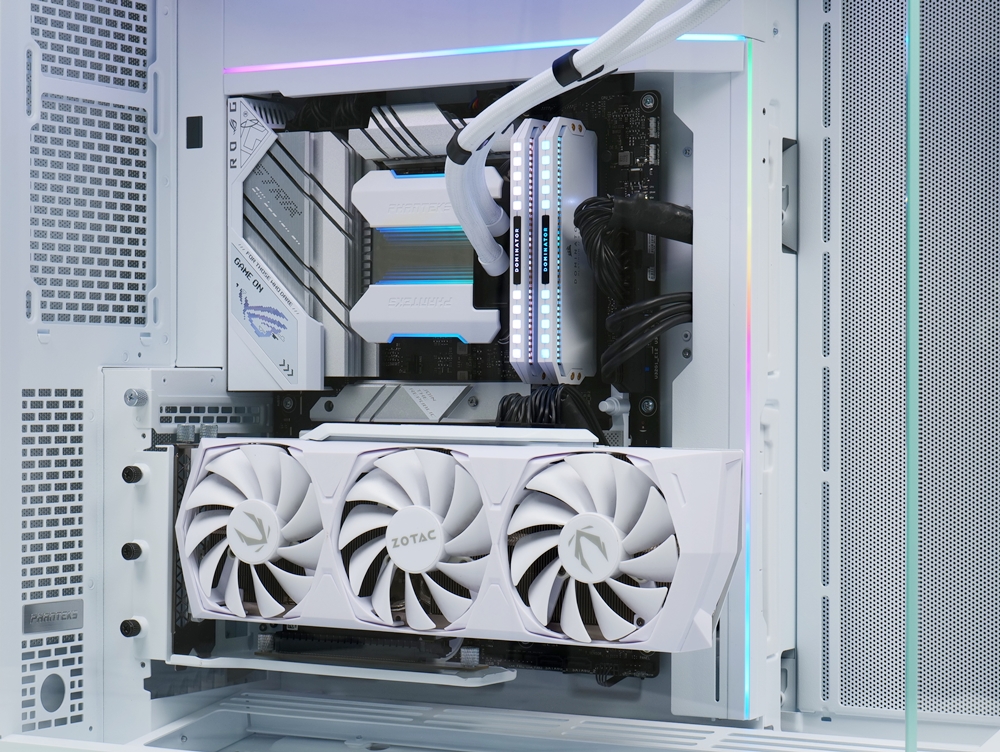
The expansion slot is provided with an 8-cao configuration, and it is equipped with a graphics card bracket. However, after the actual installation of this graphics card bracket, it is found that it can only be used with a high-end NVIDIA original card without a fan at the rear. In addition, although there is no vertical slot slot, but it can be easily installed through the vertical graphics kit. This test uses the new white version of the PCIe Gen4 vertical graphics kit from Phanteks, so that there is a more suitable choice for all white hosts.
→Schematic diagram of graphics card installation.
→White version of vertical graphics card bracket kit and chassis with 8 expansion slots.
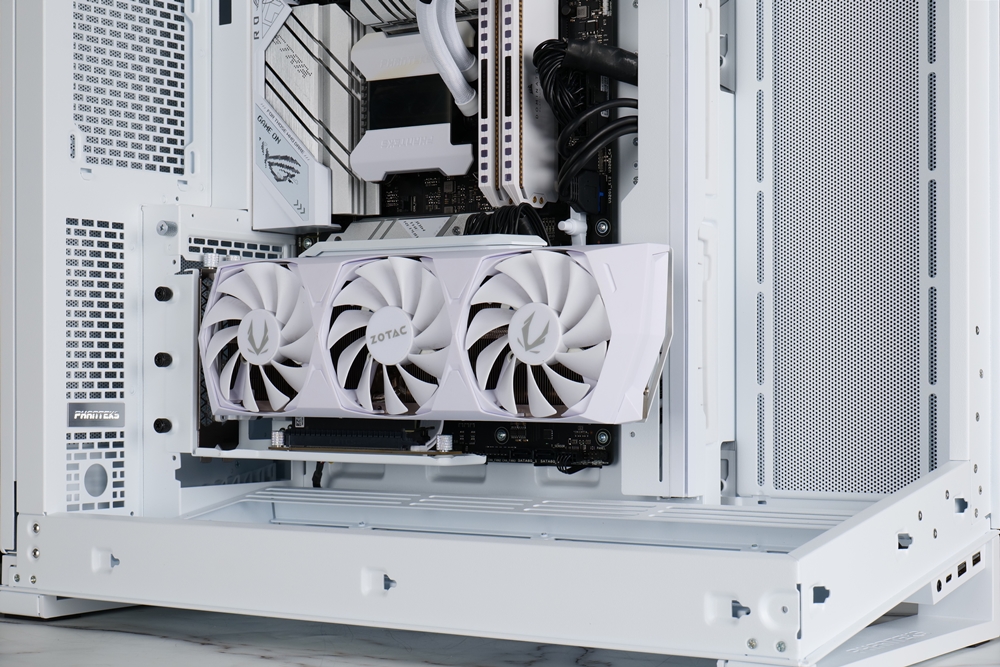
→Schematic diagram of the vertical installation of the graphics card.
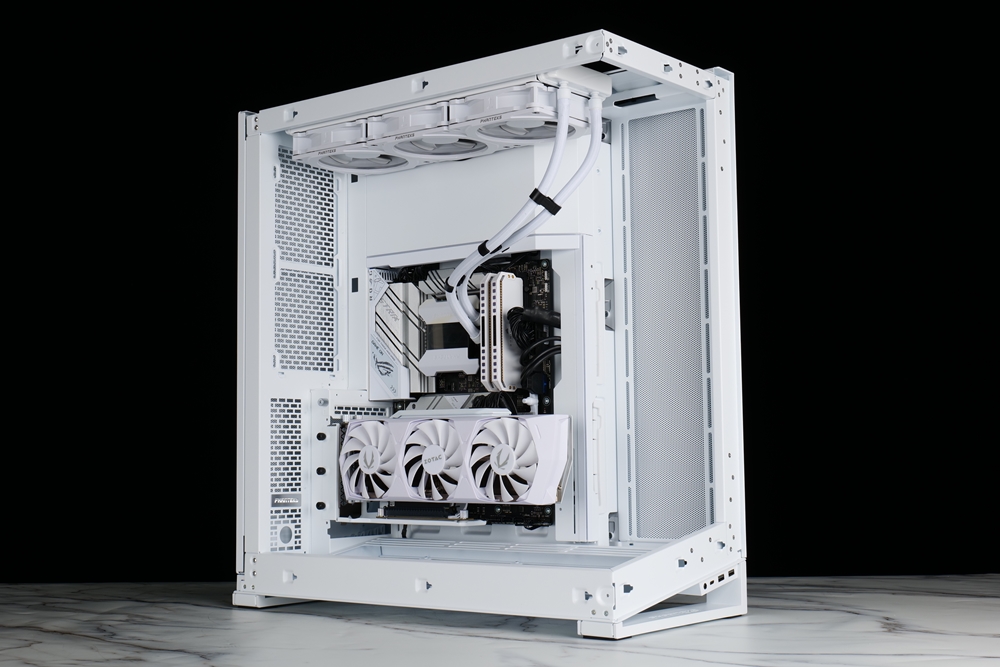
In the installation, a 360-size integrated water-cooled radiator is used this time. Due to the large internal space, it is also a test whether the length of the water-cooled tube can meet the needs of the side and upper installation. The actual measurement shows that the integrated water-cooled radiator with a tube length of 40cm will not be installed. There is a problem, but if the water-cooling radiator installed by the player is not like Phanteks’ own Glacier One series, there are tube clamps to fix the position of the water-cooling tube, so you have to find a way to fix the water-cooling tube so that the water-cooling tube will not block the rear hardware.
→Schematic diagram of the side installation of the integrated water-cooled radiator.
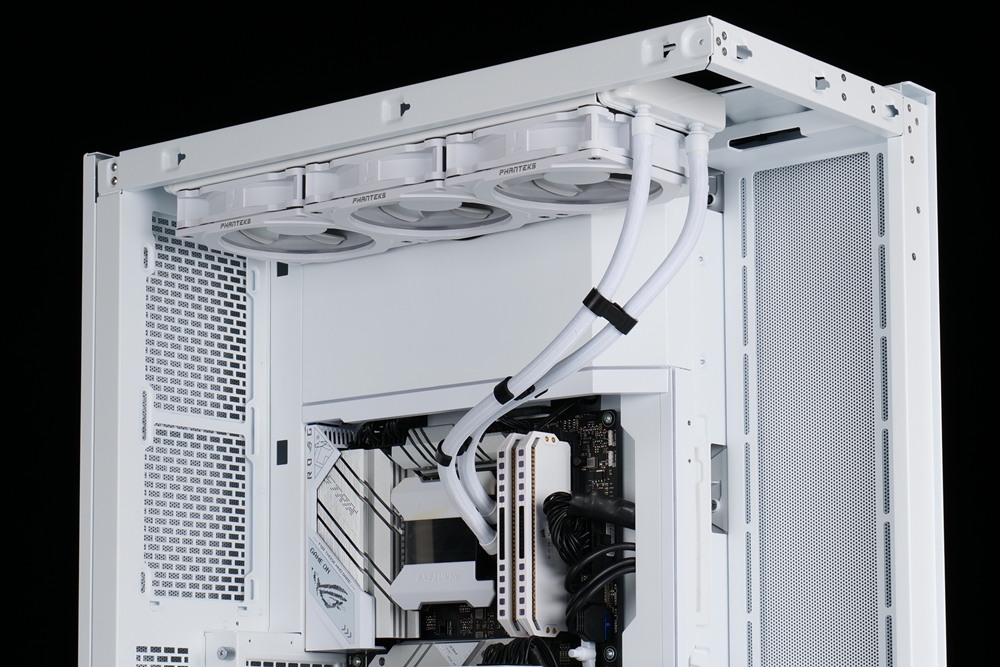
→Schematic diagram of the installation above the integrated water-cooled radiator.
Rear space, line management actual measurement
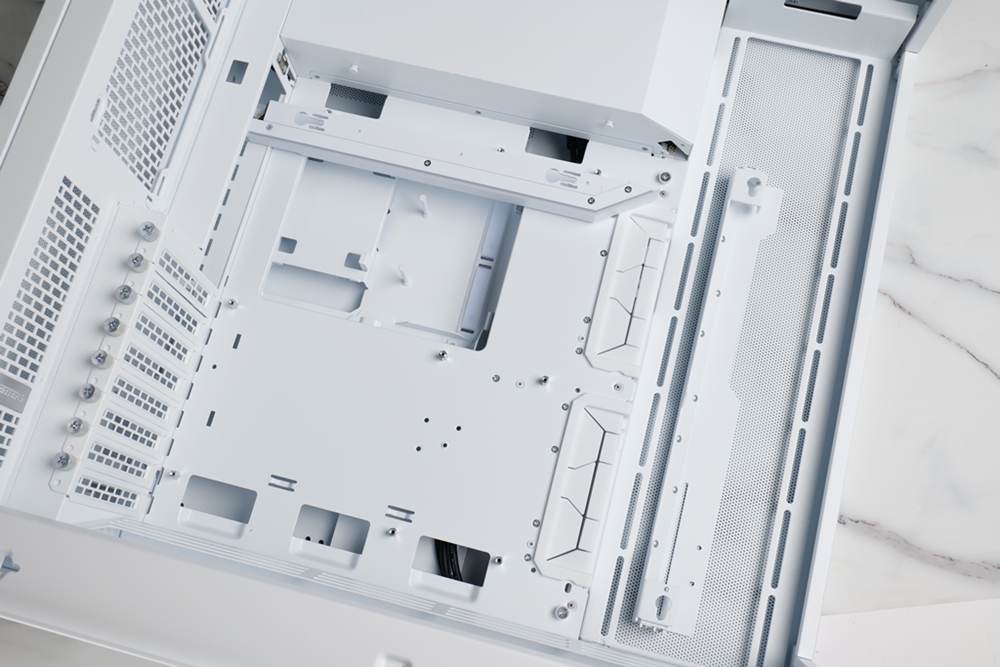
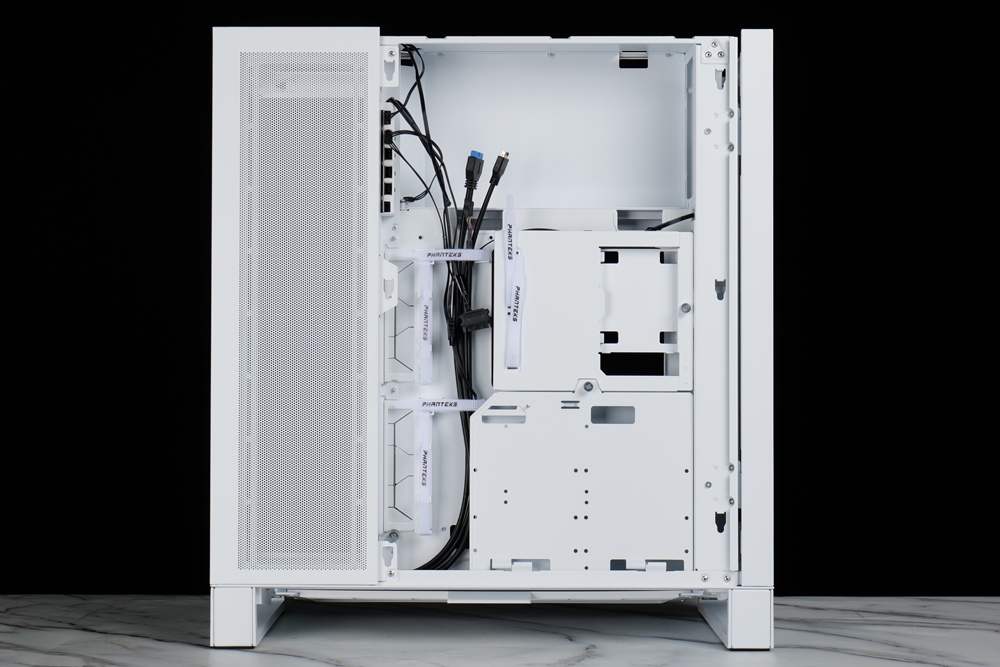
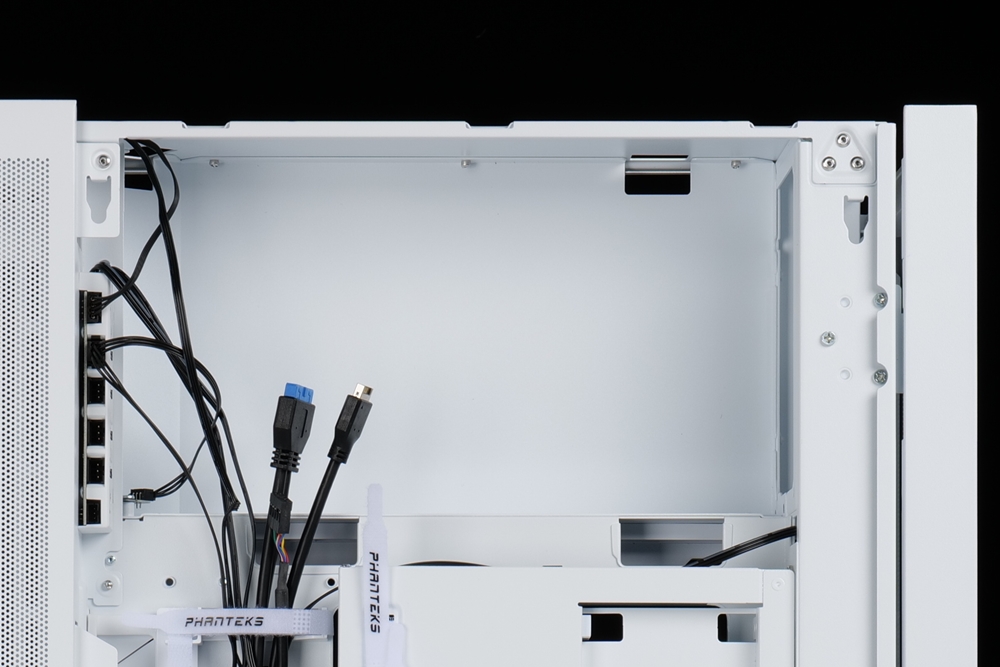
What is special about the rear of the case is that not all the panels can be removed. The Ultra-Fine Performance Mesh panel in the fan area is separated from the side back panel and cannot be removed. After the back panel is removed, you can see the power supply compartment on the top of the interior. On the bottom, there are pre-installed straps on the left side to fix the wires, and there are 2 baffles on the right side. In addition to the wire covering function, these two baffles also provide 6 installation positions for 2.5-inch storage devices, and 2 There are two 3.5-inch storage device installation slots, including two 2.5-inch installation slots and one 3.5-inch common space. However, because the hard disk installation slot configuration of the version I started this time is not the final commercial version, the actual hard disk installation slot allocation is still available. Players mainly use the commercially available version.
→A list of the appearance of the back of the case.
→ The back panel is removed, and the rear space is at a glance.
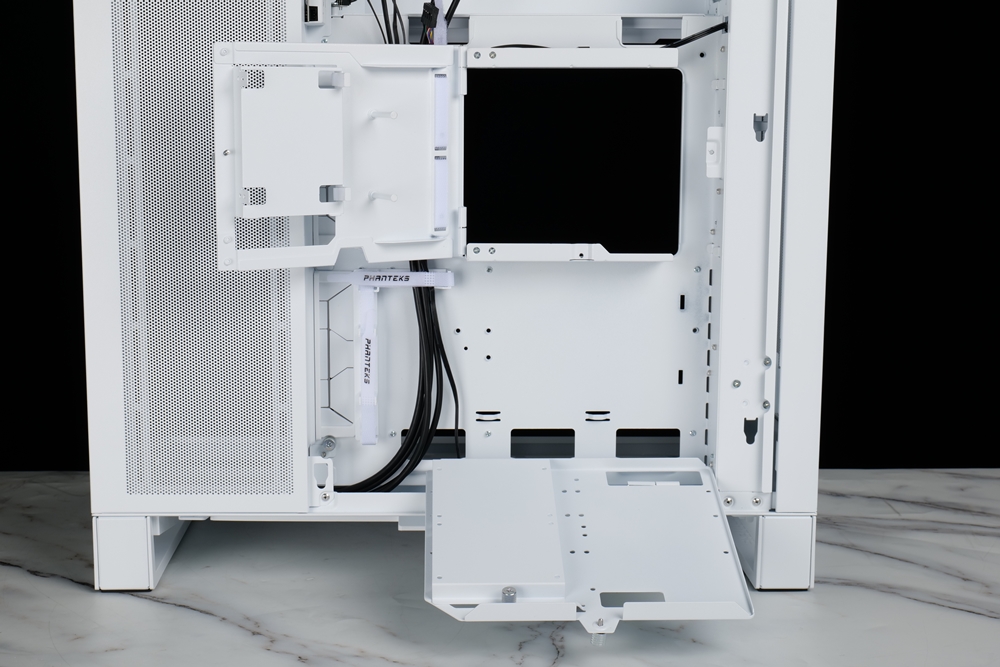
→The two shielding baffles adopt the door panel design.
In the upper part of the power supply compartment, the vertical installation design is adopted, so that the width of the chassis can be kept narrow, and the design of the power supply compartment is very wide, so there is still plenty of room for large-size and high-wattage power supplies after installation. Space to secure excess wire.
→Overview of the power compartment.
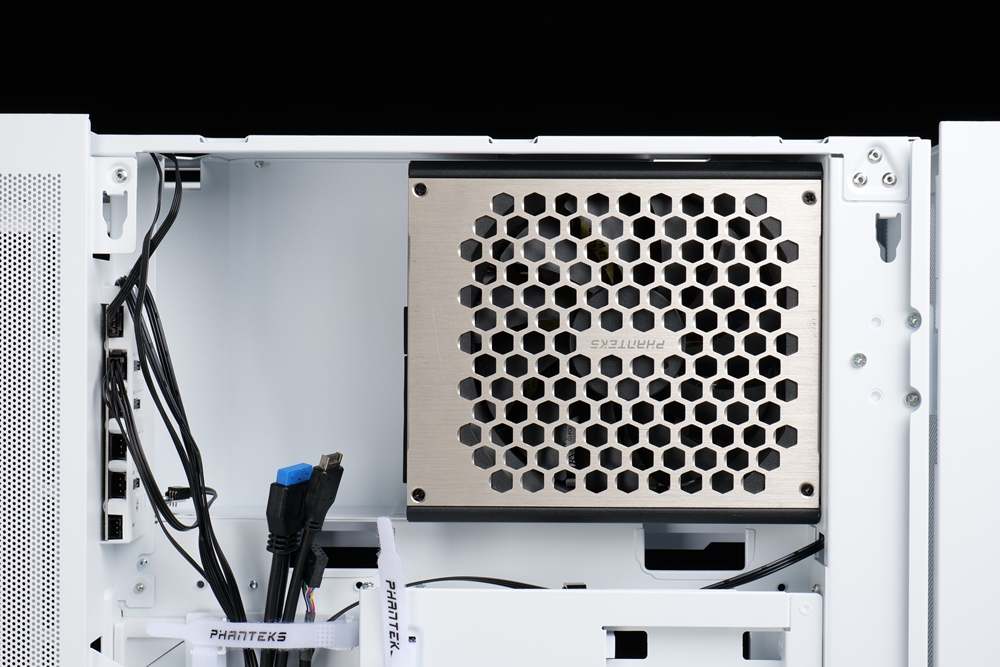
→Schematic diagram of power supply installation.
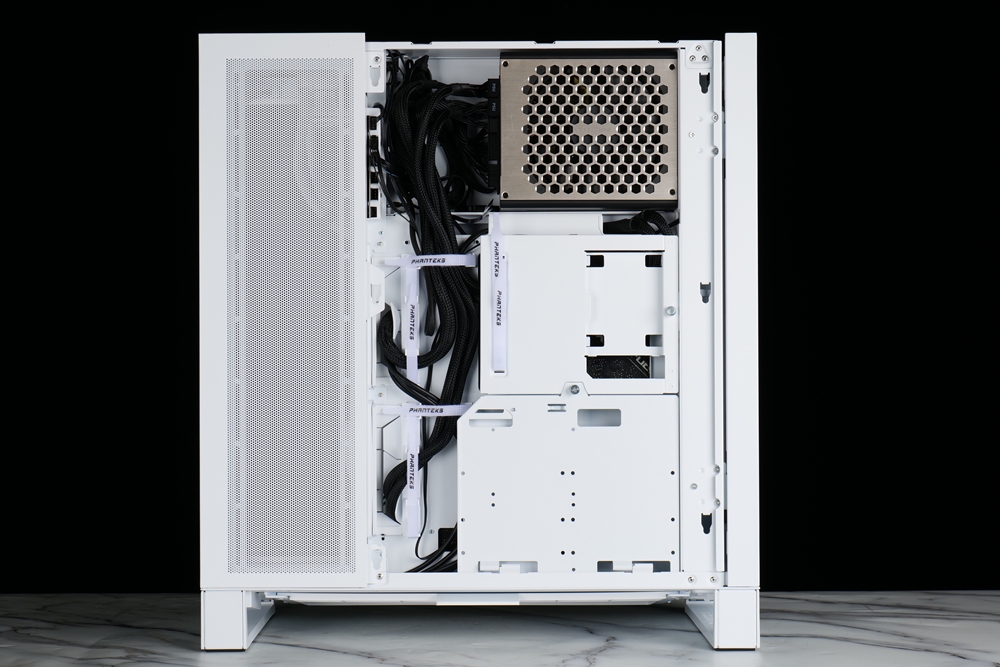
→ After the installation is completed, the back space is in full line state.
On the left side of the power supply compartment, you can see a lighting controller. This lighting effect controller provides 2 channels for separately controlling the lighting effects. Each channel provides 2 3-Pin sockets, allowing players to expand up to 4 channels of ARGB The device is also provided with a mainboard connection channel, allowing players to connect to the mainboard through the (4-1)-Pin cable to realize the control of the lighting effect of the whole machine by the mainboard.
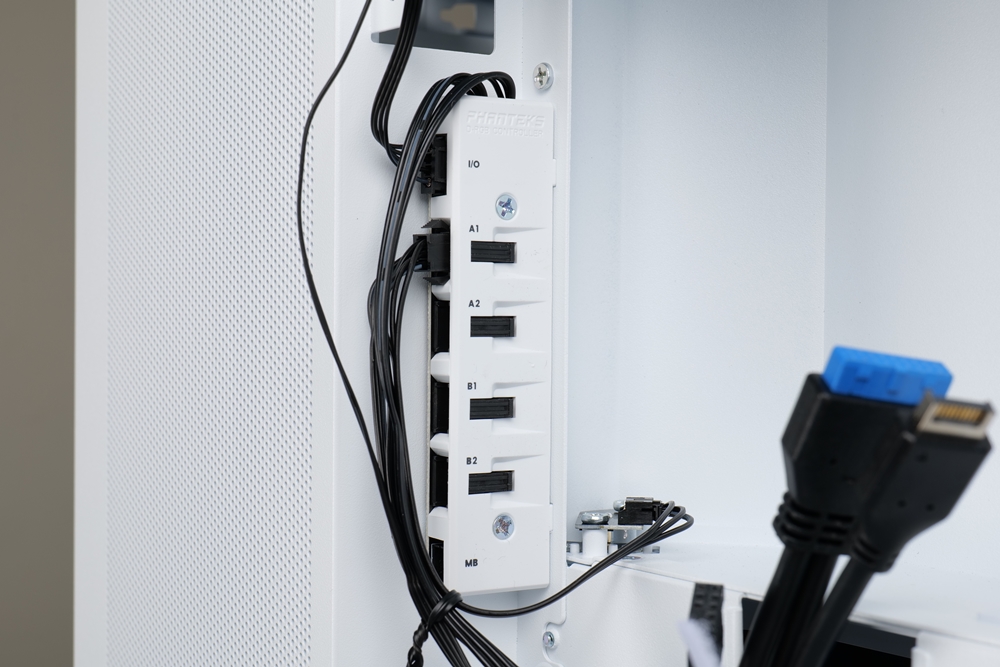
→ Lighting effect controller.
→ Schematic diagram of lighting effects.
Summarize
The NV7, an alternative panoramic case launched by Phanteks this time, after the actual assembly, it is not difficult to find that it is actually a case that is more inclined towards DIY water cooling. For general air-cooled or integrated water-cooled machines, the overall space configuration will be too large Ample, of course, players can also understand that this design provides extra space for players to make additional decorations for the case, but DIY water cooling may be the most suitable choice for this case.
And because there is no left A-pillar. It is necessary to ensure that the upper structure can support the weight of hardware such as water-cooled radiators and fans. Therefore, the internal structural reinforcement design also allows this case to have a good support on the upper side, and there is no need to worry about structural deformation caused by excessive heat dissipation configuration. .
Of course, NV7 still retains the excellent tradition of Phanteks in terms of installation experience. It has a good overall cable experience on the back. difficulty.
Phanteks NV7 is a high-end case that performs well in all aspects. The pre-sales of the $300 kits in North America have been sold out before they go on sale. The price in Taiwan dollars is estimated to be around 10,000 yuan. Players who like Phanteks NV7 can pay attention to it. Official Phanteks news.
Further reading: