
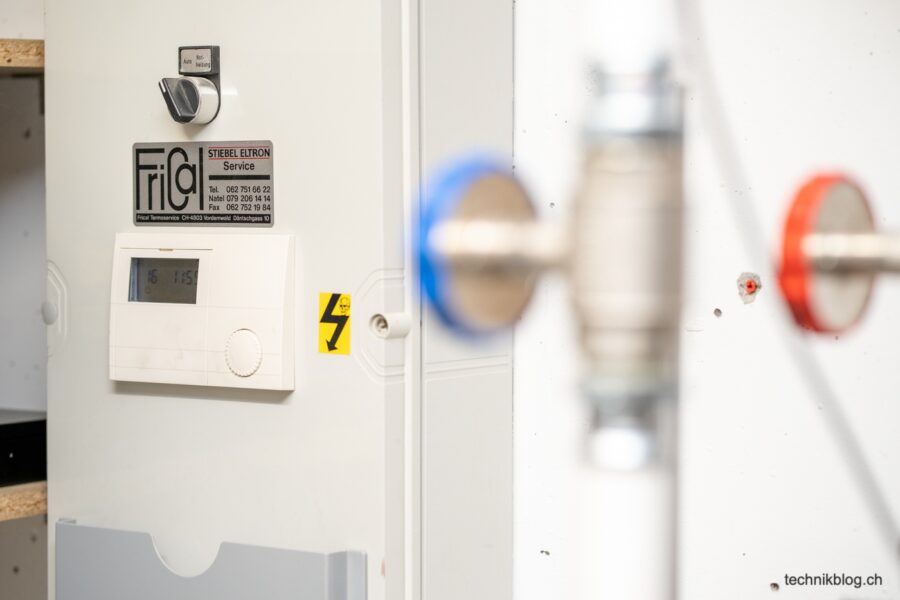
My Stiebel Eltron heat pump is now 20 years old. 7 years ago I had a Tado thermostat retrofitted with help. Now I want to get away from Tado completely and control the heat pump via the Loxone system that is already there. In addition, there is also the requirement to operate the HP with electricity from the PV system. This regulation runs via the energy management system of Solar Manager. Here I show how I implemented exactly this rule.
initial position
More modern heat pumps with network interfaces can be controlled directly via the Solar Manager and a dynamic setpoint optimization: The best way to do this is to check the list of supported heat pumps. Somewhat older models have integrated sg-ready interfaces and “very old” heat pumps like my model have to be optimized manually.
Connection to WP
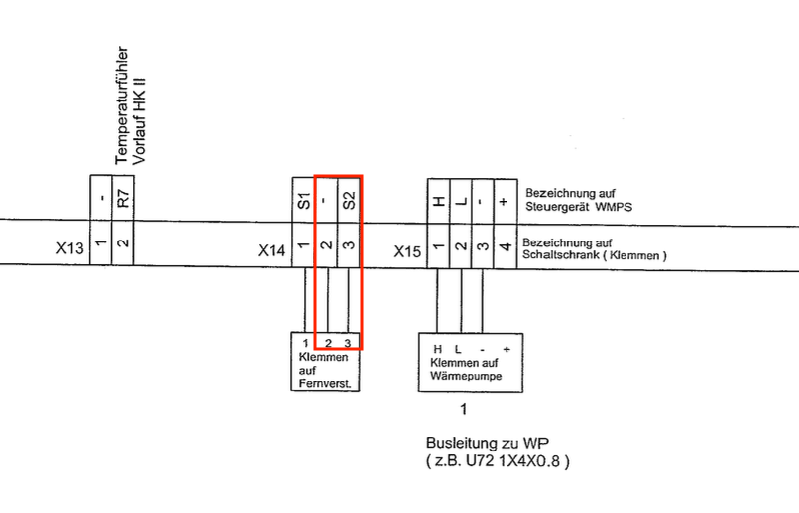
In the Stiebel heat pump diagram, there is the option of connecting a remote control. Here I use the switching contact S2 (terminal X14: contacts 2/3) and close it with a potential-free switch. In this way, I can also control the heat pump via an external thermostat.
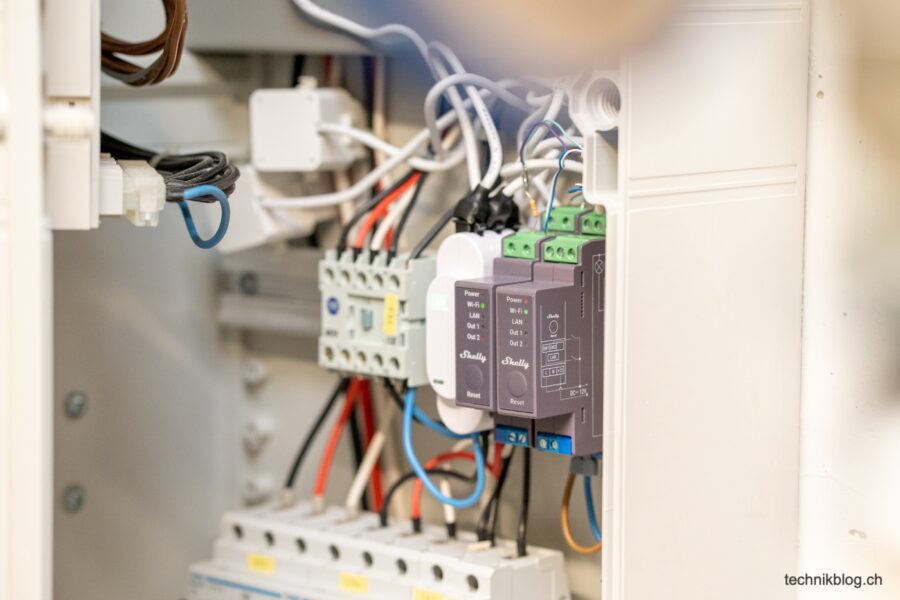
I use a Shelly Pro 2 as an actuator here, which is perfect and I have already presented the Shelly Pro series here. If you implement such projects, always make sure that the contact is potential-free. Shelly’s “PM” devices, for example, always have non-floating outputs. By using a Shelly Pro 2, I still have a second potential-free contact left.
Sensormanipulation
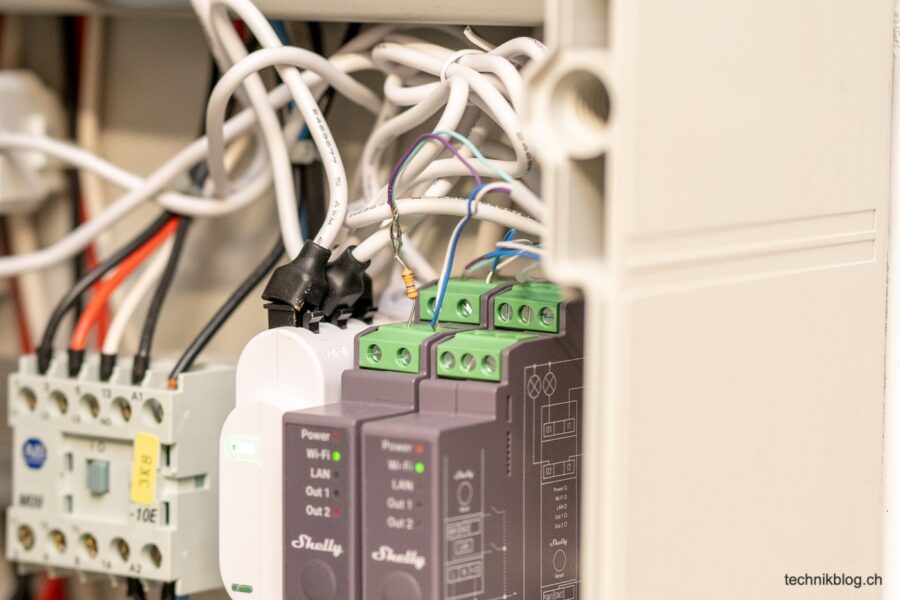
With the above solution I can control the WP reasonably solid. However, since the heat pump is controlled by the return flow, it will only run short cycles or not start at all, depending on the situation. The necessary solution here is called “sensor manipulation”. Among other things, the heat pump uses a so-called PT1000 for the return and for the outside sensor. This temperature-dependent resistor has a resistance value of 1000 ohms at exactly 0°C. This can now be manipulated by connecting a 25 kilo-ohm resistor in parallel. In this case, the total resistance value changes quite precisely to 10°C less than measured. In this way, the heat pump can “fake” a lower outside temperature or a lower return temperature. That’s exactly what I do on the reverse and so it specifically runs for a longer time.
building as a storage mass
The aim of the whole exercise is, on the one hand, to use the heat pump in a more targeted manner if there is a PV surplus of your own. On the other hand, however, to operate an active thermal management through the intelligent integration of the heat pumps. This means using the entire building as a storage mass. For this purpose, the room temperatures are specifically influenced so that a higher target temperature is reached with solar energy than without. In this way, energy can be transported through the building mass from a productive day into the night.
Control & Logic
The control is based on the SG-ready signal from Solar Manager. This is sent to a second Shelly Pro 2 and read out there by Loxone. The Loxone logic is then no witchcraft, basically the room temperature of the living room is used as a basis via a Loxone “Room Comfort Sensor Tree”. Then the following regulation, according to the operating states of sg-ready, which I simplified a bit for my case:
- Operating state 1 (1/0): blocking
Target temperature is reduced by -1 °C. - Operating state 2 (0/0): Normal operation
Control according to target temperature - Operating state 3 (0/1): increased operation
Increase of the target temperature by +2 °C and manipulation of return for longer runtime - Operating state 4 (1/1): definitive start-up command
Increase of the target temperature by +2 °C and manipulation of return for longer runtime
Adjustment temperature
Unfortunately, temperature measurement is never completely accurate and exact. Accordingly, I had the old sensor from tado running parallel to the Loxone sensor for several weeks to determine the deviation. I then stored the deviation accordingly in the system so that we have more or less the same comfort range as before. Position and sensor type are important
conclusion and result
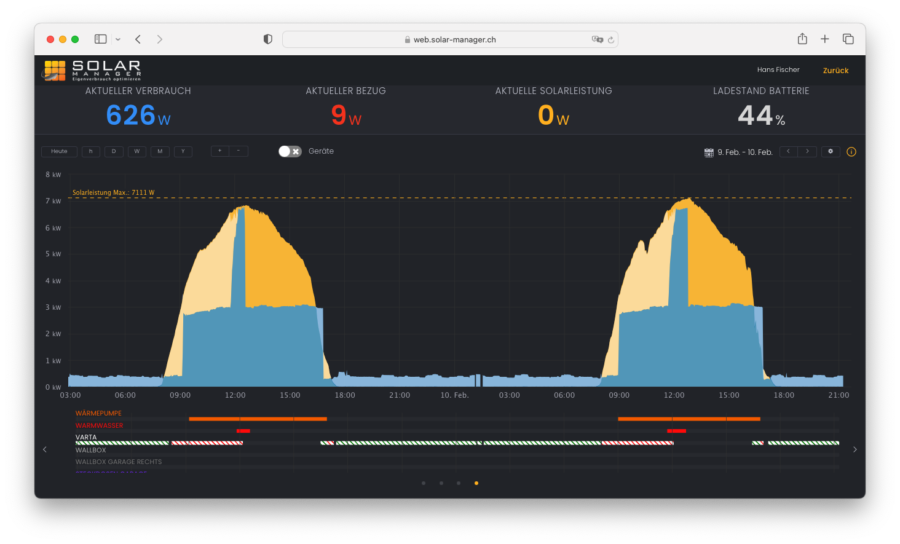
I programmed and implemented the control this winter. In the last 2 weeks, the production values of the PV system were finally back at a level that allows the optimization to work. Ideal examples like the one above are possible when the heating demand is not enormously high. With low outside temperatures around zero at night, it must also be reheated. In particular, the transitional periods with lower heating requirements should be able to do without heating at night thanks to such optimisations.
The next step for me is the hydraulic adjustment of the floor heating distributors…
transparency notice: I am professionally involved with Solar Manager.