Easter is a fun holiday and made even more fun with lots of exciting new Easter crafts. Instead of buying Easter decorations from the store, you can make beautiful decorations yourself using a few materials you probably have at home. A good idea is to make colorful Easter bags to wrap gifts in. Try these projects with your kids and have fun crafting!
Make a simple paper bag Easter bunny yourself
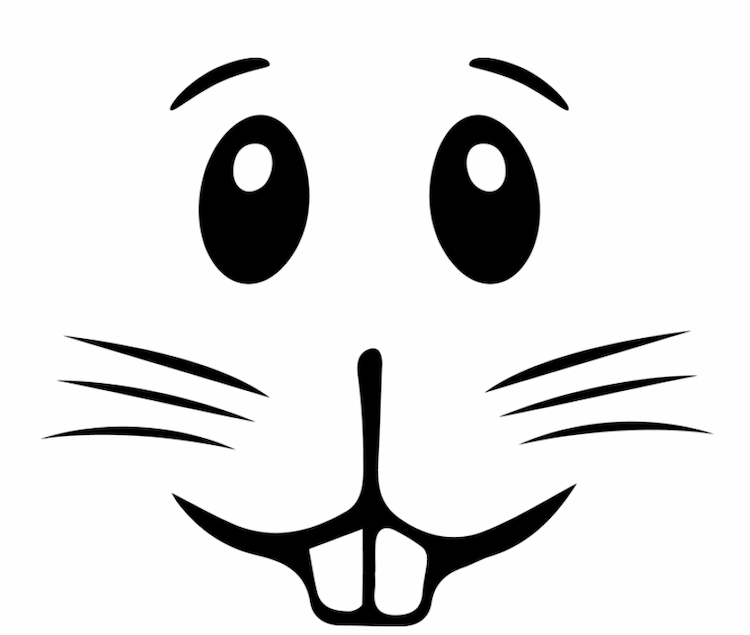
With this Easter craft project, we show you how to make the cutest Easter bunny bag out of a simple brown paper bag. Perfect for filling with eggs or wrapping gifts.
What you need:
brown paper bag
pink and black marker pens
Scissors
Do-it-yourself instructions:
- First draw the bunny ears on the bag. Cut out the shape with scissors.
- Use marker pens to decorate the face and add the features. It’s so easy to make Easter bags!
- Try colored bags for different effects.
Make Easter bags with children
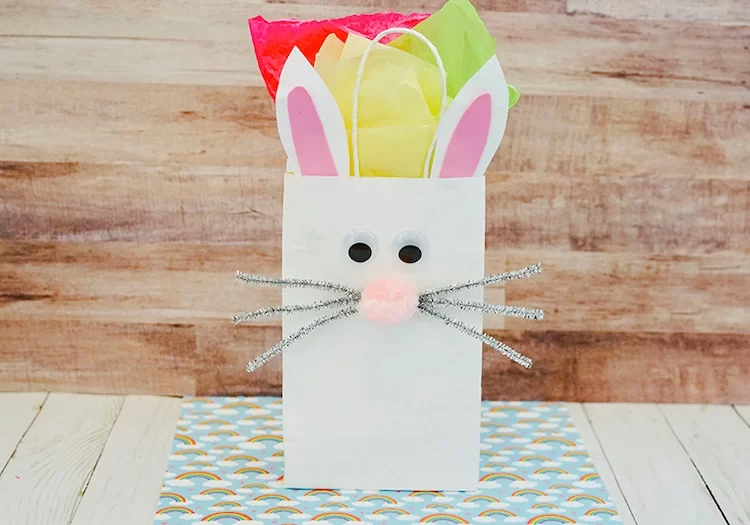
Your preschoolers and toddlers will love this paper bag bunny! It’s so cute and fun and they’re sure to be full of excitement when you put it together.
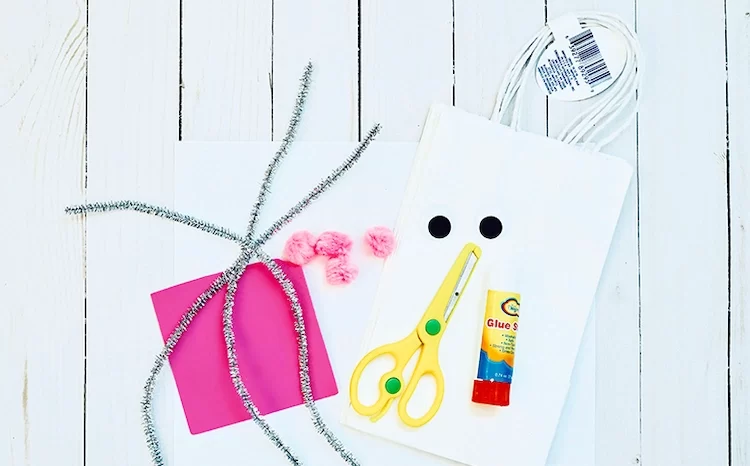
Supplies for your paper bag bunny craft:
White paper bag
pipe cleaners
Pink pompon
wobbly eyes
White paper
Rosa Paper
Scissors
glue stick
Instructions for making paper bag bunnies:
- Before you get started, you should gather the material for the bunny.
- First, take three pipe cleaners and twist them together in the middle. The sides are fluffed to create the bunny’s whiskers.
- Then glue the pink pompom in the middle of the pipe cleaners.
- Next, glue the whiskers and nose onto the paper bag, and then glue on the wiggle eyes. After the glue dries, trim the whiskers so they are even.
- Now it’s time to make the bunny ears! Take the white and pink pieces of paper and cut them out. Then glue the ears onto the paper bag to complete your paper bag craft.
DIY Easter bunny bag with template
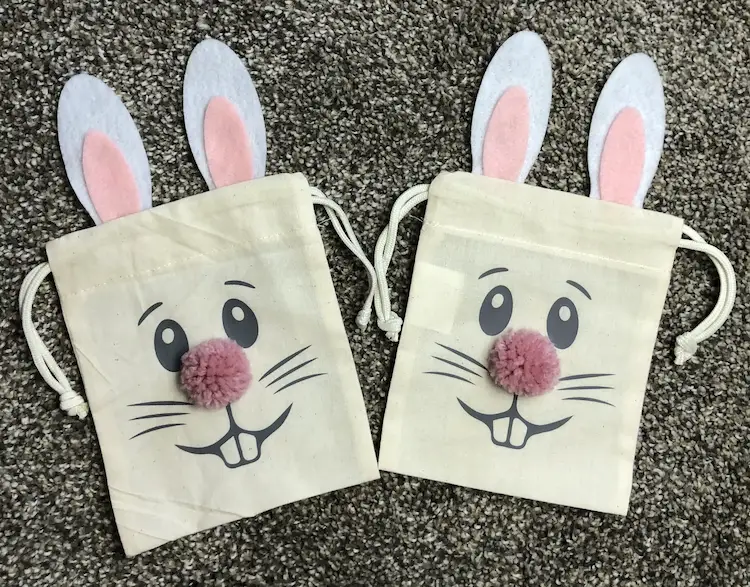
This is another interesting project. You can make beautifully decorated Easter bags out of cotton. Follow the step-by-step instructions!
Accessories for the Easter crafts:
Pink and white felt for the ears
Bunny ears template below
Yarn for the nose
Use pom pom maker or store bought pom pom
hot glue gun
Cotton drawstring bag
Bunny Face Template
Heat transfer vinyl for the bunny face
Ironing press or iron to press the image onto the bag
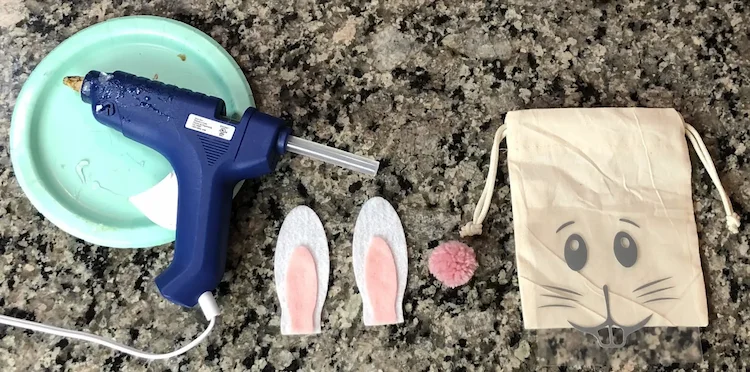
Step-by-step instructions:
- For the nose you can use a pom pom maker or a store bought pom pom. After you’ve finished your nose, you can set it aside.
- If you use the bunny ears template from my shop, you can use the felt to cut out your ears. (If you don’t use a clipper, you can use scissors to cut out the ears). Once you cut out the ears you can glue them together and set aside.
- Print out the bunny face from the template. Cut out the image onto a heat transfer vinyl of your choice.
Note: The size of the face depends on how big or small your bag is. Once you’ve cut out and weeded the face, you can set it aside.
- Set your heat press (or iron) to the correct setting. Once hot, you can press the bunny face onto the cotton bag.
- After you have attached the bunny face to the bag, you can now glue on the ears and the nose. Once you complete these steps, your Easter bag is ready!
Make your own Easter treat bag
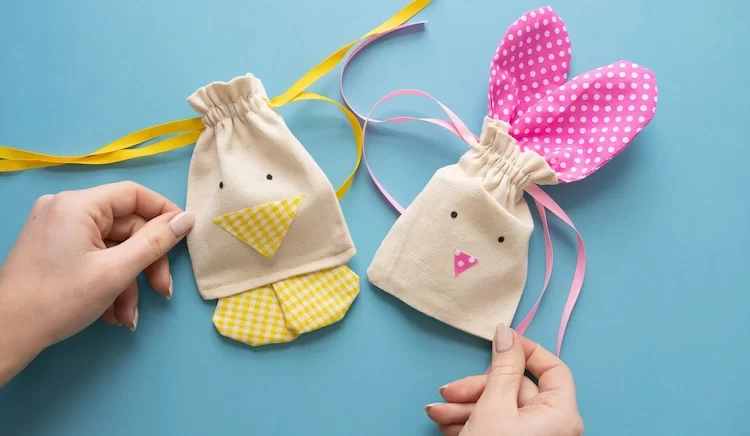
Here’s everything you need to know to sew one of these cute bags for your little ones at home!
Materials needed:
cotton fabric
Muslin bag
felt ball
craft needle
colored ribbon
sewing machine and yarn
cloth scissors
cloth iron
Step-by-step instructions:
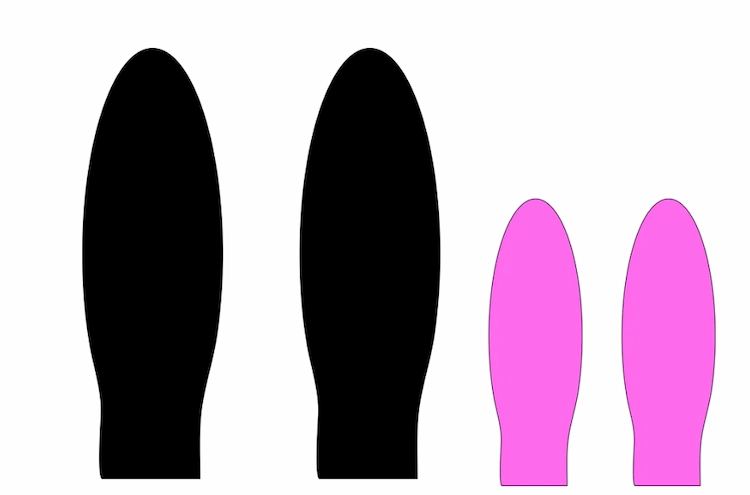
- Cut four round ears of corn from the cotton fabric, which are about 8 cm wide and 12 cm high.
- Lay two shapes back to back, with the good side of the fabric on the inside.
- Sew around the shape with your sewing machine, being careful not to sew up the bottom flat side – you need this opening to turn the ear right side up!
- Repeat steps 2-3 so you have two sewn bunny ears. Turn both ears to the right side. To make the fabric fit a little better, you can smooth it out with an iron.
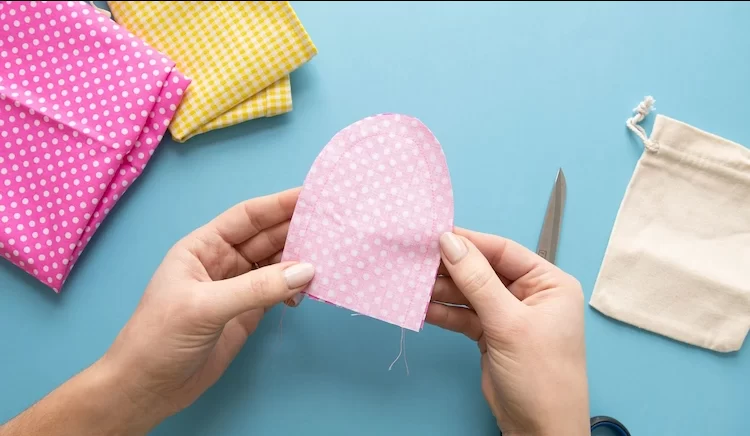
- Tuck the ears into the muslin bag about 1/4 inch from the top seam and sew along the bottom of the ears. Be careful not to sew over the channel or cord.

- Take a pair of scissors and cut out the muslin string, then cut a piece of ribbon about 14″ long. Thread the ribbon onto a craft needle and thread it through one side and back through the other channel on the opposite side. The ends should come out on the same side.
- Cut another piece of ribbon 35 cm long and repeat the previous step but in the opposite direction of the first ribbon. The threads should come out on the opposite side of the cord channels than the first piece.
- If you want you can stick a cute felt ball and a face on the bag, and tada! Easter joy to go!