
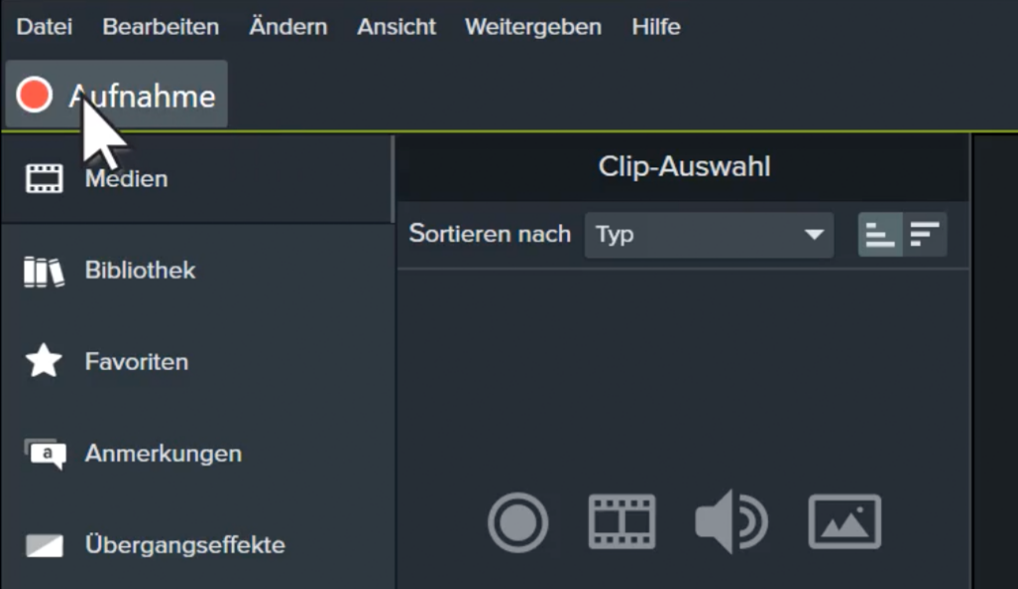
Produce a screencast in 5 steps
The proliferation of online video has also contributed to the popularity of screencasts. With a screencast you create a video recording of your computer screen, for example to describe work and processes on the computer such as the use of software or to demonstrate the use of a website. If you want to record a screencast, read our step-by-step guide on how to create a screencast.
Screencast mit Camtasia
Download the free trial for Mac or Windows and see for yourself how easy it is to record a screencast!
Download Free Trial
What is a screen cast?
The term screencast refers to a video recording of the computer screen. A screencast shows how a user works on the screen, for example operating software, navigating through a website or playing a presentation. It’s a bit like looking over someone’s shoulder while they’re working on a computer. A screencast is usually accompanied by a spoken commentary. However, some screencasts can also do without audio and are instead enriched with textual comments or callouts, for example.
What are screencasts used for?
Screencasts are easy to create and offer many advantages, especially in everyday working life. For example, let’s say a customer has a question about navigating your website. You could explain to her in detail by e-mail or on the phone where she has to click on which page – but that is very tedious for both parties. With a screencast, you give your customers visual instructions that correspond exactly to the work steps on the computer. You can also later share the same screencast video with other customers or online. This is not only efficient and saves time, but is also customer and service-friendly.
Short video tutorials in the form of screencasts are also very suitable for training new employees or for explaining work processes on the computer.
A third widespread use of screencasts is for recording online presentations: if you use a tool like Camtasia, you can start and stop recording the screencast directly from PowerPoint.
How to create a screencast step by step
1. Choose the right tool for the screencast
Many think that a screencast requires expensive equipment and the know-how of a video professional. Not even close! In fact, all you need is a screen and possibly an external microphone – everything else takes care of itself with special software for screen recording.
One such software is TechSmith’s Camtasia. Besides the important screen recording feature, the software has everything you need to cut and edit your video. Despite the range of functions, the options in Camtasia are clear and the software is intuitive to use: just install it, press the record button and you’re good to go. Try it yourself – Camtasia is available as a free trial.
2. Prepare the screencast
Think carefully about who your video is intended for and what you want to achieve with it: Need a screencast with sound? Is your video for internal or external use? Would you like to introduce colleagues to a new workflow with a training video or demonstrate the functions of your digital product to potential customers? All of this comes into play when planning a screencast.
Write a script if possible: If you pre-write a Create video script, save yourself a lot of work later to correct mistakes in the recording. A script also helps you to plan and perfect the content of your screencast in detail. Keep your script handy as you record the screencast so you don’t lose the thread.
Clean up your desktop and turn off notifications: Before you start a screen recording, you should organize your desktop. Remove or hide unnecessary icons in the menu bar. Unnecessary files and documents can be quickly hidden in a new folder. A tidy desktop is not only nicer to look at, it also helps your viewers focus on what’s important in the screencast. Also pay attention to the desktop background. Replace private family photos with your company’s corporate branding or choose a neutral background from your computer’s default settings. Make sure there is no private or sensitive information visible that you would have to painstakingly remove after recording the screencast. Turn off notifications of new emails and put your phone on silent.
If necessary, connect an external microphone: If you want to use spoken narration in the screencast, then you should use an external microphone or a headset for the recording. It doesn’t have to be expensive either. External microphones or headsets are usually better for capturing video than your computer’s built-in microphone. Camtasia also gives you the option to record the system audio.
Prepare files and programs that you want to show: Make sure you have quick access to any files and programs you want to screencast.
3. The Screencast start
Open the Camtasia Editor and click Capture or start a new recording directly when opening Camtasia. This will hide Camtasia Editor and Camtasia Recorder will appear on your screen.
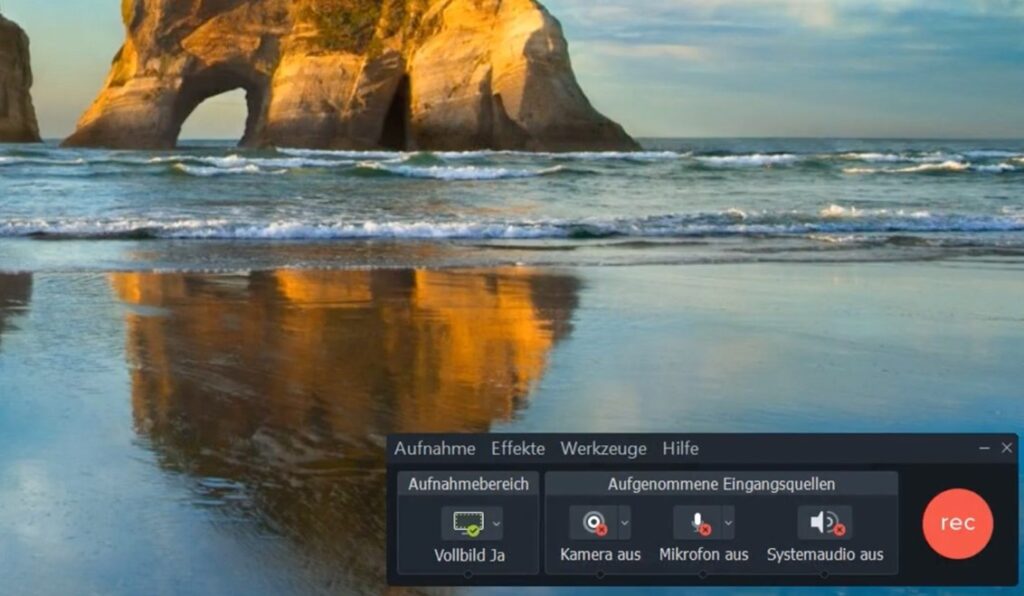
With Camtasia Recorder you control the recording of your screencast:
- You can either record your entire screen (full screen) or select a specific area (custom): full screen recordings often have the disadvantage that they contain a lot of so-called blank space, i.e. unused or unimportant areas. With a screen clipping, on the other hand, you must be careful not to move your cursor beyond the selected area. This might confuse your viewers.
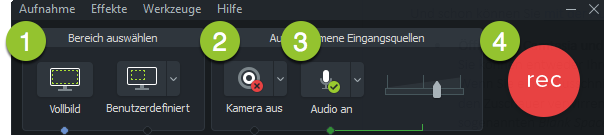
- Decide whether the webcam (camera) should also be recorded: If you no longer need the webcam recording later, you can remove it with just one click.
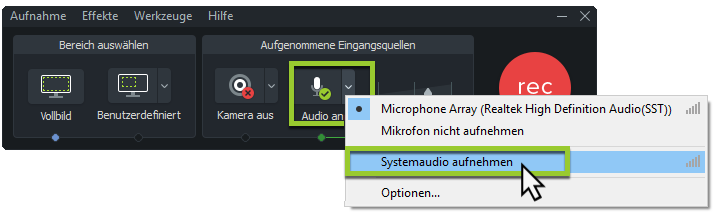
- Choose whether you want to record microphone and/or system audio: Would you like to record the sound from your speakers in addition to your spoken commentary? Then activate the audio function Record system audio.
Have you made your settings in Camtasia Recorder? Then all you have to do is redden rec-Press the record button, wait for the countdown and off you go!
4. Edit the screencast
After you finish recording your screencast, Camtasia automatically brings up the recorded video in the editor. Here you can play the screencast and edit it directly in the timeline.
Remove “ums,” pauses, slips of the tongue, mistakes, or disruptive transitions between edit windows by highlighting and cutting or hiding sequences in the timeline. Also, look at the beginning and end of your recording. You might need to trim these a bit. The shorter and more effective your screencast is, the better for your viewers.
If necessary, separate the audio and video tracks and edit the sound. You can also move elements by simply dragging them with the mouse or zoom into the image and add all sorts of effects to the video, such as annotations, callouts, arrows or speech bubbles.
If you choose to add an audio commentary after recording the screencast, you can record it directly as a voiceover in Camtasia.

At the separate recording of audio it may happen that your audio material does not match the length of the video. This can also happen when cutting the video. However, the problem can be fixed quite easily by lengthening pauses at appropriate points during video editing, or by trimming your video.
Read these tips for a top screencast to find out how you can further perfect your screencast.
5. Produce the screencast and upload it to platforms
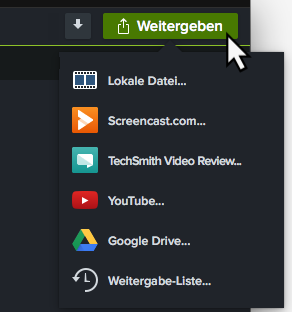
While it’s tempting, don’t tweak the finished video for too long. Ultimately, what matters is that your viewers learn something from it. Therefore, once you are satisfied with the result, you should share the screencast with your target audience. You have various options for this. You can upload the video to a public video platform such as YouTube, Screencast.com or Vimeo, publish it on a password-protected or internal learning platform or send it by email – the latter is usually not recommended or fails due to the large file size.
If you publish the screencast on a video platform such as YouTube, you can send and share a direct link to the video. Camtasia offers the user-friendly option to upload screencasts directly to YouTube, Vimeo or Screencast.com.
Record and upload screencast
Get your free Camtasia trial today and discover the many features for creating and editing screencasts. Upload your video directly to other platforms like YouTube or Vimeo.
Download Free Trial