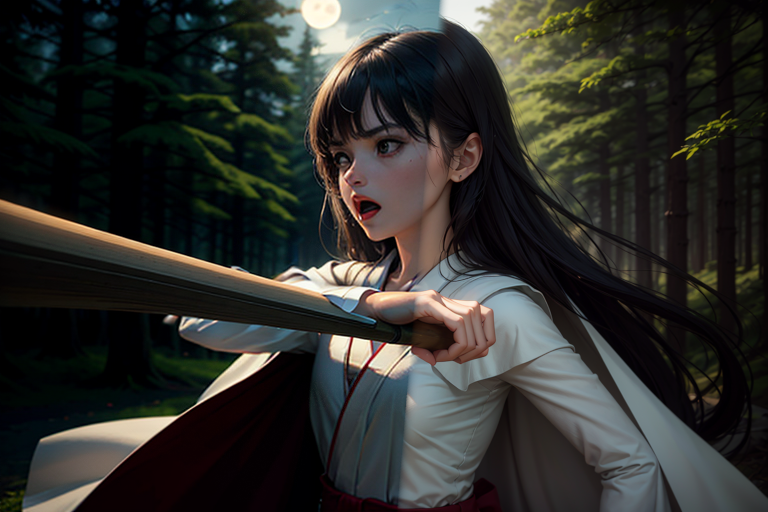
Comparison Between After Correction and Before Correction of Light Source
Foreword:
This article addresses a common problem encountered when producing realistic or real-life pictures – excessively bright light sources. Many popular models often exhibit unnatural hyper-highlights when characters are drawn, even if the scene is set at night or the entire photo is intentionally blurred. Another issue experienced is that the shadow of the light source does not align with the layout of the intended composition.
The Stable Diffusion prompts, namely light and shadow, as well as Stable Diffusion advanced – light and shadow control, are both viable methods for controlling light and shadow. However, this article will focus on a more refined control approach by altering the light source and shadow of the generated image to produce varying levels of light and shade. This allows the producer to choose the best outcomes for light and shadow in their artwork.
Method:
Firstly, let’s generate a character image set in a night forest using txt2img. Often, the pictures generated by the model do not align with our desired layout of light and shadow, which could be due to the extensive use of daytime studio images during model training or the lack of diverse light and shadow prompt words in the training of LoRA. When various prompt words fail to produce the desired light and shadow, an alternative is to use ControlNet with Loopback to generate a series of images with different light and shade effects. From this collection, the best result can be chosen.
In this case, the aim was to create a moon as the light source above the center of the frame. Using any drawing software like GIMP, a black background was selected, and a white light source mask was manually created using a brush. This image was then inputted into img2img while keeping the same prompts as the original image. A medium weight, such as Denoising strength 0.4, was used for the setting of img2img.
Subsequently, ControlNet was opened and divided into two groups. The first group utilized Openpose to fix the person’s pose during picture generation, while the use of ControlNet was more significant. The second group of ControlNet used either Canny (edge detection) or normal (normal map) to fix the shape and expression of the characters in the original picture. Using ControlNet was crucial in both cases.
Lastly, the setting of Loopback was the most important. By leveraging Loopback’s looping input capability, the entire image was gradually restored from the basic pitch-black mask. Ten rounds were set, and the Final denoising strength was set to a higher weight of 0.75, which resulted in substantial light and dark changes in subsequent rounds.
Achievement:
Once all the settings were configured, the image was processed, and after ten rounds were completed, the desired picture could be chosen. Initially, the AI was only able to roughly calculate the outline of people near the light source under the dark mask. However, as the result picture continued to circulate and input, the image became clearer, and the distribution of shadows followed the relative relationship between objects and changes in light source intensity.
If ControlNet’s canny was used to fix the shape, some strong shadow boundaries would be sampled, thereby interfering with the distribution of light and shadow. In such cases, the Canny image could be downloaded to erase these extra lines. Another alternative is to use the normal setting to fix the shape, although this might lead to a complete change in clothing style.
Ultimately, the most suitable image was selected that best represented a night forest illuminated by moonlight and with sufficient darkness, approximately on the seventh round. Apart from the changes in character shadows, the shadows of the background forest and road were also completely different. This adjustment aligned better with the atmosphere of moonlight lighting and fulfilled the desired aesthetic.
Concluding Remarks:
In conclusion, this article highlighted the comparison between the before and after correction of light sources in producing realistic or real-life pictures. By employing ControlNet with Loopback and making subtle adjustments to the light source and shadow, producers can choose the best light and shadow results for their artwork. This technique allows for more control over the final output, ensuring greater realism and adherence to the desired atmosphere and composition.
