142
- Use a tripod or stable stand: during the long exposure, the camera must remain still to avoid blur. A tripod or stable stand will help keep the camera steady while shooting.
- Using a remote control or the self-timer: pressing the shutter button of the camera can cause vibrations and movements that affect the sharpness of the photo. A remote control or the self-timer allows you to take the picture without touching the camera.
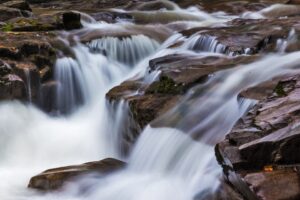
- Choose the exposure time: the exposure time depends on the scene and the desired effect. For photos of moving water, for example, a 1-5 second exposure time can create a silky effect. For photos of starry skies, on the other hand, a few minutes of exposure may be needed.
- Use an ND filter: The ND (Neutral Density) filter reduces the amount of light entering the camera, allowing you to extend exposure time. It is especially useful in bright light conditions, for example at the beach or in the mountains.
- Setting the aperture and ISO sensitivity: to avoid overexposure, it is important to choose a small aperture (high F-number) and a low ISO sensitivity. In this way, the camera “absorbs” less light and the photo is correctly exposed.
- Try different exposures: to find the right exposure, it is important to experiment with different times. For example, in a photo of a river, a 1 second exposure time might not be enough to create the silky effect, while 5 seconds might be too much.
We are waiting for you on our page FACEBOOK !!!
