Lian Li’s new full-tower model V3000 PLUS is a derivative of the old V3000. Compared with the old model’s simple large space, the V3000 PLUS uses the entire space more perfectly. In addition to supporting EEB+ITX dual system installation, it supports 16 fans As well as exaggerated designs such as 3x 480mm+1x 360mm water cooling radiators, sixteen 2.5-inch hard drive expansions, and three installation modes, the V3000 PLUS case accommodates a super multi-modular design, but can you fit it in your head?
LIAN LI V3000 PLUS case specifications:
size: (D_length) 678.5mm x (W_width) 279mm x (H_height) 674mm
color:black
material: Aluminum, steel, double-sided 4mm tempered glass
motherboard: Standard/Rotary Mode: EEB, E-ATX, ATX, Micro-ATX, Mini-ITX. Dual system mode:system 1 EEB、E-ATX、ATX、Micro-ATX、Mini-ITX / system 2 Mini-ITXs
CPU air cooling:system 1 198mm / system 2 80mm
graphics card: Standard mode 589mm, rotation mode 358mm, dual system mode system 1 589m / system 2 320mm (Width limit within 125mm)
Power Supplier:system 1 ATX 220mm / system 2 SFX-L/SFX
Fan installation position:
- standard mode
Front: 4 x 120mm or 3 x 140mm
Top: 4 x 120mm or 3 x 140mm or 2 x 200mm
Above the power compartment: 3 x 120mm or 3 x 140mm
Bottom: 4 x 120mm or 3 x 140mm
Rear: 1 x 120mm or 1 x 140mm - rotation mode
Front: 4 x 120mm or 3 x 140mm
Top: 4 x 120mm or 3 x 140mm or 2 x 200mm
Bottom: 4 x 120mm or 3 x 140mm
Rear: 3 x 120mm or 2 x 140mm
Above the power compartment: 1 x 120mm or 1 x 140mm - dual system mode
Front: 4 x 120mm or 3 x 140mm
Top: 4 x 120mm or 3 x 140mm or 2 x 200mm
Above the power compartment: 2 x 120mm or 2 x 140mm
Bottom: 4 x 120mm or 3 x 140mm (system 2 without graphics installed)
Rear: 1 x 120mm or 1 x 140mm
Water-cooled row support:
- standard mode
Front: 480mm or 420mm
Above: 480mm or 420mm
Above the power compartment: 360mm or 420mm
Bottom edge: 480mm or 420mm - rotation mode
Front: 480mm or 420mm
Above: 480mm or 420mm
Bottom edge: 480mm or 420mm
Rear: 360mm or 280mm - dual system mode
Front: 480mm or 420mm
Top: 480mm
Above the power compartment: 240mm or 280mm
Bottom: 480mm or 420mm (system 2 without graphics card installed)
Upper I/O port:system 1 USB 3.0 x2, USB 3.2 Type-C x1, HD_AUDIO, lighting color, lighting mode / system 2 USB 3.0 x2、USB 3.2 Type-C x1、HD_AUDIO
Hard Disks and Storage Bays: Eight 2.5/3.5 inches, eight 2.5 inches
LIAN LI V3000 PLUS Full Tower Case Unboxing
There is no doubt that the V3000 PLUS is definitely a full-tower case, with a large size of 678.5 x 279 x 674mm in length, width and height, and at the same time it brings excessive weight. It is strongly recommended that two people work together when moving, even if the empty case has not been installed yet. After all, safety is the most important thing!
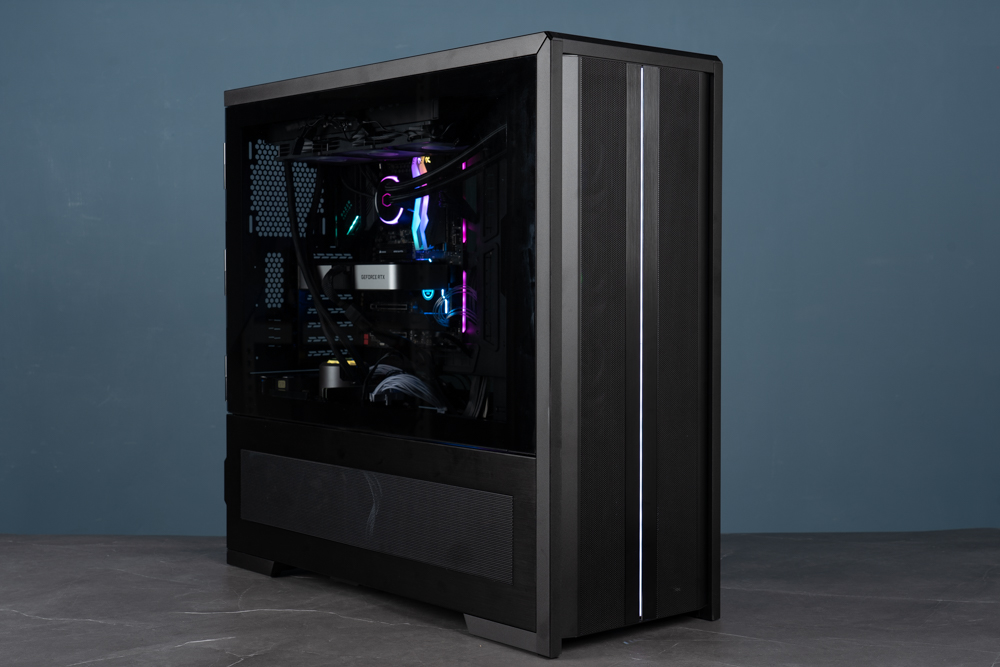
∆ The weight of the V3000 PLUS full tower case is no joke, two people are strongly recommended to carry it together.
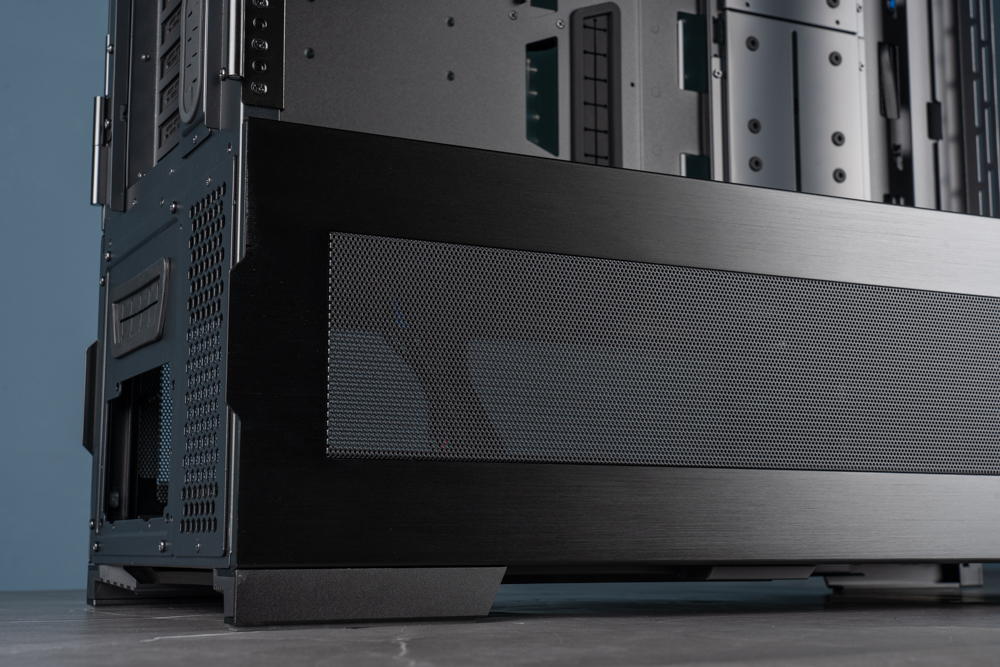
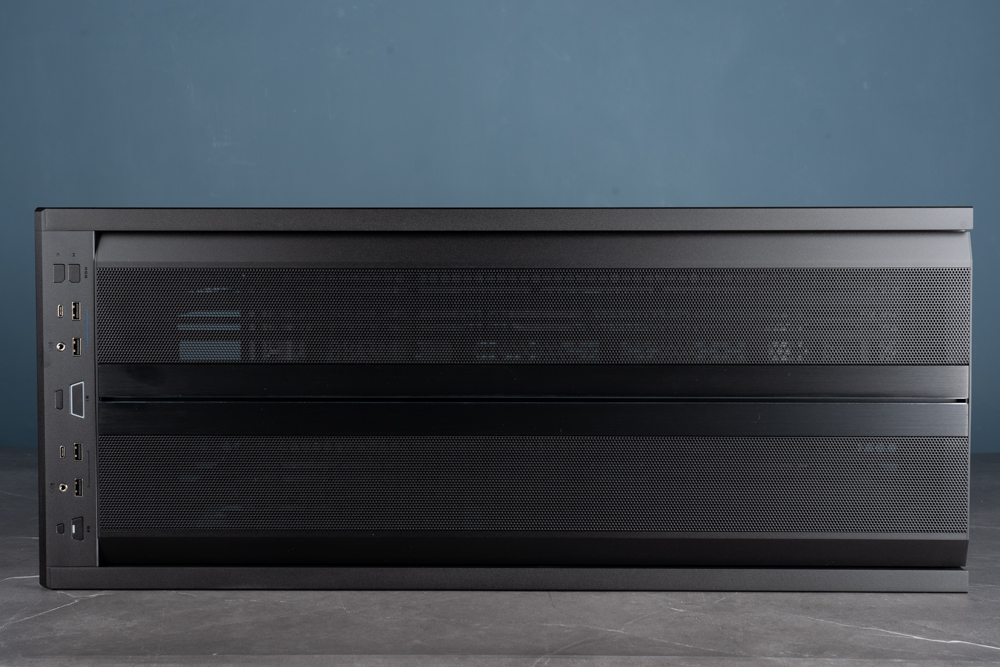
The height of 67.4cm also elongates the front panel a lot. The brushed aluminum front panel is divided into two halves by the RGB light bar on the center line, and the perforated screen provides sufficient air intake space for the interior.
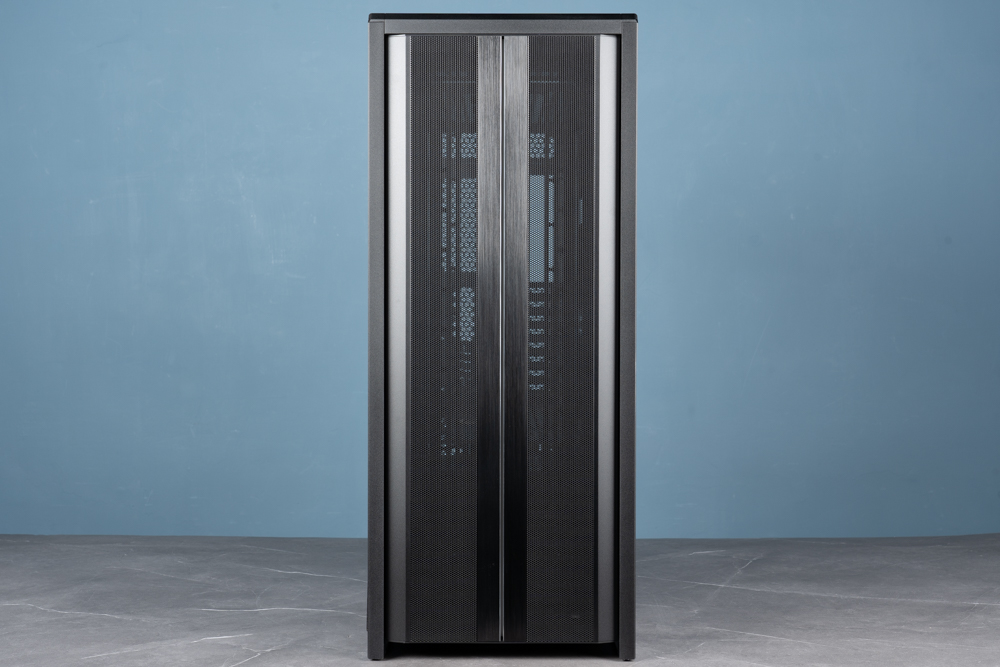
∆ The front panel is divided into two by the RGB light strip.
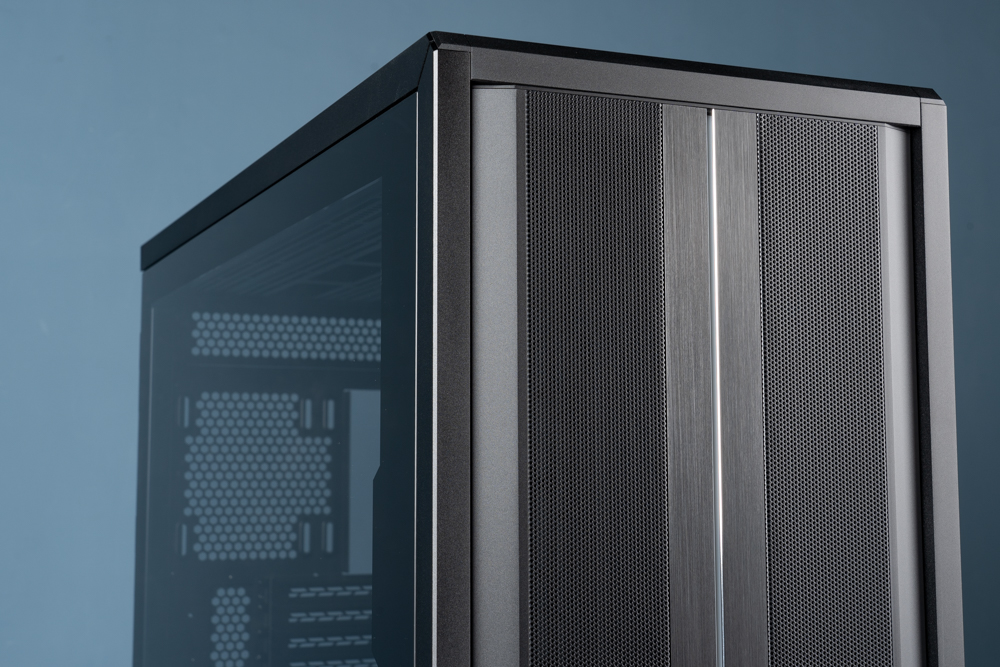
∆ Brushed aluminum front panel with perforated mesh panel is more textured.
The LIAN LI logo will be projected on the bottom of the front panel after being powered on. The projection lamp is powered by the metal contacts on the back of the front panel. When removing the front panel, there is no need to worry about pulling the wires. Otherwise, players need to pay attention to the protection of the pins and contacts.
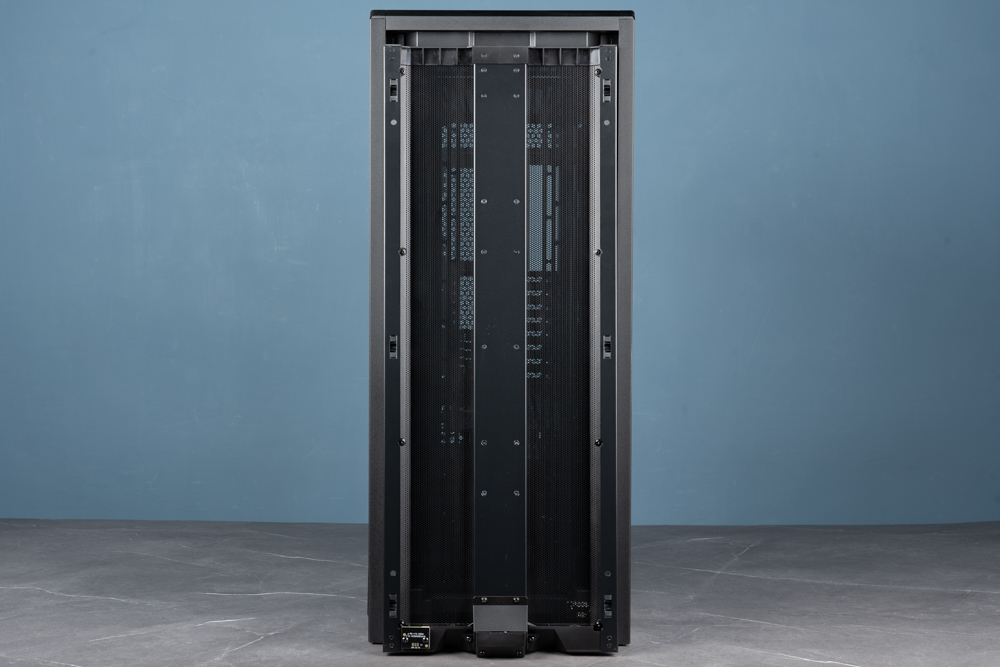
∆ With the front panel removed and the back, there is no additional dust filter.
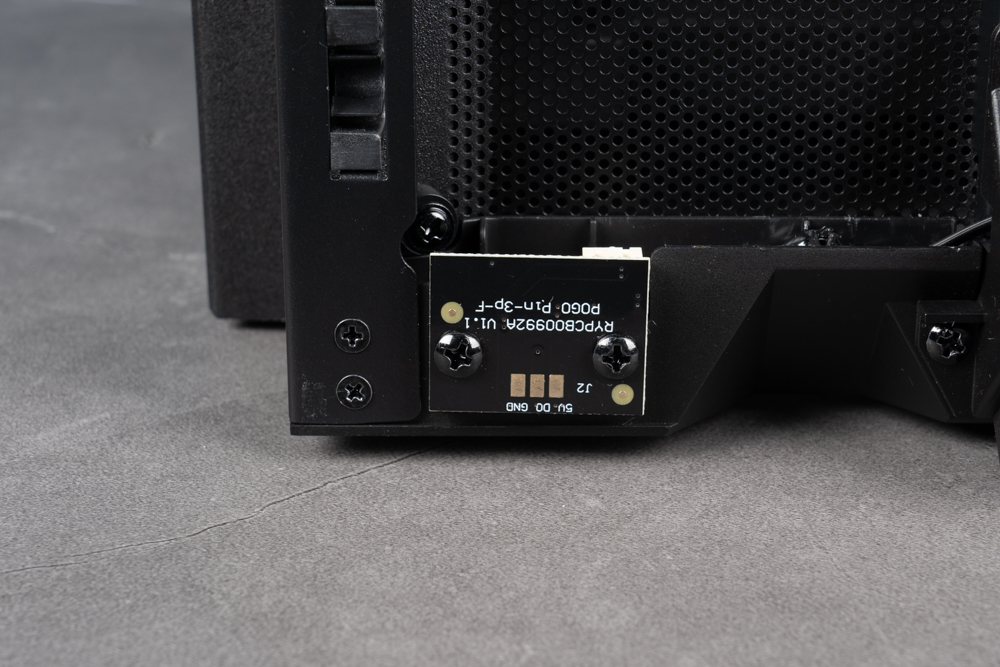
∆ Lamp power supply contact.
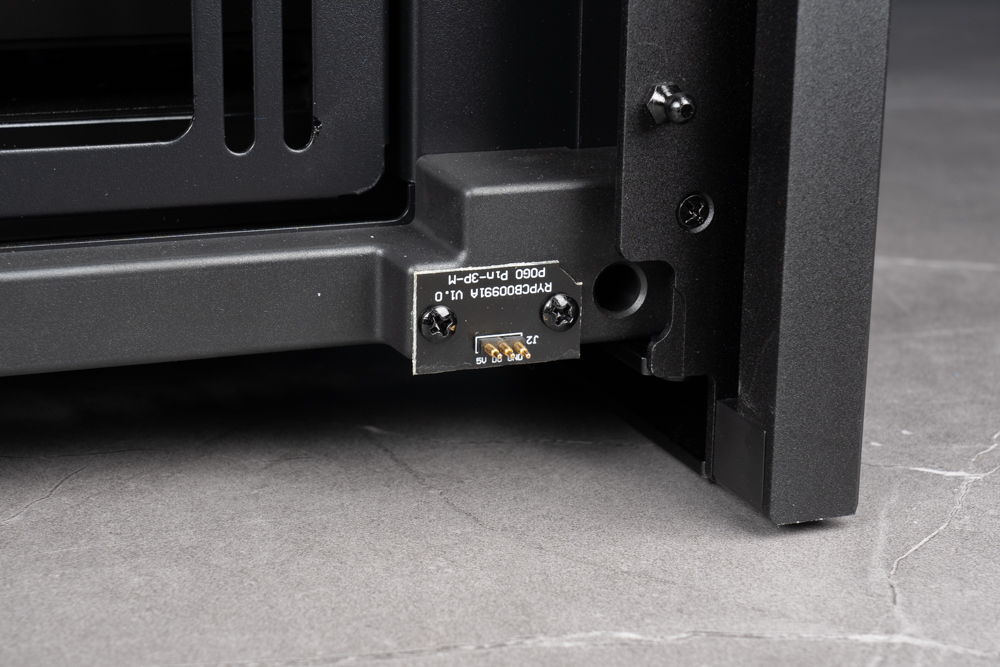
∆ Contact pins on the housing frame.
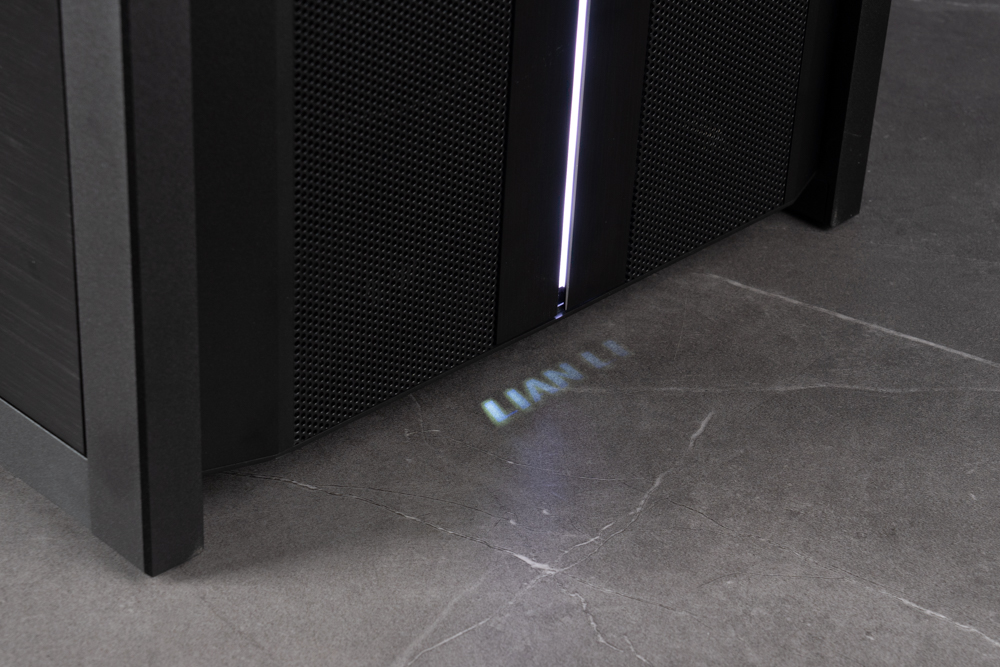
∆ LIAN LI logo projection lamp will be more obvious in total darkness.
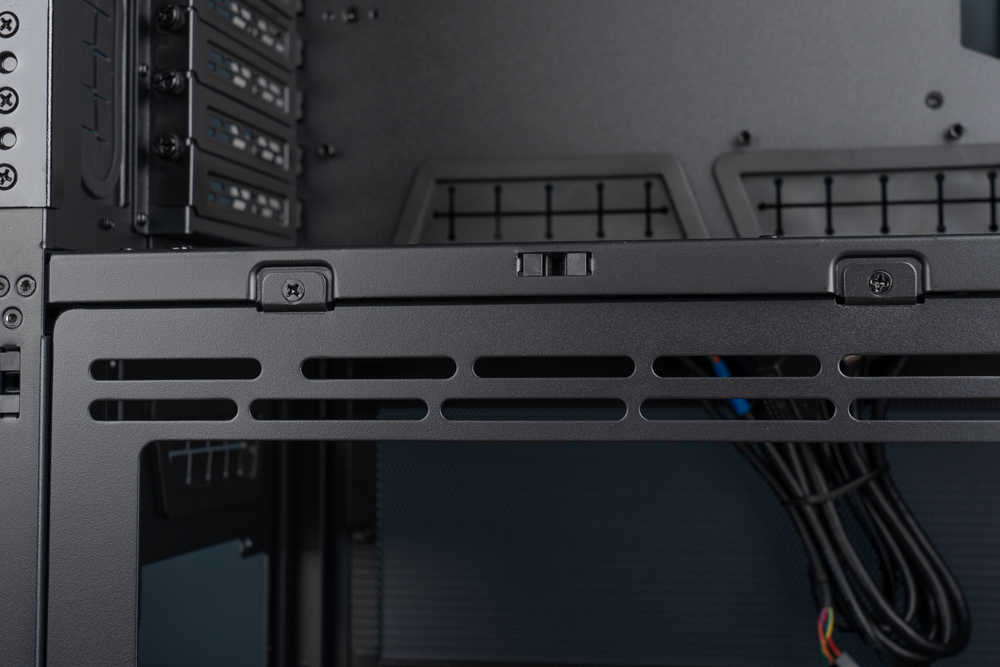
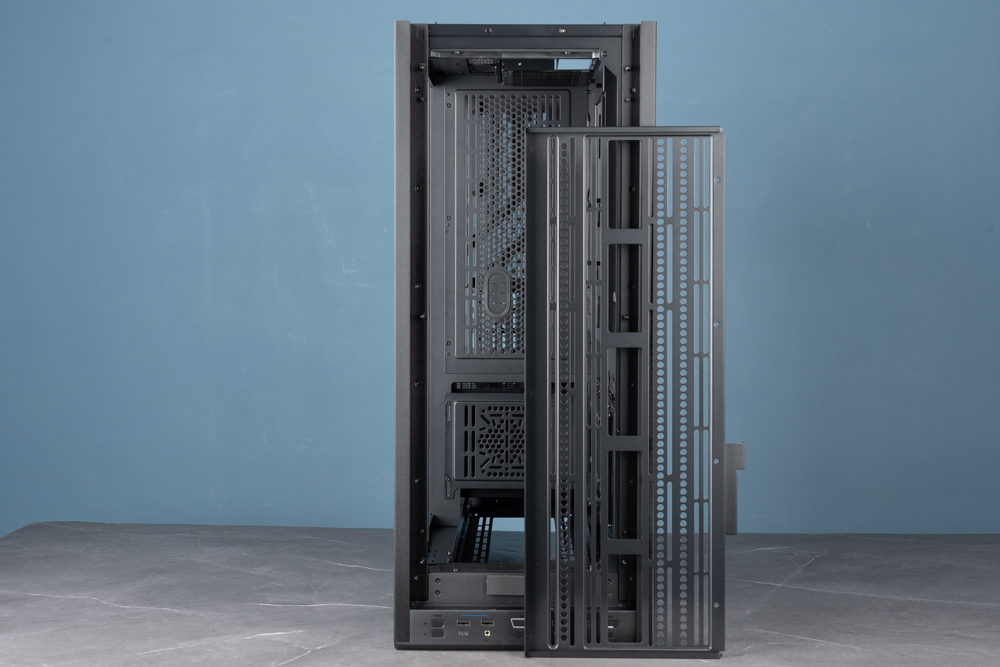
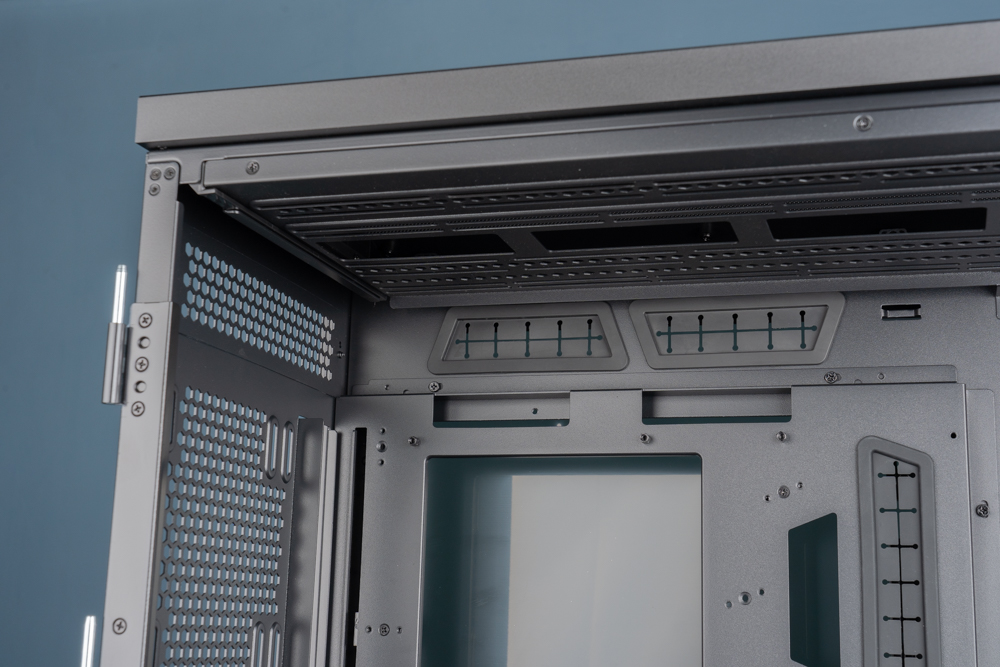
The detachable fan bracket is fixed by two screws on the left and right of the upper part, and there is an internal pressure tenon structure on the top to stabilize the fan installation bracket. After removing the screws, press the switch to release the tenon, and you can move forward Lift the entire mounting bracket above, remove the entire fan mounting bracket to install the fan and water cooling.
The front of the V3000 PLUS can be installed with a maximum 480/420mm radiator, four 12cm and three 14cm fans, and it will be more convenient to use a detachable fan bracket and fix it.
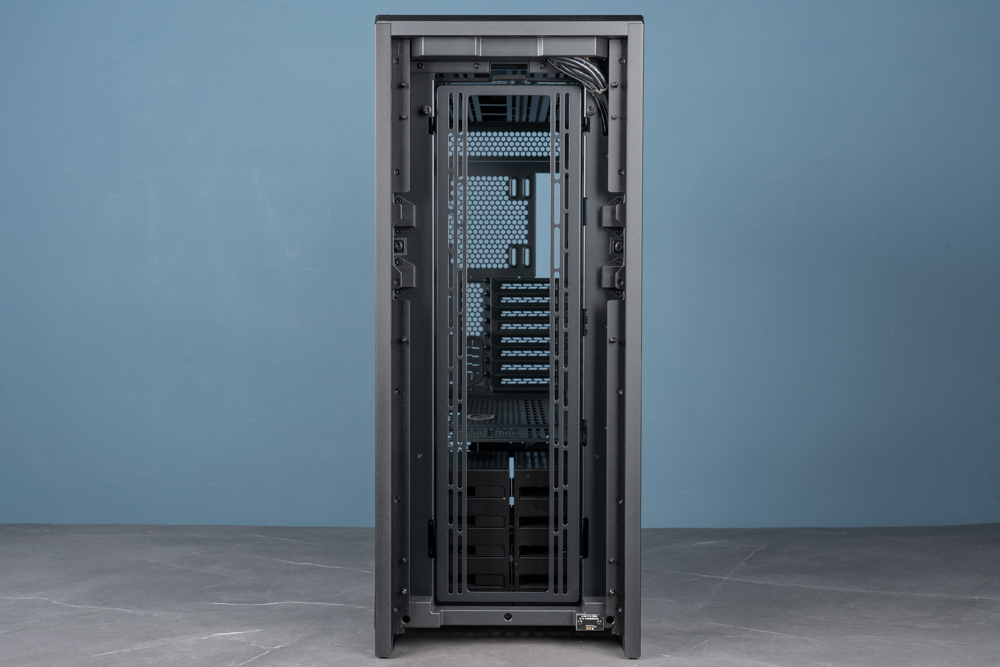
∆ The extra long fan mounting bracket can be used with 480/420mm water cooling.
∆ Fix the bracket with one screw on the left and right sides.
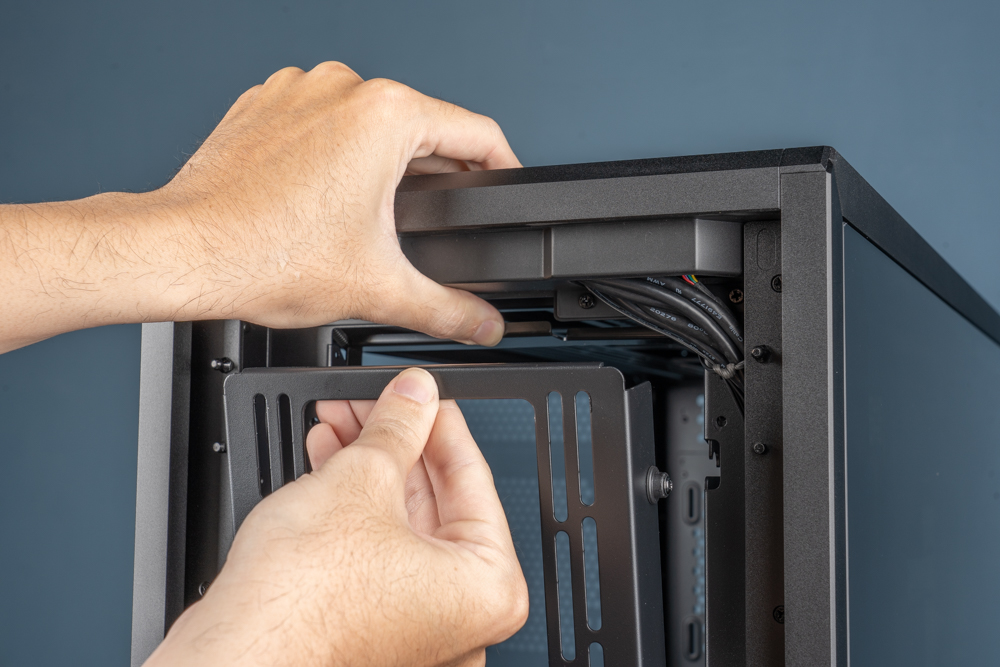
∆ There is a fixed structure above the bracket, and the bracket can be pulled out forward and upward after being pressed inward.
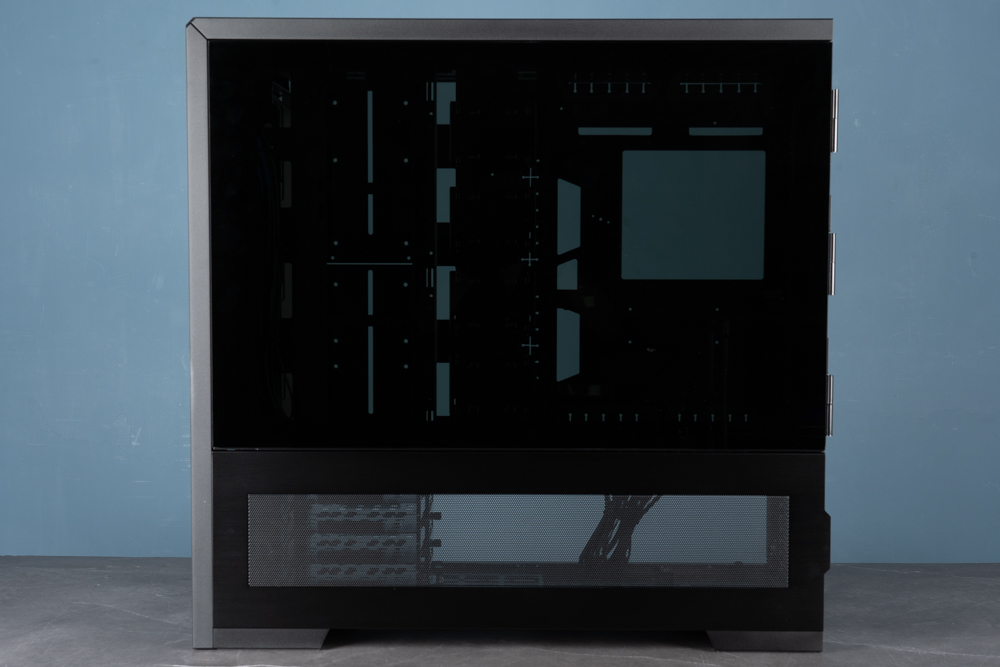
The 4mm thick matte black tempered glass can be opened through the side opening, which is safer and easier to use, and there is no need to worry about the lock breaking the glass during use! The opening method of the side glass that is rotated by the rear shaft is quite special. Press the center of the glass near the front panel, and the side glass will be automatically pushed up by the spring mechanism. If the opening and closing is not smooth or does not pop up normally during use To fix it, it is necessary to manually press the two spring mechanisms to correct it.
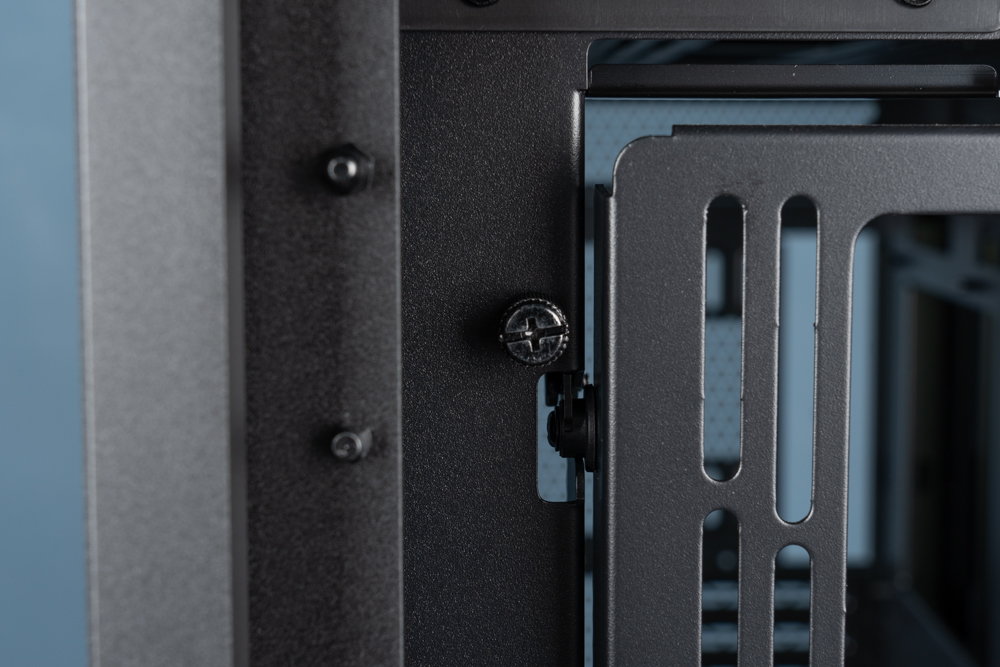
If it is found that the glass side can not be opened, there are two hand-turned screws beside the middle of the front fan mounting bracket to fix the glass side. These two screws can help the case not to be damaged by impact during transportation The glass opens by itself, but after installing the desktop computer, there is no need to lock these two screws for daily use.
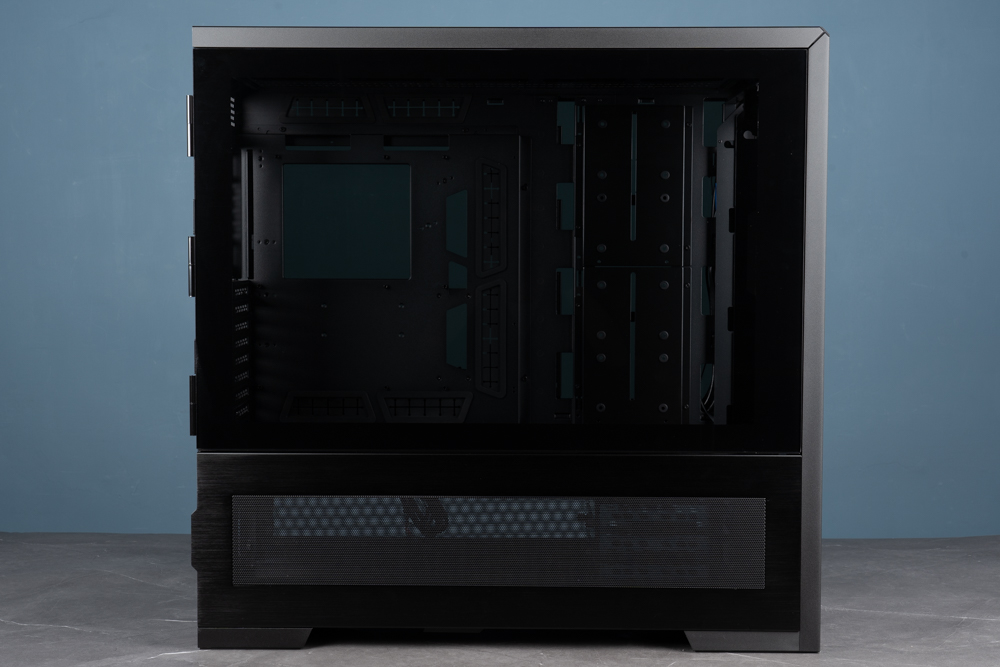
∆ The 4mm thick foggy black glass is transparent on the side, and the internal vision is relatively low-key if there is no electricity.
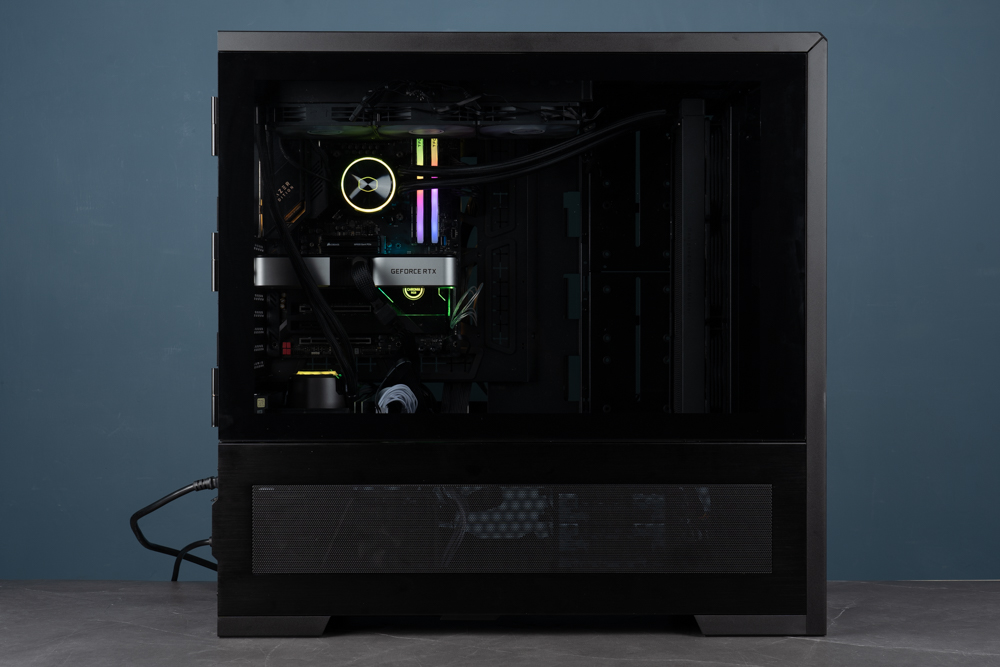
∆ Hardware RGB lighting effects.
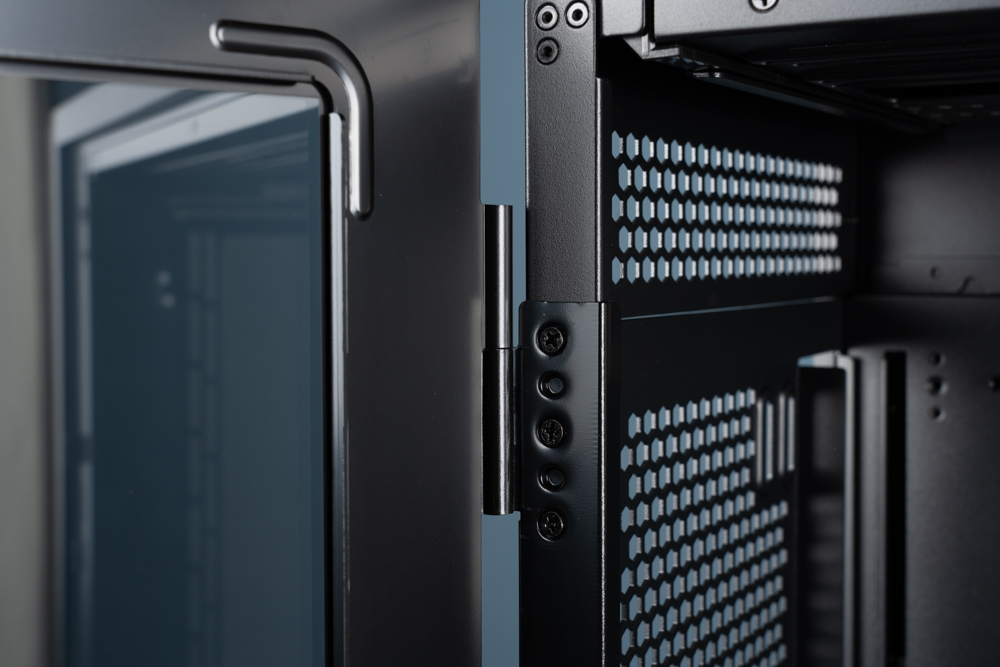
∆ The side-opening hinged glass is supported by the rear hinge.
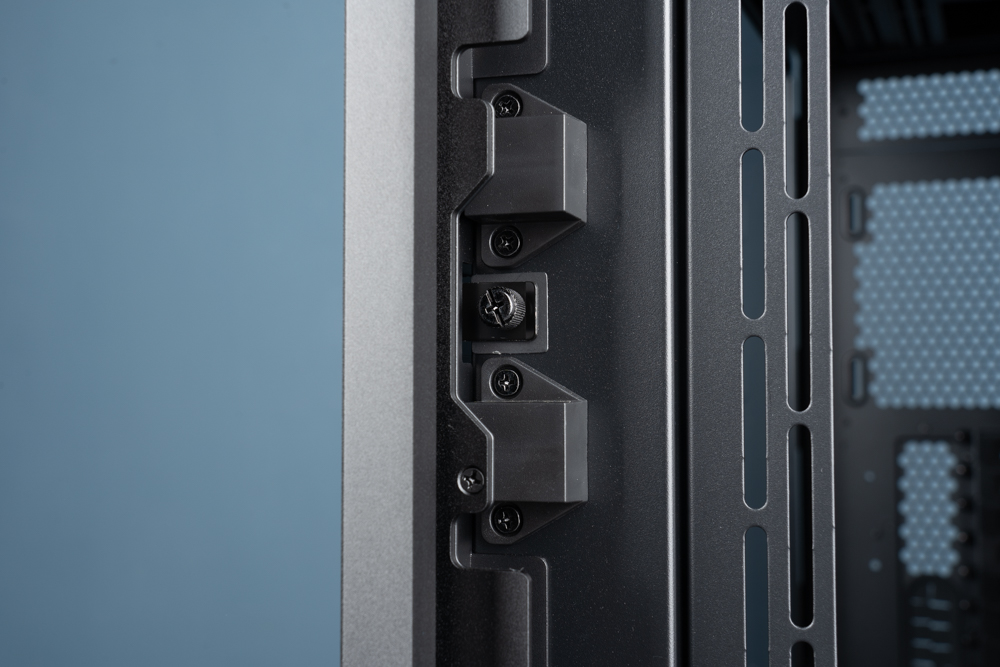
∆ Next to the middle section of the front fan mounting bracket, there are two thumb screws to fix the glass side.
∆ Spring structure of the glass side panels.
Ventilation mesh panels are installed on both sides of the power compartment, and the two panels are fixed by tenons. Users can use the rear protruding block to help open. On the front side of the motherboard, there is also a fan mounting bracket for expansion. The fans and radiators support 480/420mm radiators, and four 12cm and three 14cm fans are installed, which is the same expansion specification as the front fan bracket.
∆ Mesh ventilation side panels are provided on both sides of the side of the power supply compartment.
∆ There is a fan mounting bracket on the front of the motherboard, which can install 480/420 water cooling and fans.
∆ It is also a detachable design fixed by six screws.
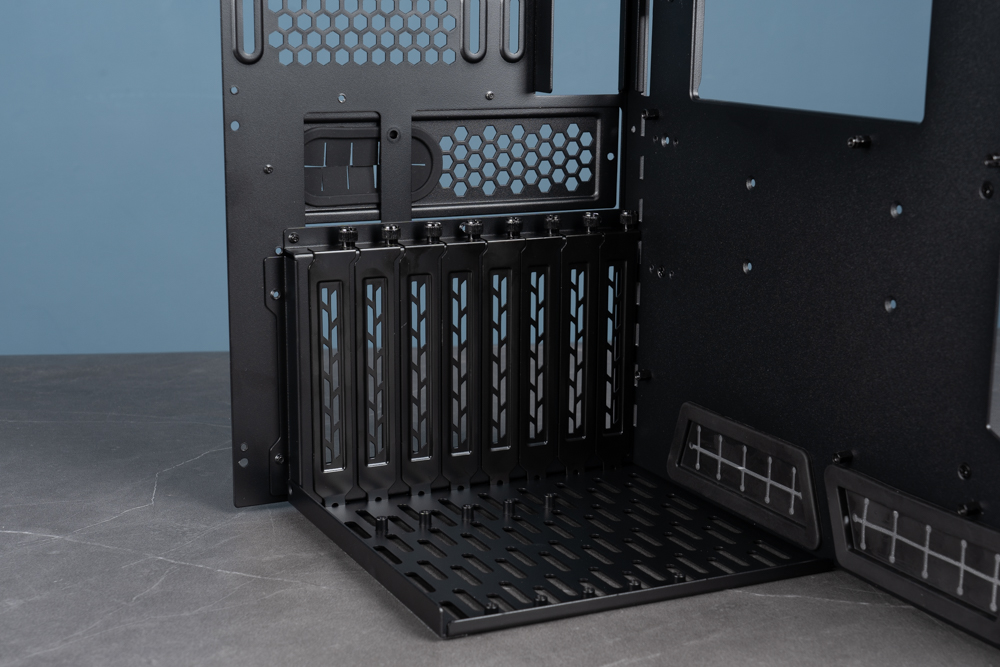
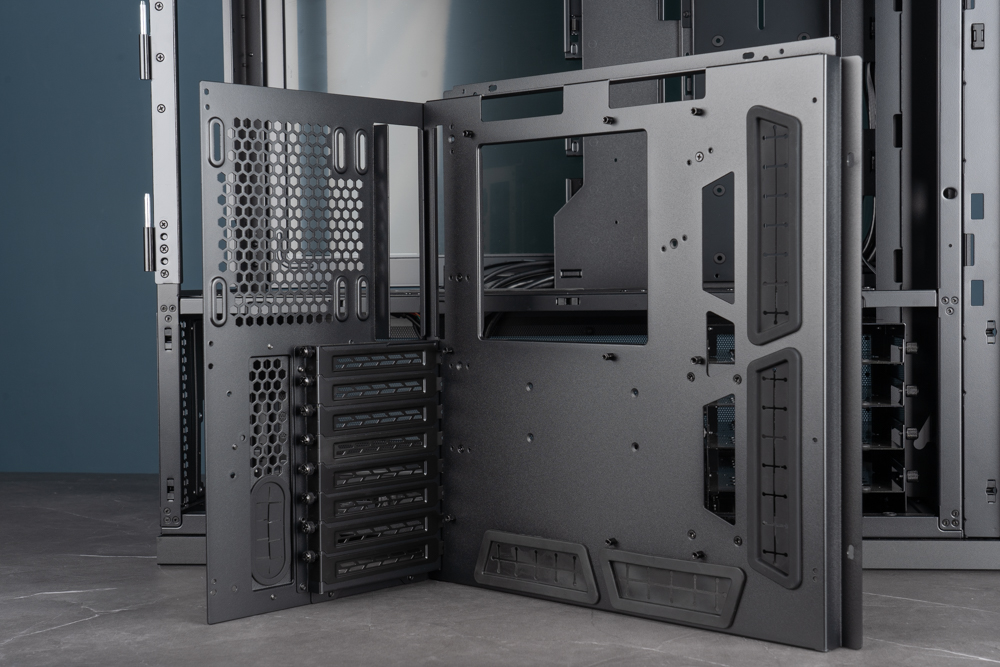
The rear of the V3000 PLUS supports a 12/14cm fan installation and eight PCIe device expansion slots. Although there is no additional vertical installation position for the graphics card, the slot design uses a modular and detachable structure. Just remove the PCIe slot After fixing the screws near the slot, the entire PCIe module block can be directly converted into the vertical mode of the graphics card. If players want to display the graphics card upright, they no longer need to purchase an additional vertical adapter frame, but only need to purchase an additional graphics card extension cable. It can be used by fixing the extension cable on the accessory base, and the cost of display card erection can reduce some budgets.
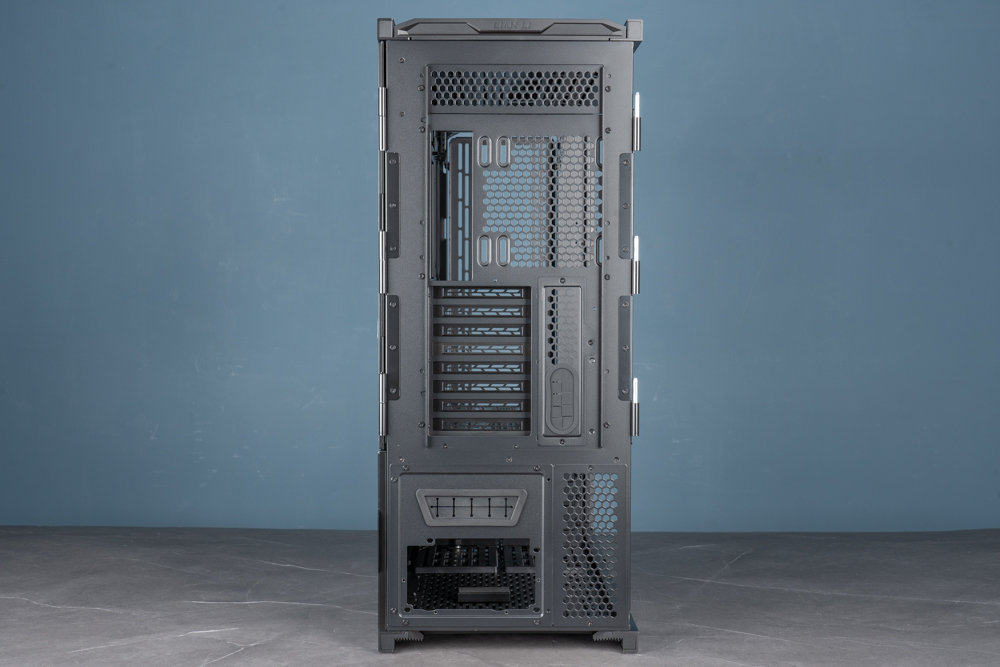
∆ View of the rear of the V3000 PLUS case in standard mode.
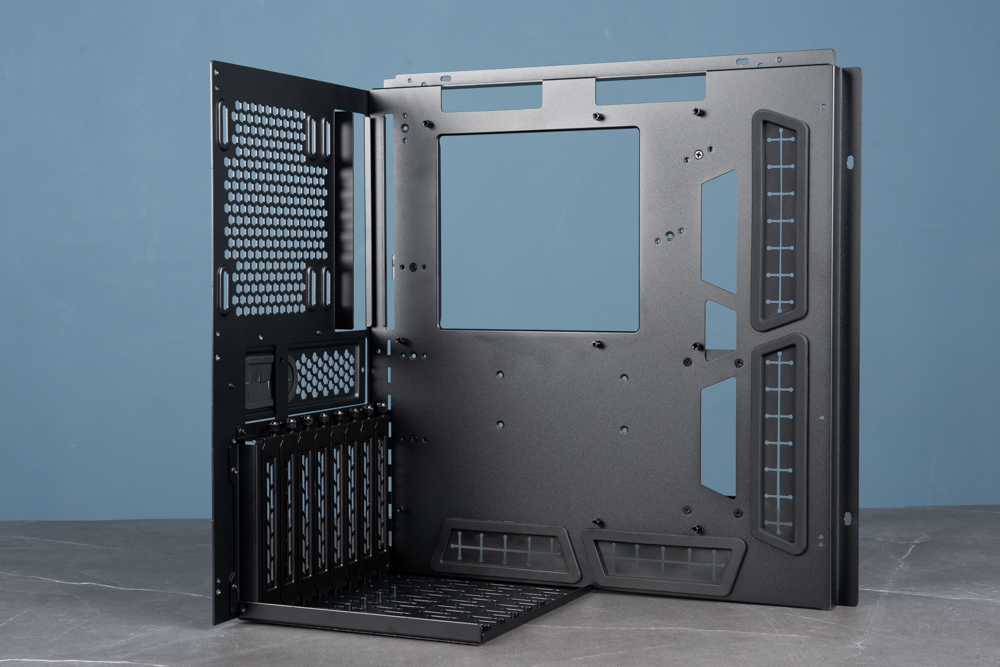
∆ The entire installation area needs to be disassembled and adjusted to change the mode of the display card from vertical to direct.
∆ Use the graphics card upright stand included in the accessories to secure the extension cable.
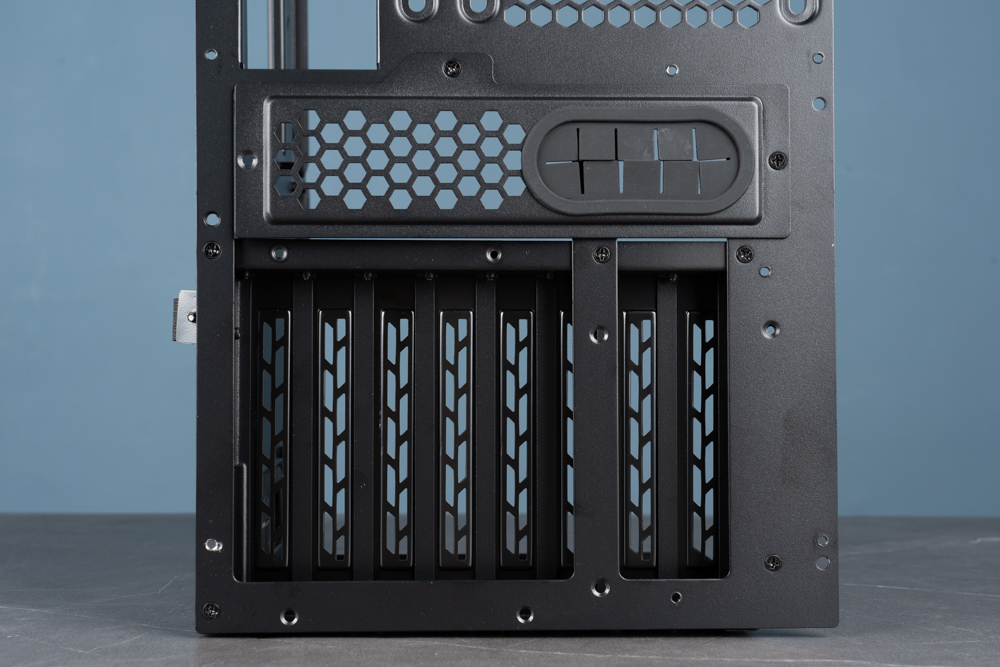
∆ Overview of the vertical slot of the graphics card.
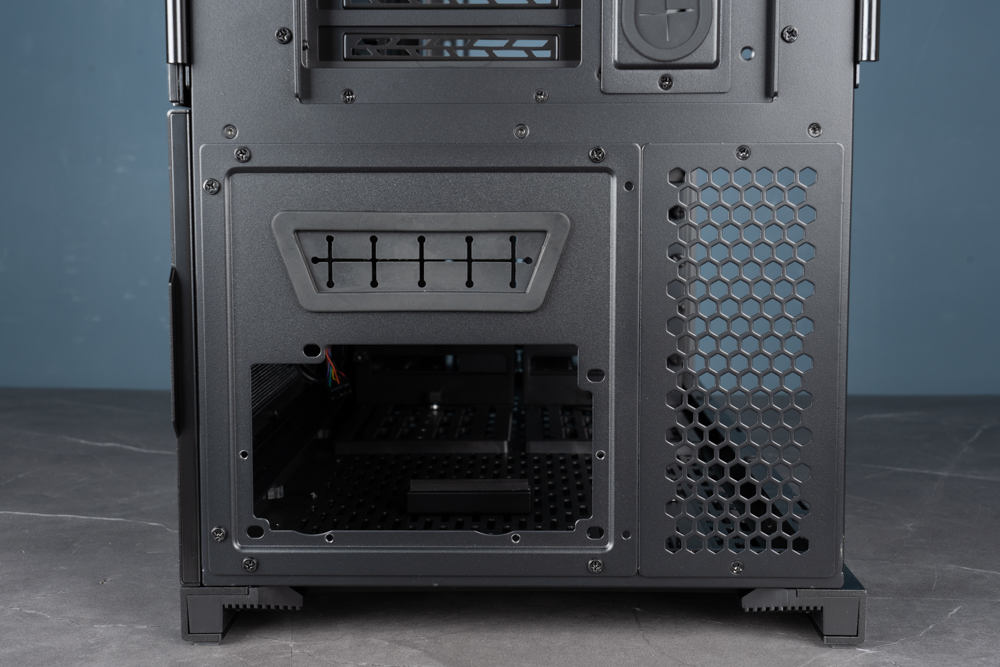
∆ The power supply installation position at the bottom, the wiring hole at the top is used for flip mode, and the rear I/O and screen wires are used for wiring.
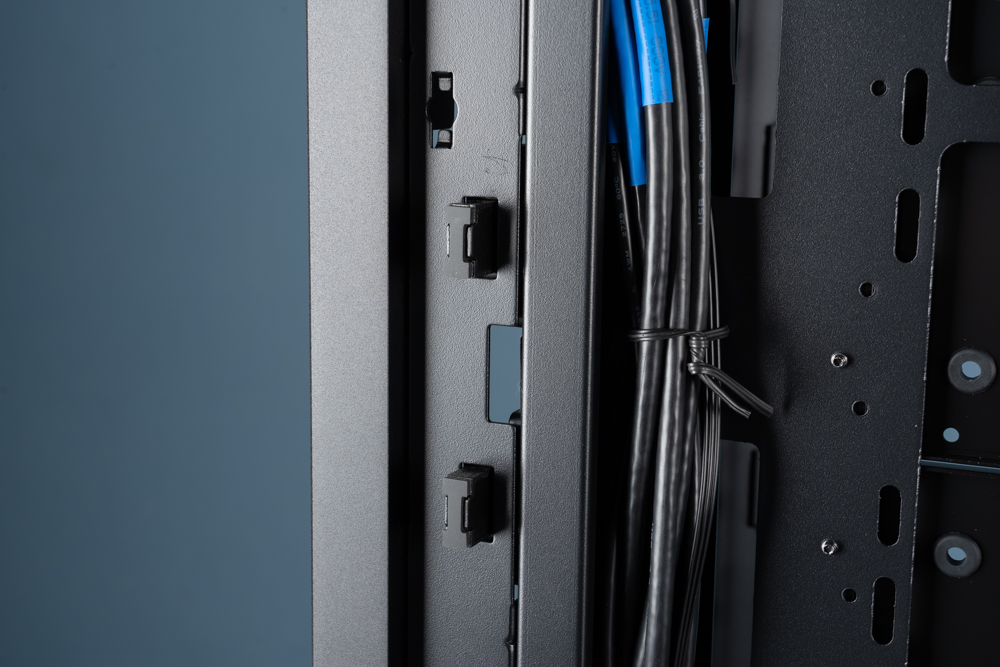
There is also a deep black 4mm thick glass side panel on the back of the motherboard, which is another magnified inspection of the entire line of technology for players! The thread management space on the back has a thread hiding depth of about 4cm. With multiple Velcro straps on the back, the whole thread process should be easy and no problem.
The system I/O cables on the top will have blue labels, and the cables with blue labels are the I/O cables of system 1, so that it is more convenient to distinguish the difference in the whole line planning.
∆ 4mm thick deep black glass side see through.
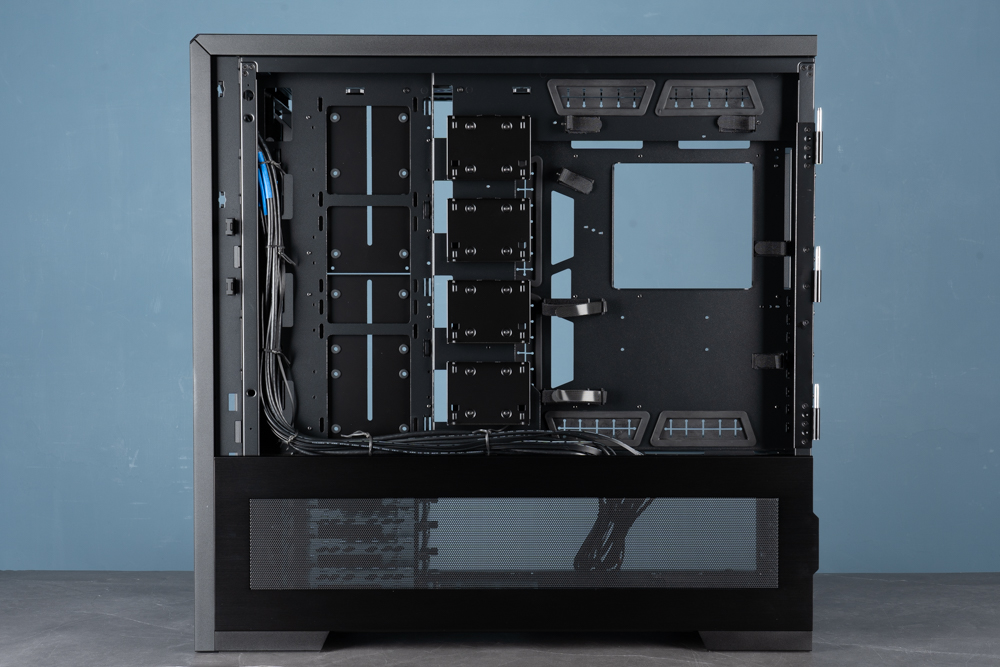
∆ Seven Velcro cable ties to help with the line.
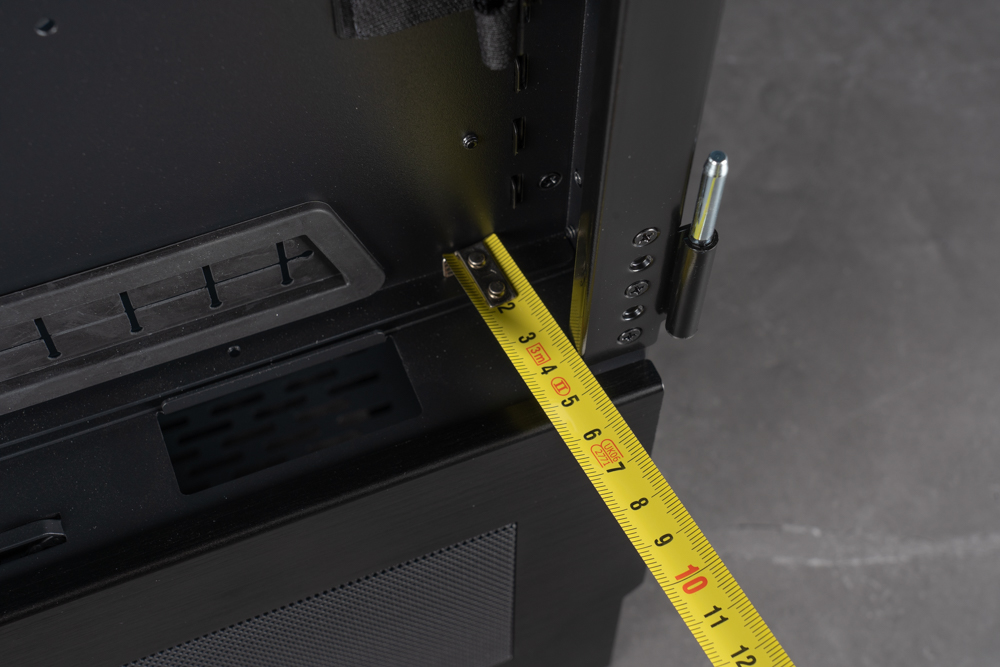
∆ There is 4cm of space behind the whole line.
The rear cable management space is equipped with four wall-mounted 2.5-inch hard drive mounting brackets, and the tool-free tenon and clip fixing solution can disassemble and install hard drives more quickly.
The shield closer to the front panel can actually install four 2.5-inch hard drives. It should be noted that the hard disk is installed on the back of the shield, that is, the hard disk is installed when we look from the cable management space to the front. noodle.
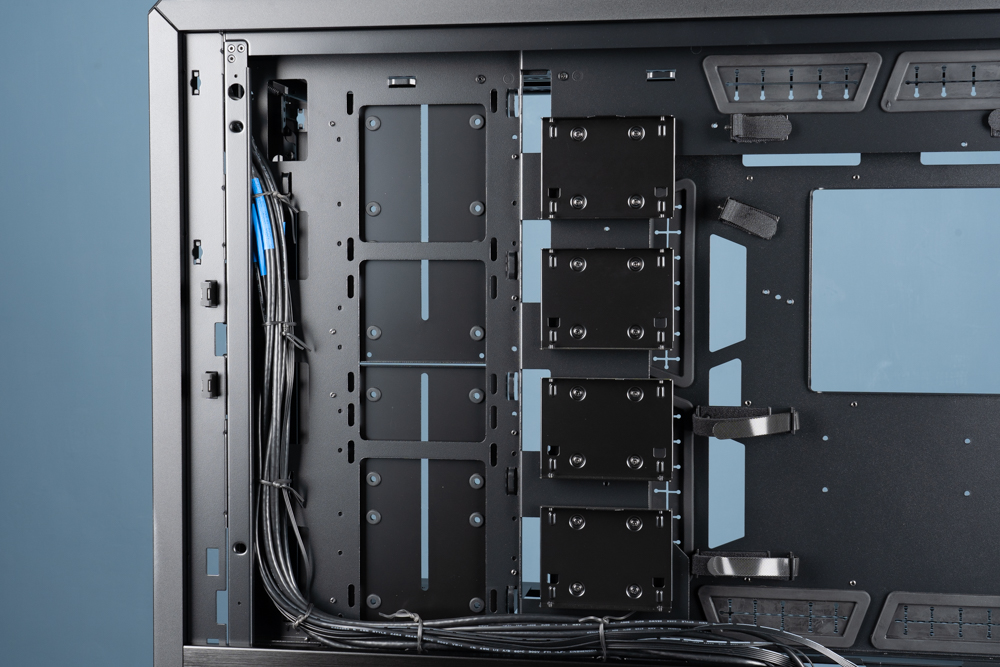
∆ The shield mounting position plus the wall mounting bracket can install eight 2.5-inch hard drives.
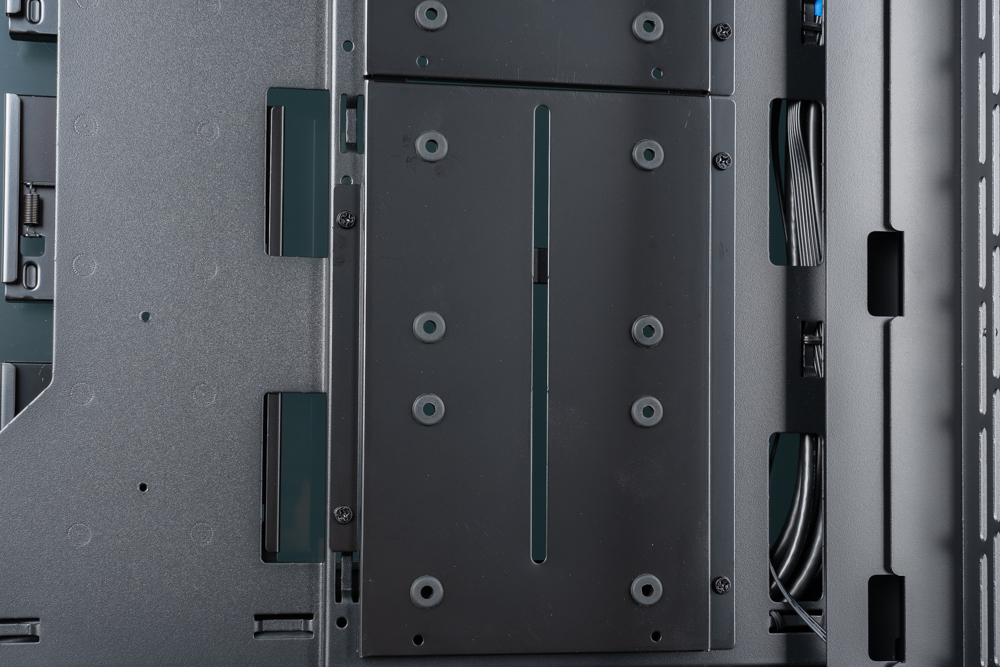
∆ The shroud can accommodate four 2.5-inch hard disks.
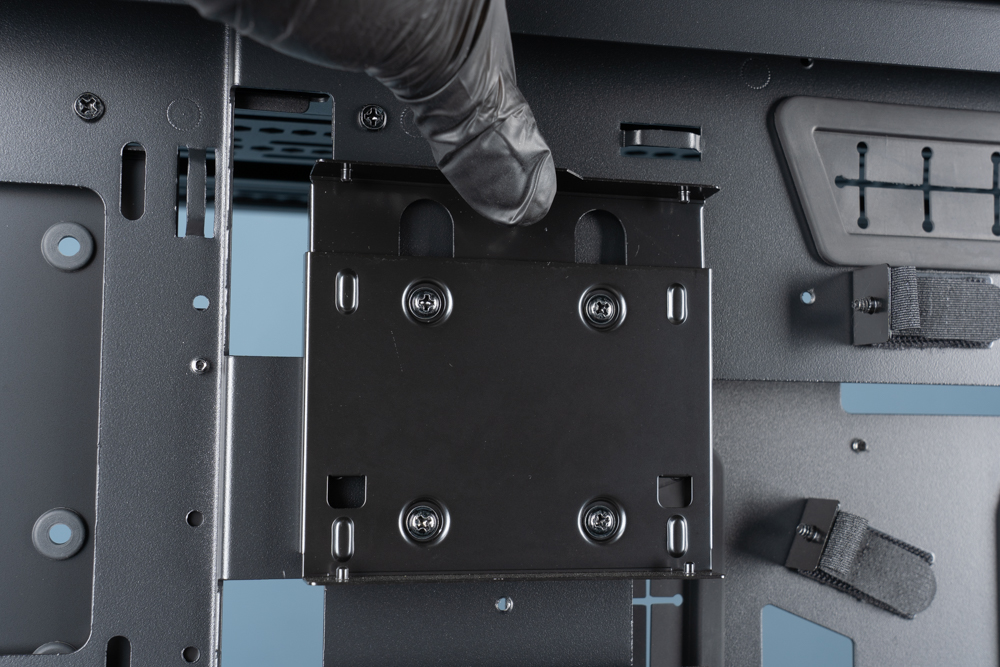
∆ The wall-mounted mounting bracket is screw-free design, which is convenient and quick to disassemble.
V3000 PLUS plus two sets of composite hard disk brackets in the power compartment, there are a total of eight 2.5-inch hard disk installation positions and eight 2.5/3.5 composite installation positions, that is, up to sixteen hard disk expansion installations, the bottom The composite hard disk rack can be adjusted according to the usage situation, leaving more space for cable management or for water cooling and fans, and the flexibility is quite free.
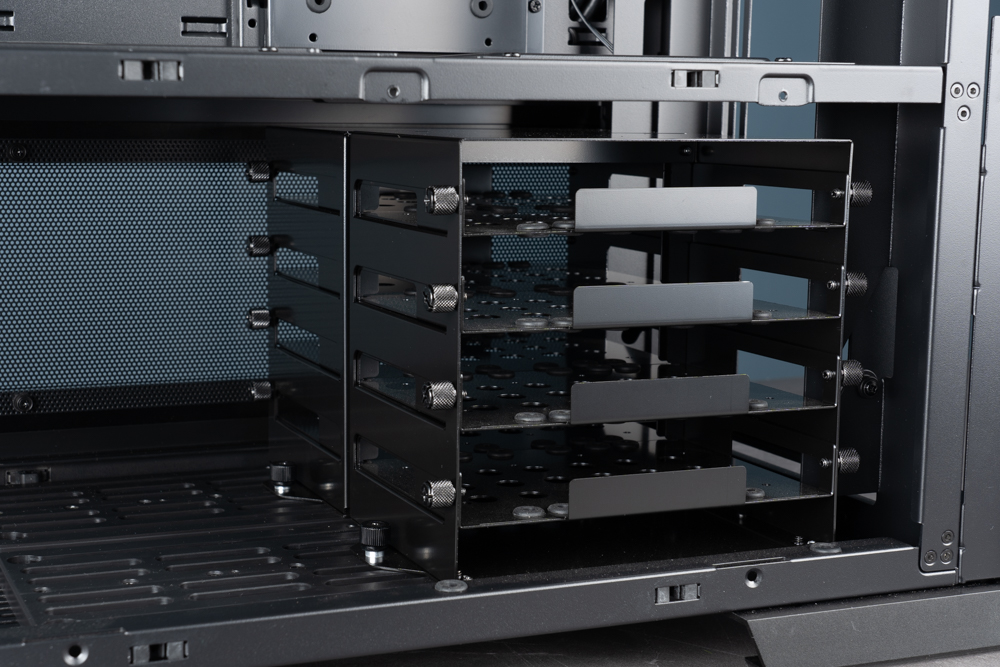
∆ There are a total of eight 2.5/3.5-inch hard disk composite installation trays in the front and rear groups.
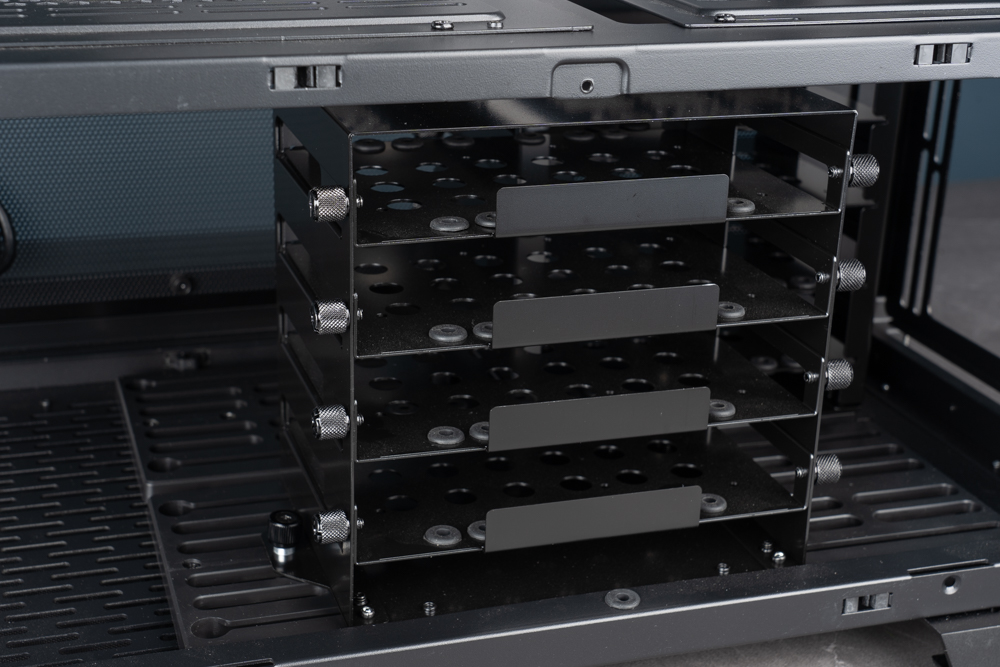
∆ With the bottom lock hole, the position of the hard disk bracket can be changed.
The design language of the upper cover on the top of the case is similar to that of the front panel. It is also a two-piece perforated mesh panel to provide sufficient heat dissipation performance, but there is no RGB light bar on the center line.
Of course, the upper fan mounting bracket is also a modular detachable structure. After removing five screws, the fan bracket can be completely removed. It is more convenient to install the upper water cooling and fan. The top of the case supports 480/ The 420mm long water-cooling row, the fan part supports the installation of four 12cm / three 14cm / two 20cm installations, which is the most expandable part of the cooling device of the whole coffee case.
∆ Large-area heat dissipation mesh helps heat dissipation.
∆ The detachable bracket is compatible with 480/420 mm water cooling and up to two 20cm fans.
The system I/O set on the front of the top cover is quite special. The power button marked in the center of the S1 and the I/O on the left belong to the system 1 (system 1) interface, and the right half belongs to the system 2 (system 2) interface. I/O interface, the I/O cable belonging to system 1 will be marked with a blue heat-shrinkable tube, do not confuse it when installing in dual-system mode!
The two I/O interface ports provide the same settings, two USB 3.0, USB 3.2 Type-C, Microphone Combo Jack, power button, reset button, which means that the two systems can be used independently, and there is no mandatory binding between the two systems to share a single power supply.
However, System 1 has an additional front ARGB light bar control button. In addition to setting Mode (mode) and Color (color), it can also be connected to the ARGB slot of the main board through the 5V 3-Pin ARGB connector. It can be controlled by the main board or The lighting control software in the system can set the lighting effect.
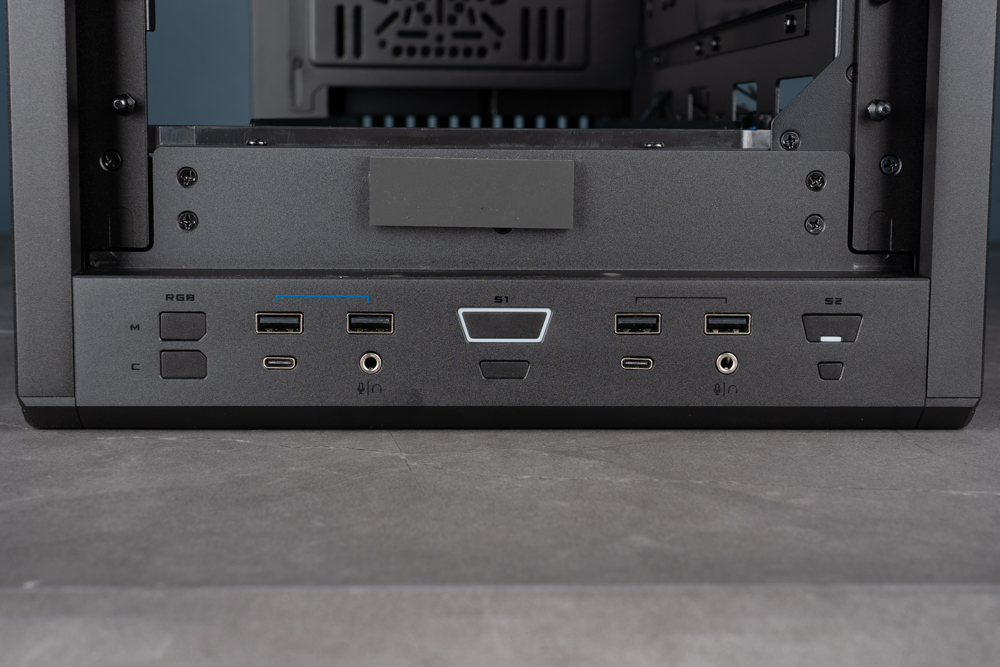
∆ The upper I/O has a dual system interface, which can be identified by the blue heat shrinkable tube during the whole line.
Core hardware installation space, standard/flip/dual system installation demonstration
The V3000 PLUS is in the standard installation mode when it leaves the factory, that is, the normal single motherboard installation setting. In the standard mode, the V3000 PLUS supports EEB, E-ATX, ATX, Micro-ATX, Mini-ITX specification motherboard installation. In the upper/right/lower directions of the installation position, holes for wiring are set up for various power supply and connecting wires to pass through.
The core hardware installation space supports air-cooled towers with a height of up to 198mm, and a graphics card installation length of up to 589mm. You don’t have to worry about installing both towers and graphics cards on flagship models.
The more exaggerated motherboard installation position can also be disassembled separately. It is more convenient to install the air cooling tower or water cooling head without getting stuck. However, it is recommended to remove the block before the whole line operation, otherwise the power supply The wires have to be rerouted once.
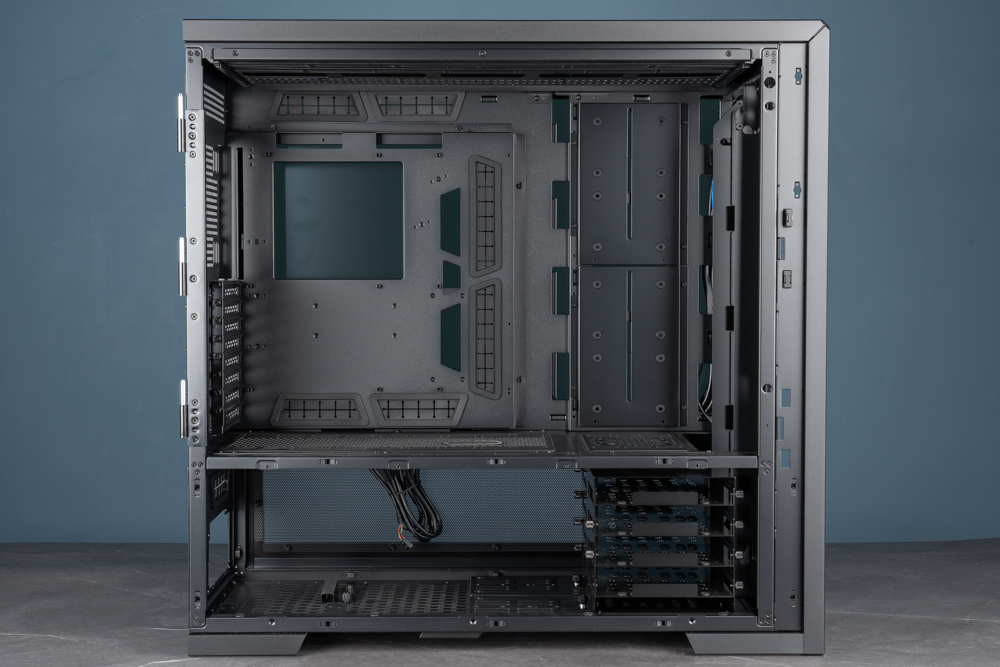
∆ Display of installation space in standard mode.
∆ Reserve the installation space above the motherboard for water cooling.
∆ The motherboard mounting block can be removed in one piece.
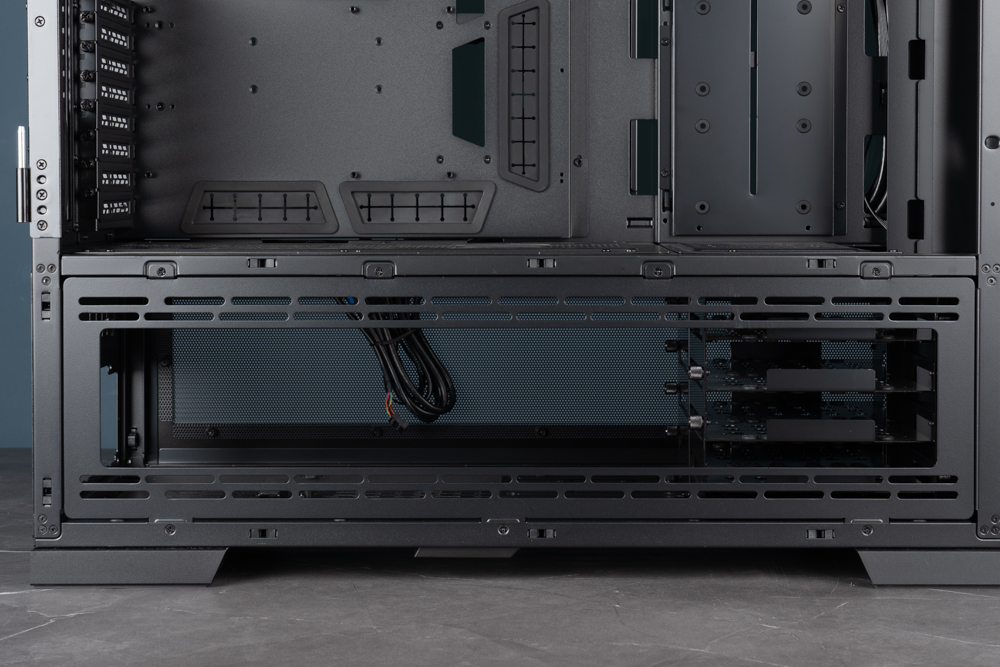
In addition to the graphics card power supply wiring hole, there is also a fan lock hole on the top of the power supply compartment for installing a water cooling radiator and a fan, and supports a maximum of 420/360mm water cooling radiator and fan installation.
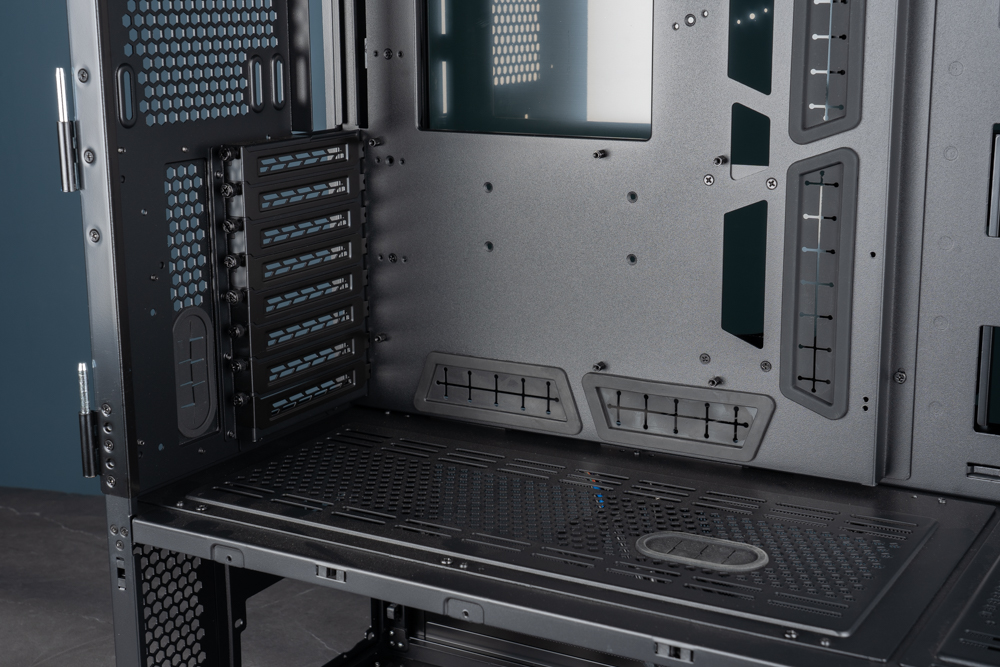
∆ A 420/360mm water cooling radiator and fan can be installed on the power compartment.
In addition to the reserved space for the front water cooling installation in front of the power supply compartment, the front section of the power supply compartment is actually a water pump installation bracket. When the split water cooling is installed, the water pump can be fixed on this bracket. When the bracket is installed in the power supply compartment, the height limit is 275mm. If you want to install For higher-sized water pumps, after removing the lower hard disk bracket, use the bottom water pump bracket to install it under the power compartment, and it can be installed to a water pump up to 345mm.

∆ When the water pump mounting bracket is above the power compartment, a water pump with a maximum height of 275mm can be installed.
In addition to the standard mode, the V3000 PLUS also has a flip mode that can be changed for installation. After the flip mode, the I/O on the back of the motherboard and the screen wires of the display card must pass through the wiring hole above the power supply outside the case. In addition, the flip mode Although it also supports EEB motherboards and 198mm air cooling, the graphics card is limited to 390mm in length, but it is still more than enough for the current 40 series and RX 7900 series graphics cards.
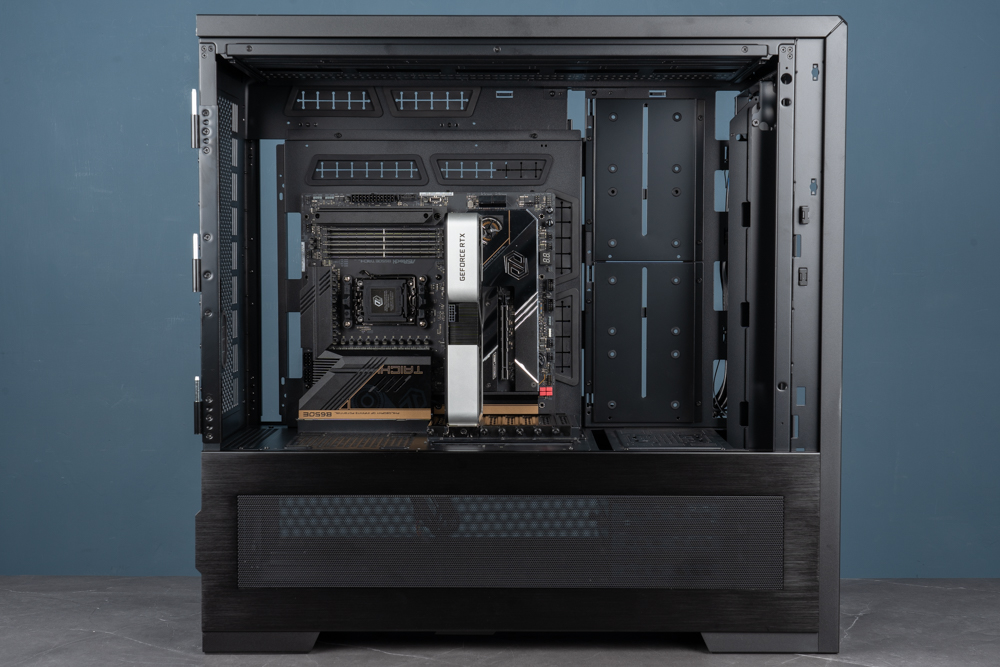
∆ Display in flip mode.
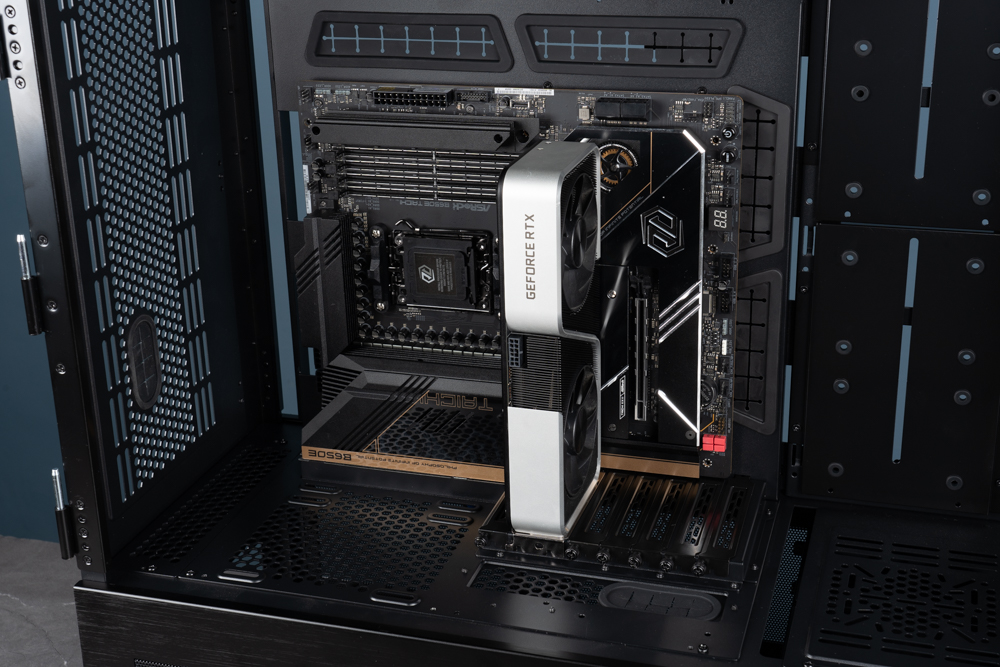
∆ Install with ASRock B650E Taichi motherboard in E-ATX size.
The most prominent feature of the V3000 PLUS product must be the dual system support. The dual system can be installed on two platforms compatible with the EEB motherboard and the Mini ITX motherboard at the same time. During the installation process of system 1, you only need to raise the upper part to make the lower part Power compartment replaced with System 2 mounting plate for ITX.
It should be noted that the graphics card of system 2 must be installed in the power compartment through the dedicated PW-PCI-4-24X extension cable, and cannot be directly installed on the ITX motherboard in the direct plug mode.
The space for hardware support is slightly different. System 1 maintains the same specifications as the standard model, while System 2 supports a 79mm high air cooling tower, and a 400mm long 140mm wide graphics card for vertical installation.
∆ Demonstration of dual system installation.
∆ The system 2 graphics card of Mini ITX must be installed in the power compartment, and the volume is limited to 400mm in length and 140mm in width.
V3000 PLUS has a lot of cabinet accessories, from left to right: ITX mounting plate of system 2, display card support frame, hub mounting plate, bottom mounting plate of water pump power compartment, display card upright base, dual system power supply and graphics card The mounting plate and two hard disk brackets are used to fix the strengthening plate.
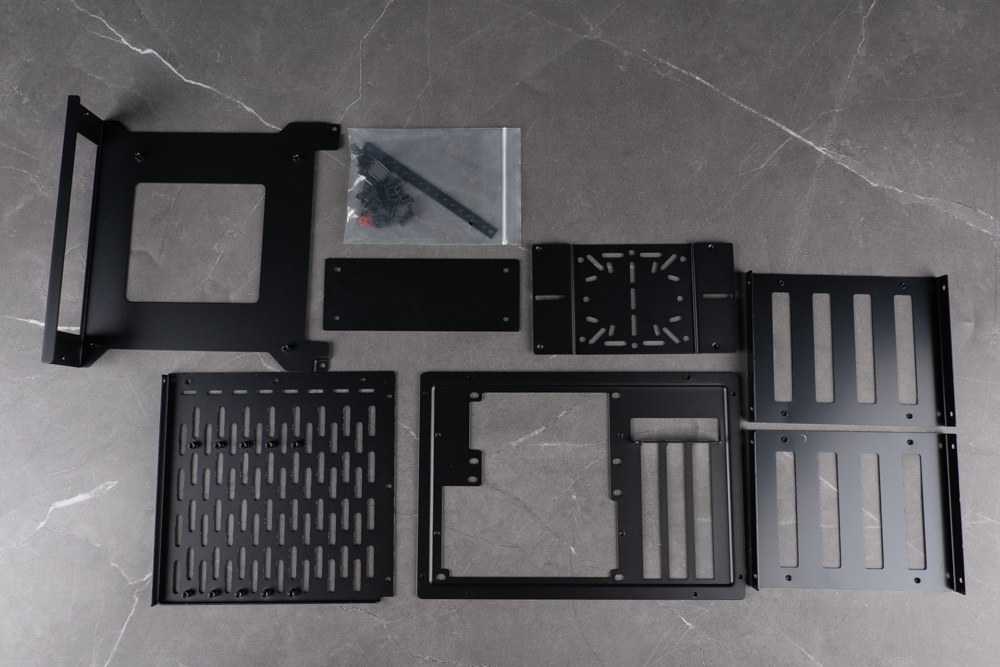
∆ List of important accessories Each performs its own duties. It is recommended to read the manual before installing the machine.
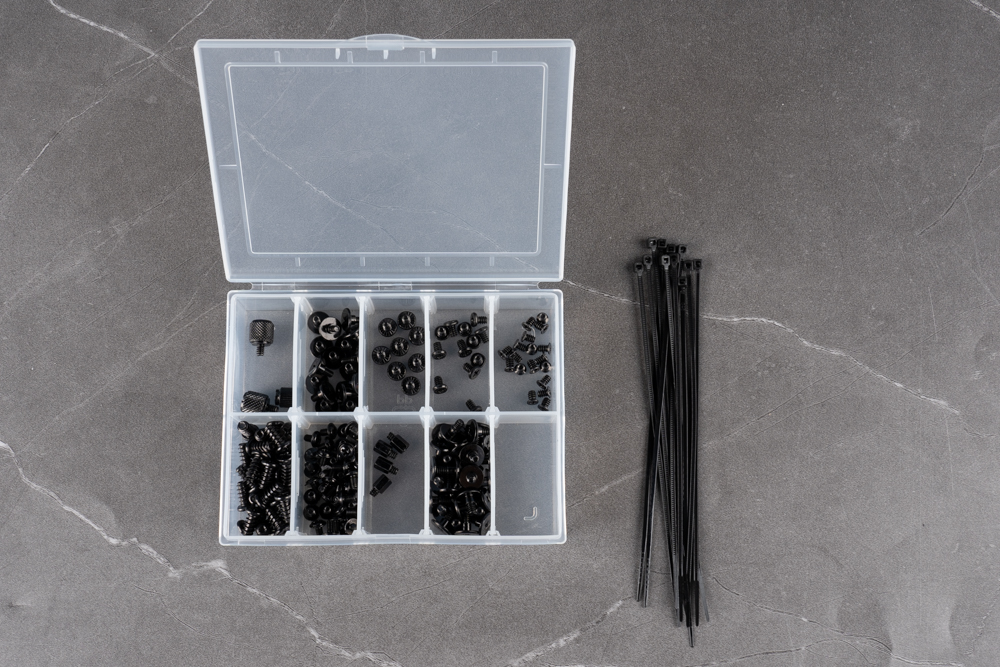
∆ Subpackage screws and cable ties for one-time whole line.
V3000 PLUS dual system actual installation and thermal performance test
This time, two Intel platforms are installed, and both use 360mm integrated water cooling to provide sufficient heat dissipation configuration for the processing. The heat dissipation test uses AIDA64 FPU and Furmark two software simultaneous tests to simulate the extreme dual The temperature data in the baked state, and the data collection uses HWiFO64 to collect and record the highest temperature.
testing platform_system 1
Processor: Intel Core i9-12900K
Radiator: 360mm AIO
Motherboard: ASRock Z690 Taichi Razer Edition
Memory: T-FORCE DELTA RGB DDR5 16GBx2 6200MHz
Graphics Card: NVIDIA GeForce RTX 3060Ti Founders Edition
Operating System: Windows 11 Home Edition 21H2
Power Supply: 850W PSU
testing platform_system 2
Processor: Intel Core i7-13700K
Radiator: 360mm AIO
Motherboard: ASRock Z790 PG-ITX/TB4
Memory: Micron Crucial DDR5 5600MT/s UDIMM 16GBx2
Graphics Card: NVIDIA GeForce RTX 3070 Founders Edition
OS: Windows 11 Professional 21H2
Power supply: LIAN LI SP750 SFX

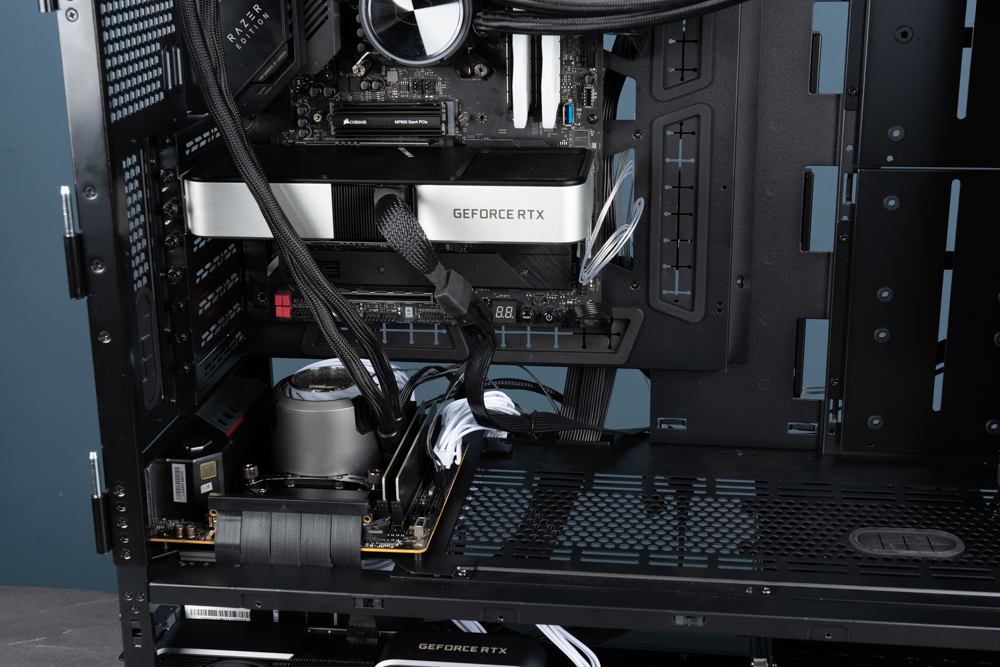
∆ Display of actual installation effect.

∆ Dual system internal installation configuration.
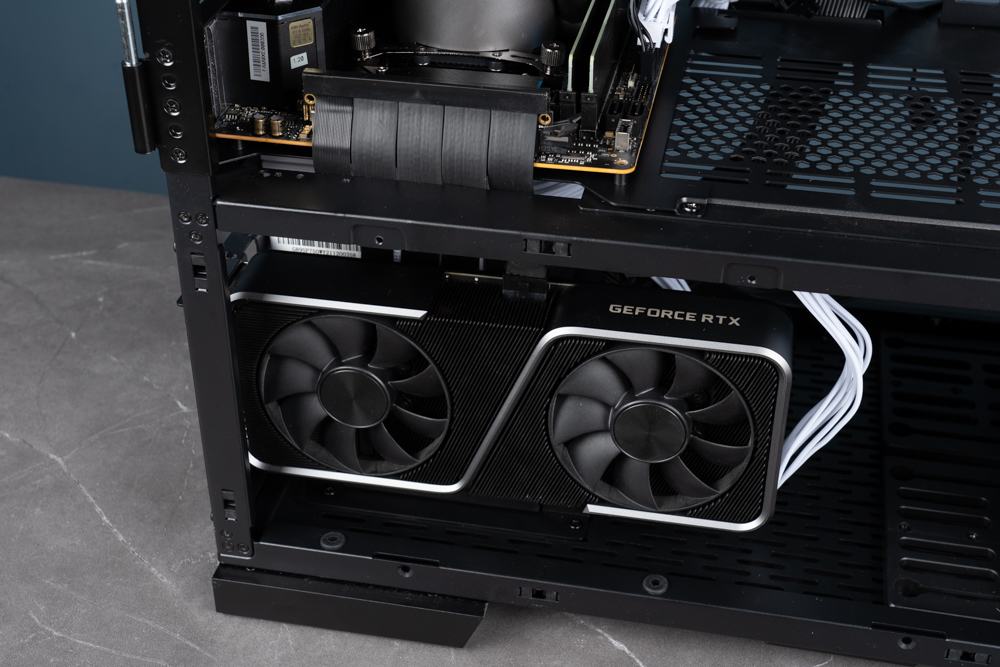
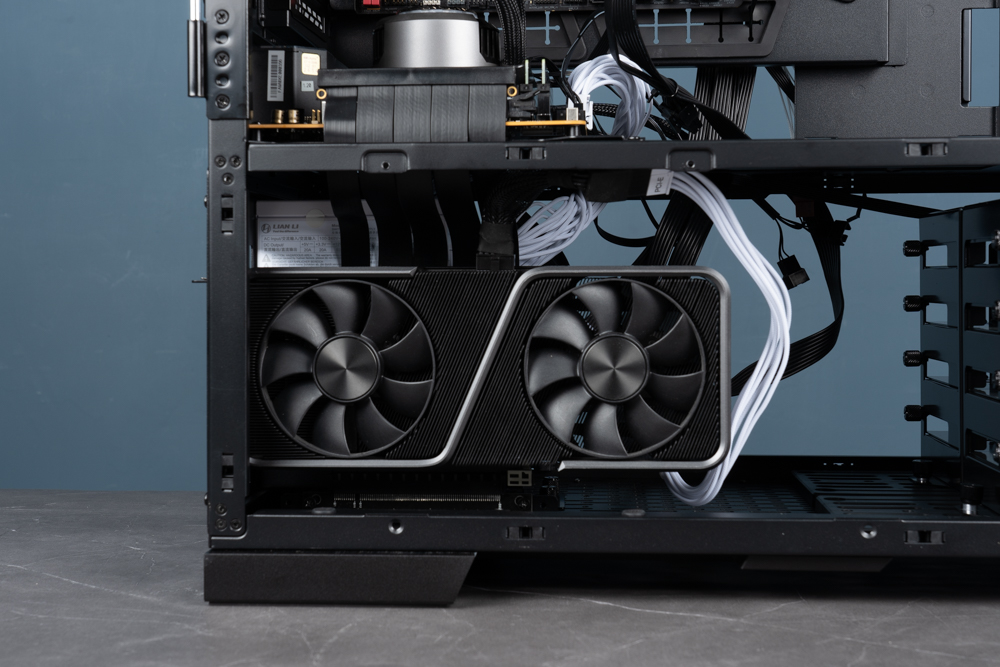
∆ The graphics card of system 2 is installed in the power supply compartment, and it supports graphics cards with three-slot thickness and a maximum length of 32cm.

∆ Visual effect after the side panels are covered.
Since a dual system was specially built to install the machine, we must conduct a stress test at the same time! Let’s take a look at the cooling performance of the V3000 PLUS full-tower chassis!
Judging from the results, the hardware temperature of System 1 is quite cool, while System 2 is equipped with Intel i7 13700K and Z790 platform, the 13th generation processors under the preset voltage are a bit higher, and System 2’s 360 all-in-one The water cooling is installed on the top of the case and serves as the only exhaust fan system for the entire case, so the unsurprisingly 13700K temperature broke through 100K and the frequency was reduced.
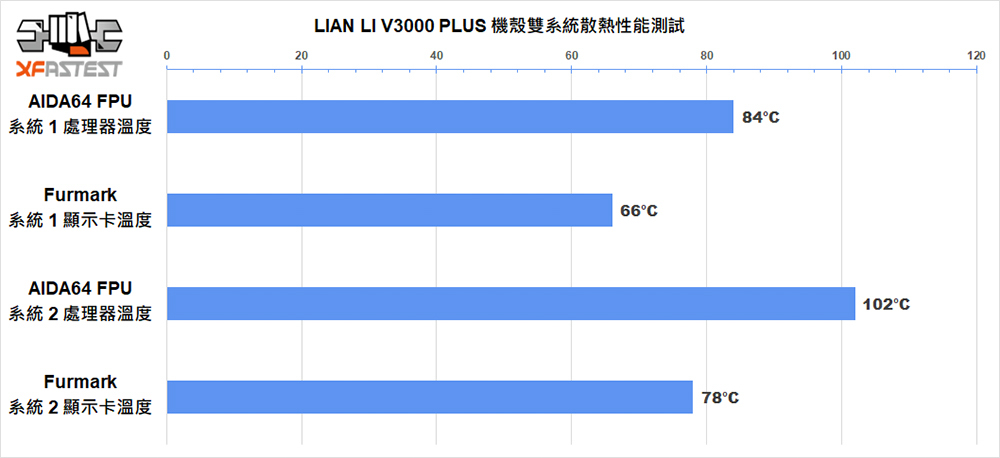
∆ LIAN LI V3000 PLUS chassis thermal performance test chart.
Summary and experience
Compared with the previous generation, V3000 PLUS has more diverse and more practical advancements. In addition to its huge space and volume, it not only has monster-level expandability, but also makes full use of all aspects of space. Through various modular designs, it brings three kinds of The installation mode is for users, no matter how you want to install this coffee case, it can be used for you.
Up to 16 fans, 3×480 plus 1x360mm water-cooling radiator and other heat dissipation expandability, as well as the installation support of E-ATX and ITX dual systems, high-end players want to use split water-cooling installation for dual systems, there is absolutely no problem! V3000 PLUS is currently priced at NT$14,500. The internal configuration and design are worthy of this extraordinary price. The only problem is that it is recommended that two people work together for handling and assembly.
If the author’s installation plan today is also used, dual systems plus two integrated water-cooled radiators, players must first ensure that the length of the water pipes and fan wires of the integrated water-cooled system is sufficient. In order to provide system 2 installation space for system 1, the entire The motherboard will be installed upwards, which will lead to a rather tight length of the CPU power supply cable of the power supply, and the problem of insufficient cables can be solved by extending the cable, but the integrated water cooling part is more embarrassing and helpless.
V3000 PLUS does not provide system 2 wiring holes on the power supply compartment, so the 24-Pin power supply and other wires of the ITX motherboard must be bypassed from the top of the ITX motherboard, which is not so beautiful for patients with forced wiring. V3000 PLUS is great with good expandability and structure, but players must be mentally prepared for the planning of wire routing and wire length before installation.
Further reading: