")
Everyone knows Photoshop, and P-picture has become our daily term, but you may not know that Photoshop can do a lot of things besides P-picture. From photo editing, illustration to poster design, let us take you through the latest super useful features of Photoshop!
☞ Subscribe to Photoshop first, then do it together!
Tip 1: Let AI help you quickly simulate makeup effects
Neural Filters is a new feature in Photoshop that dramatically speeds up the image editing process with Adobe Sensei-powered machine learning. For example, the “Makeup Transfer” filter allows photographers to more specifically simulate the appearance of makeup on the model’s face, especially the eyes, whether they communicate with the stylist and creative team in the early stage, or during the post-retouching process. Makeup and lip make-up are the most effective.
When using Neural Filters for the first time, you need to download the filter in the software first. After applying the filter, you can switch the Before/After preview effect immediately. In terms of output options, you can choose to create a new layer, smart layer, mask or new file according to your needs, which is very convenient for users.
Function button location: Filter > Neural Filters > Makeup Transfer
☞Download Photoshop now and try it out
Skill 2: Facial expression control savior to generate a perfect smile with one click
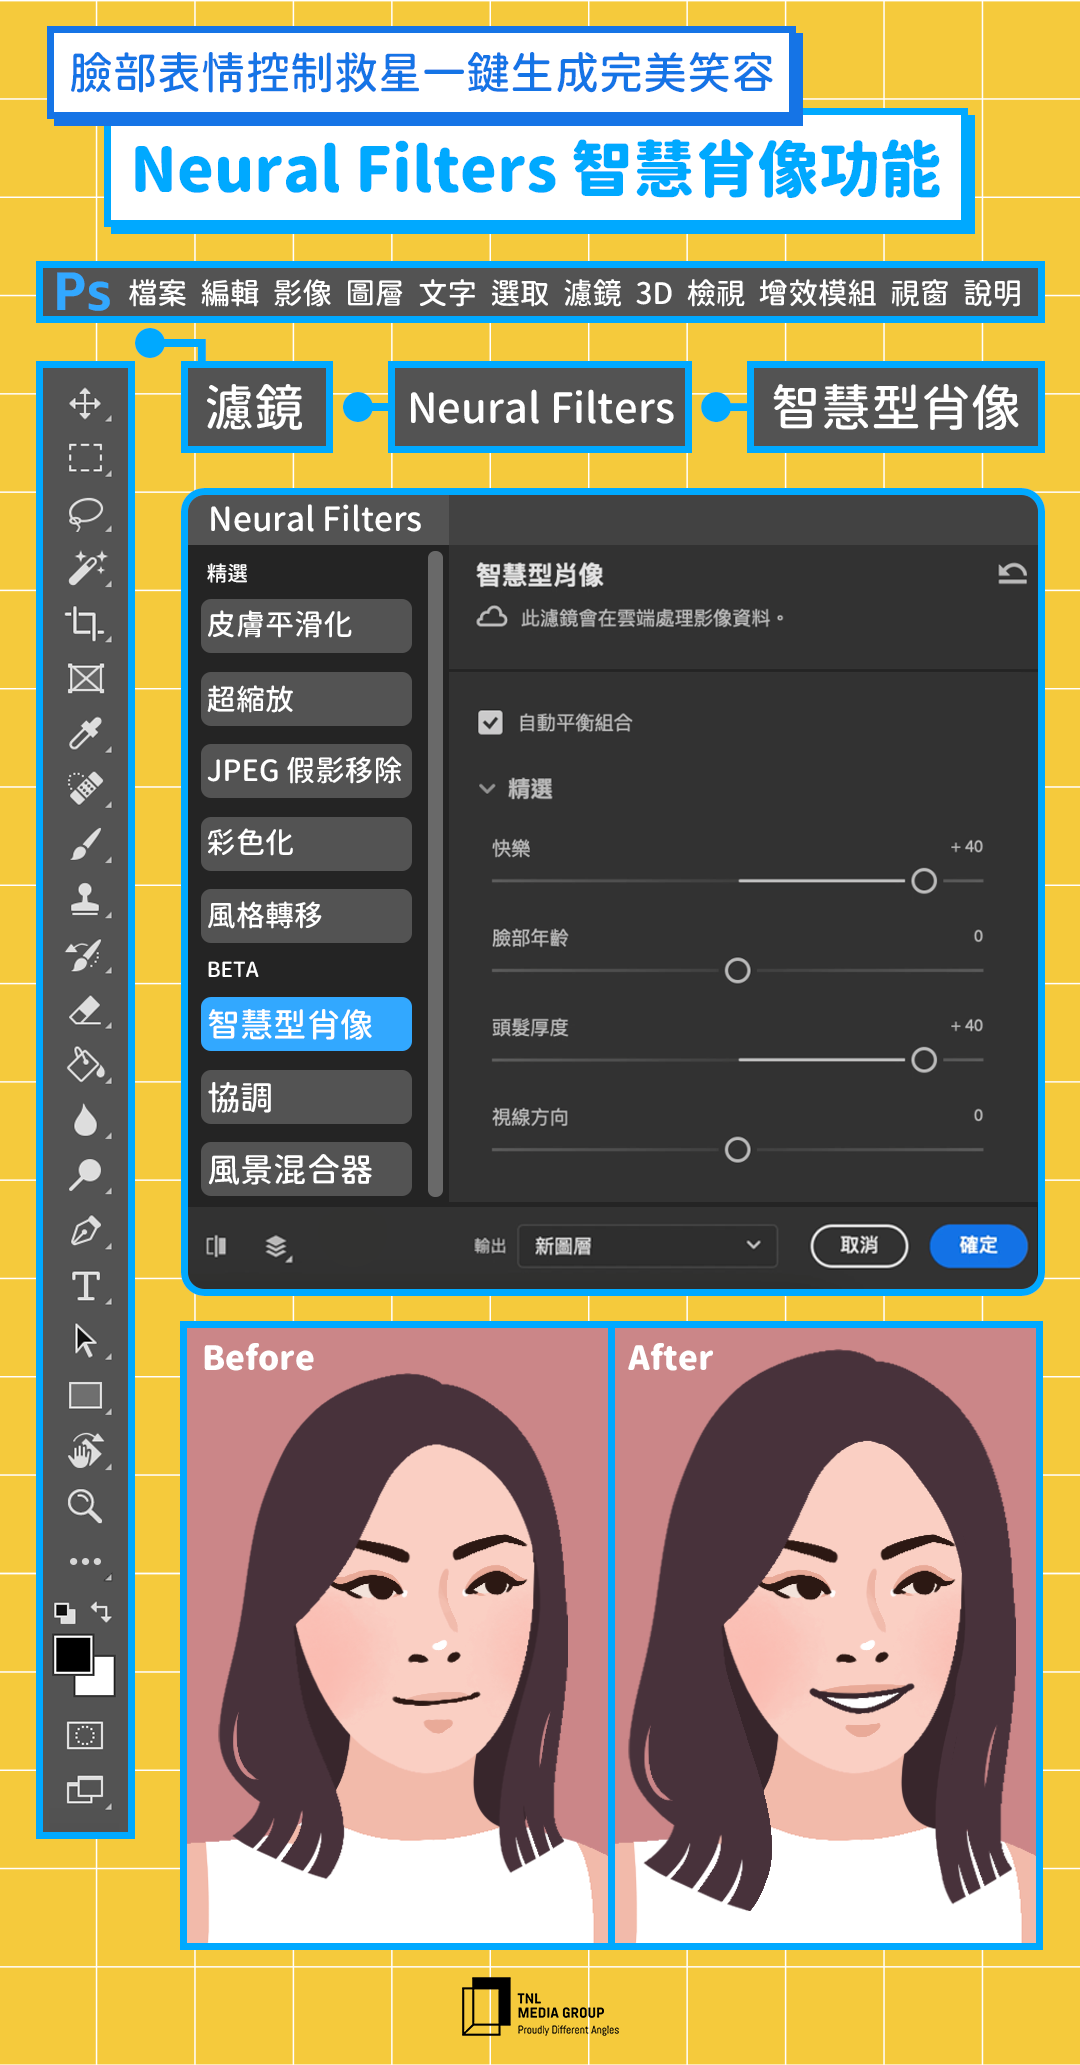
It is inevitable to forget to grin when taking pictures, or to accidentally drift away when the shutter is pressed, only to find these little bumps when checking the file, now you don’t have to worry anymore, just one click in Photoshop will do it all. It is also a function in Nerual Filters. Smart portraits can use PS liquefaction to make smiles for portraits in a few seconds, adjust the direction of the eyes, and even change the visual age of the characters by adjusting the skin condition and hair volume. .
Neural Filters can be used on macOS 10.15 and later, Windows 10 and newer operating systems, remember to update your Adobe Photoshop, come and try these amazing new features together!
Function button location: Filter > Neural Filters > Smart Portrait
☞ Immediately adjust the expression through Photoshop
Tip 3: A smart way to draw shadows and reflections on a character’s face
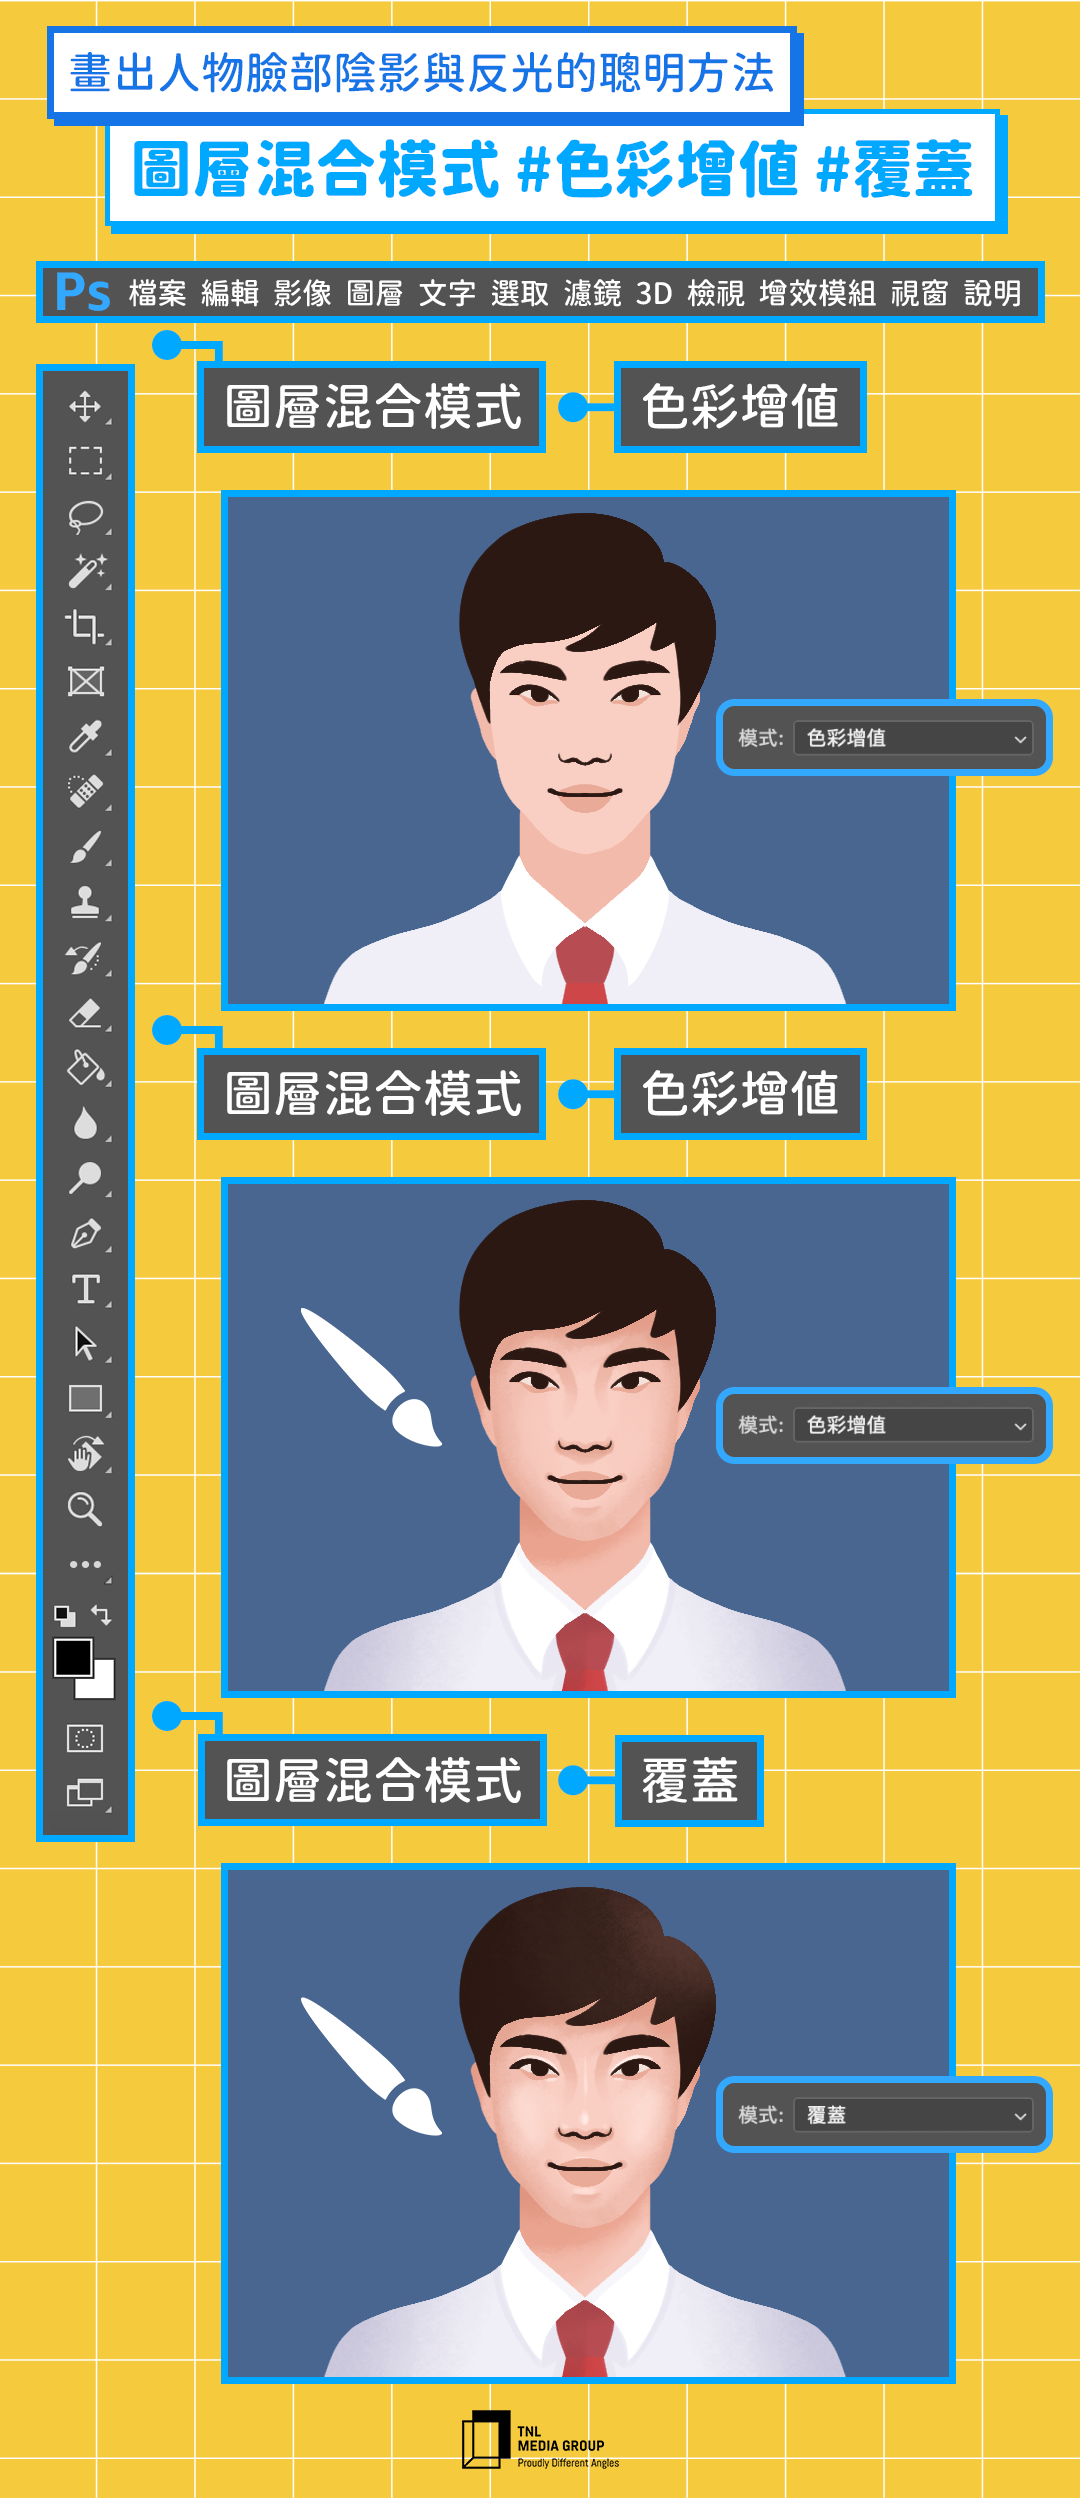
Hey! Are you still slowly switching colors to paint shadows and reflections on your character’s face? Use the PS brush tool and adjust Layer Blending Modes to make your illustration workflow more intuitive. First add a transparent layer, draw the shadow distribution position with low-transparency gray, and then adjust the “Layer Blending Mode” and select “Color Value” to quickly create a shadow effect.
For the reflective part, use high-brightness light yellow or white, and draw the distribution positions on the newly added transparent layer, such as the bridge of the nose, forehead and chin, and finally select “Overlay” in the “Layer Blending Mode” to complete the perfect reflection. . After adjusting the layer blending mode, you can also use Color Balance to adjust the color of the shadows and reflections to better match the overall tone of the image.
PS shortcut key: B brush tool
☞ Open Photoshop to make your characters more vivid
Tip 4: Paste the Illustrator vector graphics directly into super easy
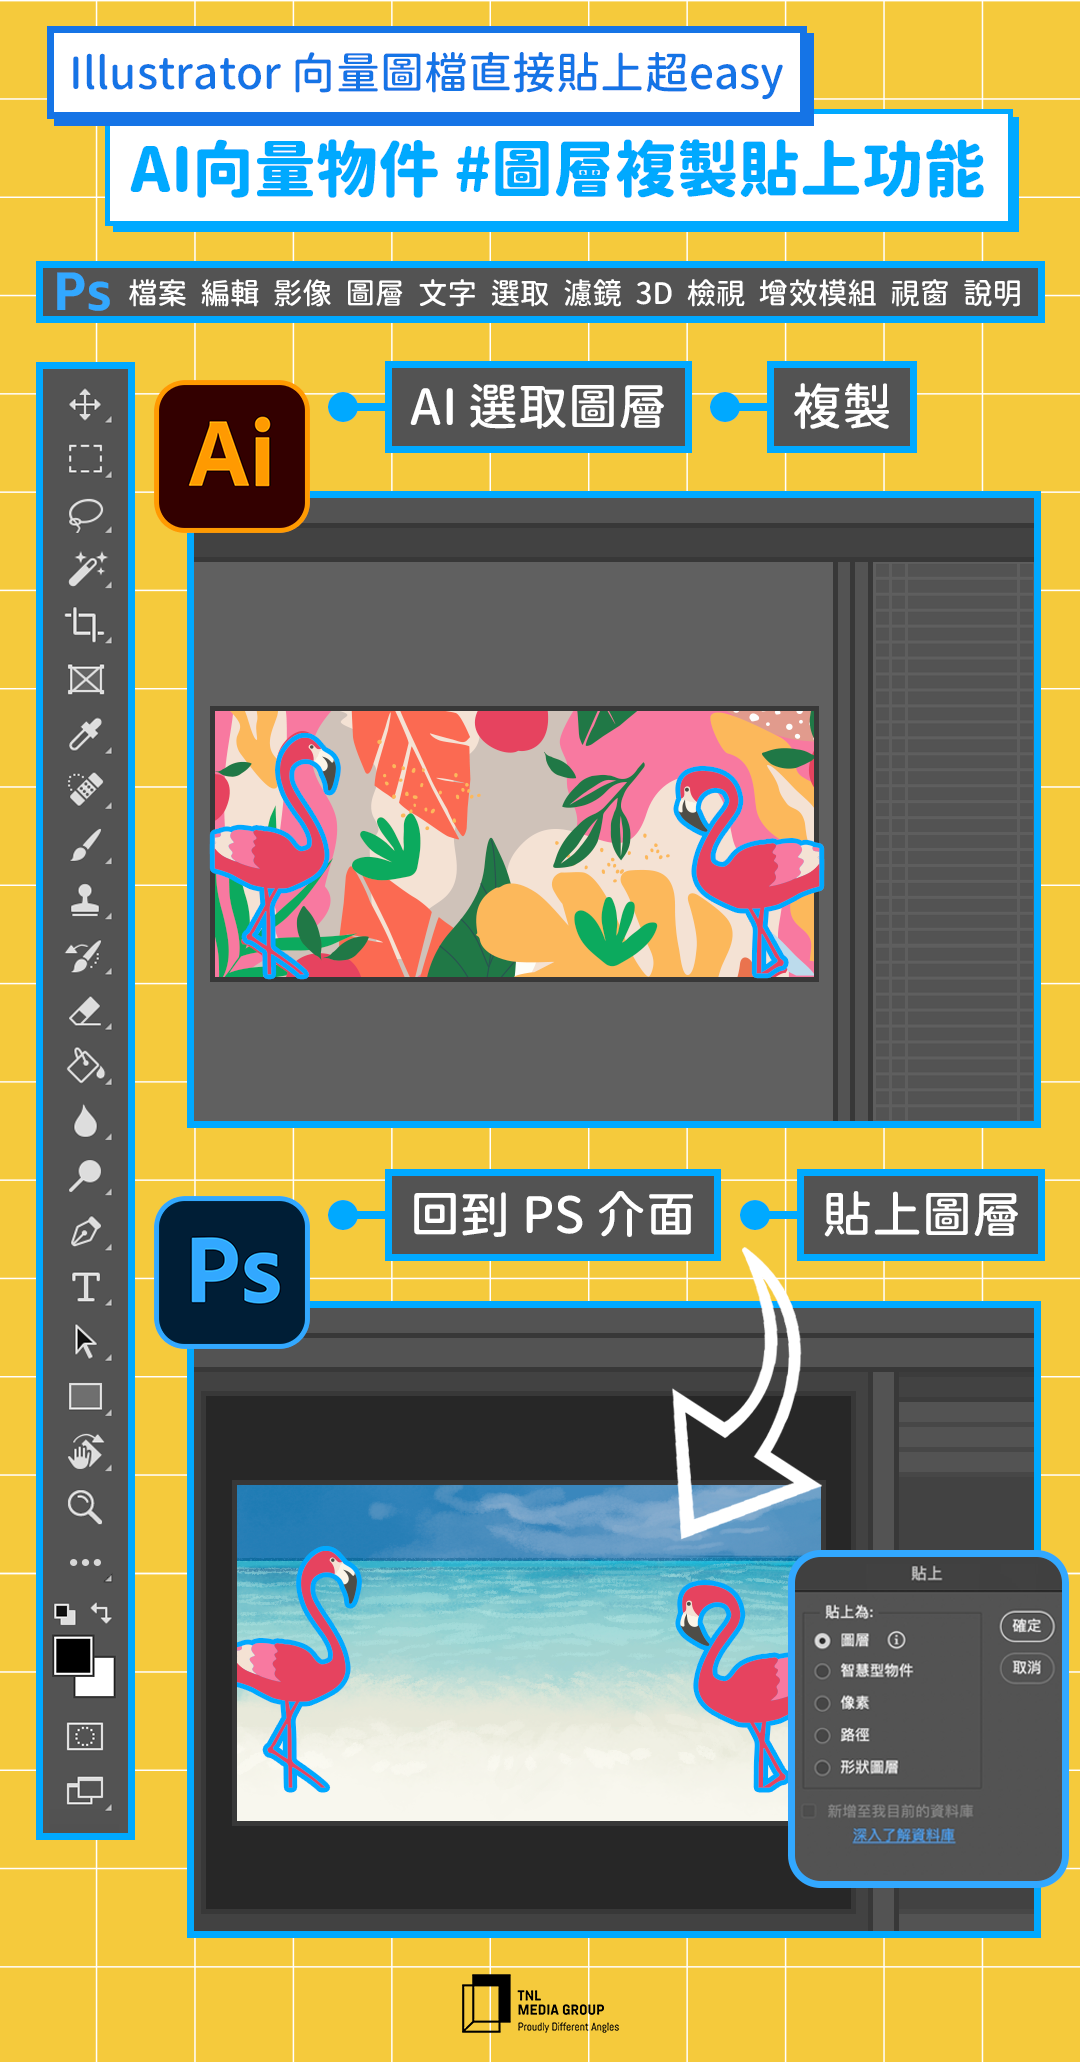
Photoshop and Illustrator are essential software on almost every designer’s computer, and the updated features in the new 2022 version of Photoshop make the integration between the two smoother. The vector objects drawn in Illustrator can be copied and pasted directly to Photoshop, and now there is an option to paste them as “layers”, making it easier for users to use powerful PS brushes and filters to create texture effects , this function is very useful in both poster design and banner design. Similarly, the text created in Illustrator can also be directly pasted in Photoshop to continue editing, so that your creative flow is uninterrupted.
PS shortcut key: control/cmd + V paste
☞It’s amazing!A quick update to Photoshop coming soon
Tip 5: Use the Object Selection Tool to Capture Elements in Seconds
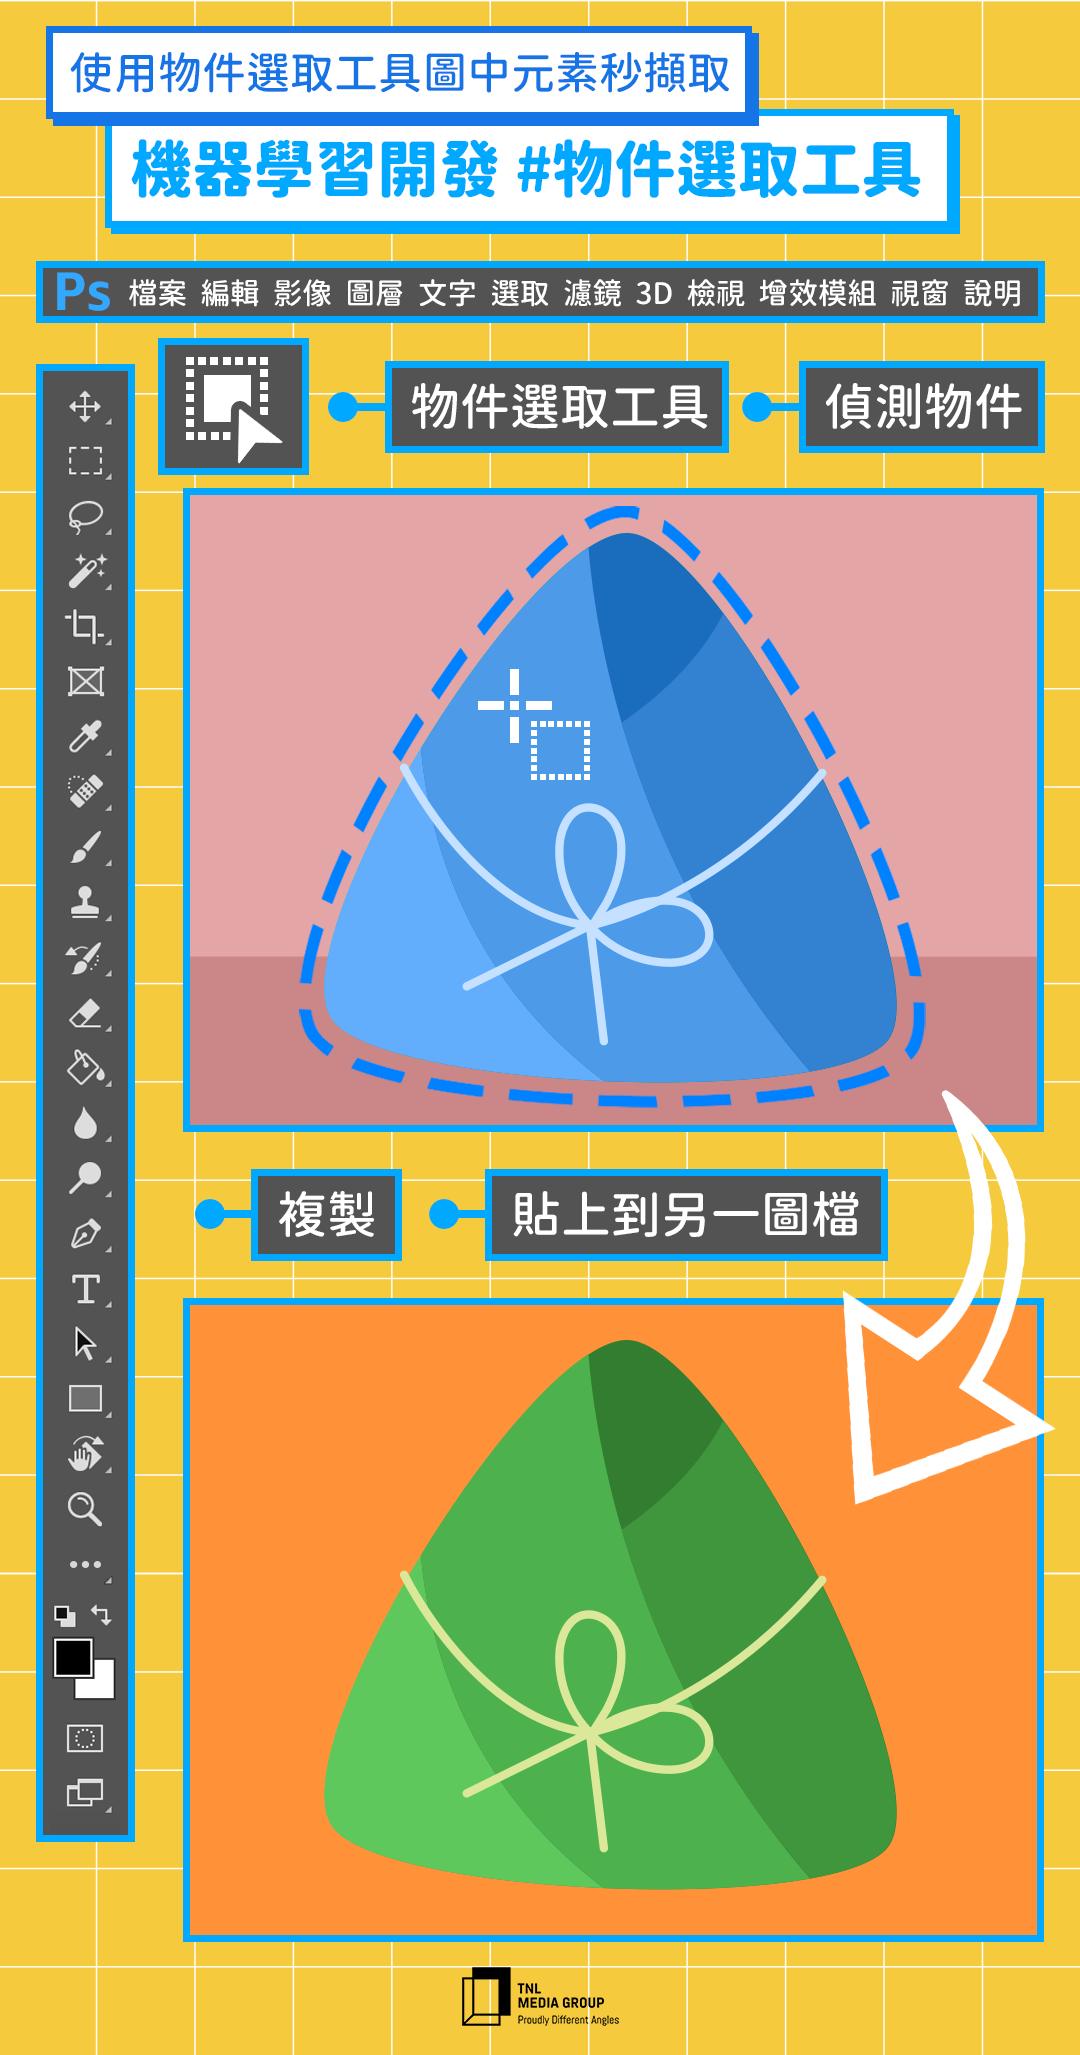
Graphic designers often need to extract some elements from images as design materials. Magic wand or magnetic lasso are both commonly used functions, but this time I will introduce the “object selection” which is faster than the above tools, which is also one of the functions developed by Adobe using machine learning recently.
Just click the “Object Selection” in the selection tool, Photoshop will determine the object in the picture within a few seconds, then check the “Object Finder”, just move the mouse to the screen, the highlighted area is detected. object. This function is also very suitable for removing the back. When the object detection is completed, right-click “Reverse Selection” to select the background, and then you can delete or change the background color you need.
The difference between the two functions of “object selection” and “select subject” is that the former can help us select multiple elements in the screen more quickly, while the latter focuses on distinguishing a single main element. In addition, these new selection tools are best used in images with well-defined elements in the image, or images with a strong contrast between the background and the subject!
PS shortcut key: W selection tool
☞ It doesn’t take a minute to memorize, try it out with Photoshop
There is no one-size-fits-all answer to creative work, and professional tools can be used in many ways. Adobe is constantly enhancing existing tools and introducing new features. It is the best partner for creative workers to practice inspiration. Go to the official website to explore more Photoshop features now!
☞ Download Photoshop now and give it a try